
Making KB’s Visor from Star Wars Skeleton Crew Part 1
This is our working solution for making secure sensor array mounts for our robots. Because the first one failed, we made many changes based on what worked well and what didn’t.
Please note, this material is provided for informational purposes only and is not a guide on how to create the designs. Please take a look at our disclaimer.
The Video below shows us making a model for the sensors.


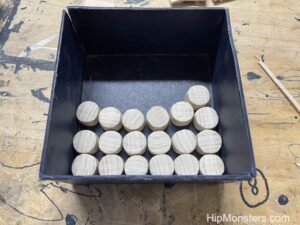
We carefully remove the resin from the molds.

‘A bit of light sanding finishes it off.


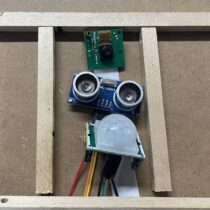
To make a sensor array mount for the robot, we wanted to try using resin molds. This experiment did not work as intended, but we wanted to share how our experiment went and maybe find a use for the resin pieces in the future. Here is a link to our working solution.
Please note, this material is provided for informational purposes only and is not a guide on how to create the designs. Please take a look at our disclaimer.

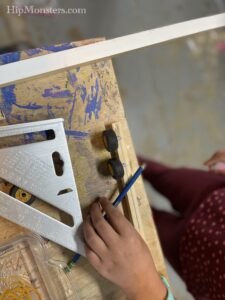
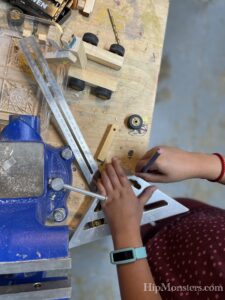
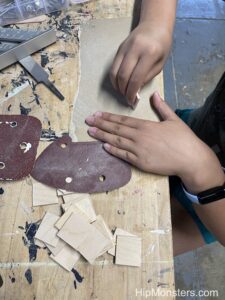
First, we laid out our basic design of the sensor array mount using square wooden dowels. Then we traced the design using a markers on a piece of plywood to help guide us later.

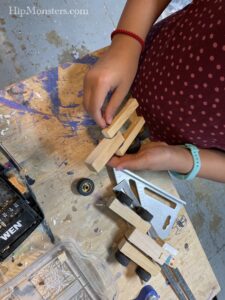
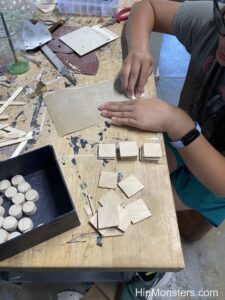
Next, we glued the dowels together using hot glue to create a frame. We made sure the joints were tight and leak proof so the resin wouldn’t spill out.

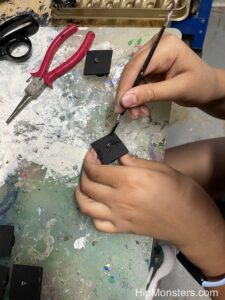
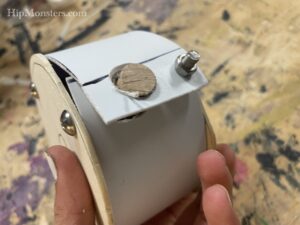
Then we glued the mold to the plywood and put an extra layer of hot glue on the outside. We lined everything with a mixture of one part vegetable oil and one part dish soap to help the resin would separate from the mold. Then we poured the resin into the mold.

We store the mold in a secure location making sure it was laying flat.

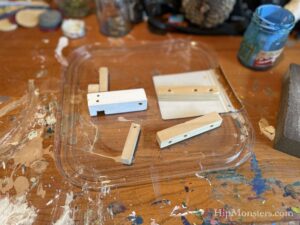
While the process did give us a cast, the mold had to be destroyed to get the resin out. The homemade releasing agent did not work, and caused the clear resin to turn green and oily. The design also ended up not aligning as well as we needed. For making resin molds, we recommend not using dish soap or vegetable oil because it will interfere with the resin’s color and make it oily and sticky even after it dries. However, it did make it easy to separate the resin from the mold. We also learned to not make the mold out of wood. Back to the drawing board!
Happy Creating!
We take Number Two and Number Three on the road a lot. While we are now experts at rewiring them after a long road trip, we started testing new ways for securing wires while still letting kids see how the robots were put together. After many designs, we settled on using clear silicon pneumatic tubes. The tube protect and secure the wires but still allow people to see how the wires attach.
Please note, this material is provided for informational purposes only and is not a guide on how to create the designs. Please take a look at our disclaimer.

This video shows us taping the wires.

This video is us splitting the clear tubes down the middle to fit in the wires.

This video shows the process of wrapping the wires in the tube.

This is the final result.
Happy Creating!
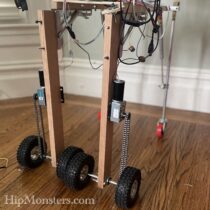
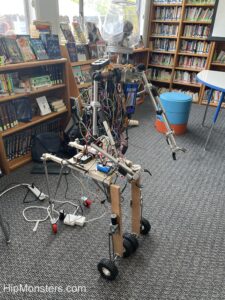
From last year’s Bay Area Maker Faire we learned a lot about what is the right and wrong way for our robots to move. Our first designs did not work well on the rough and uneven surfaces, and our bi-pedal design fell over before the gates even opened. From that experience, we have opted for a centaur design for the new legs, leveraging a more powerful engine, a collapsible design, and gears.
Please note, this material is provided for informational purposes only and is not a guide on how to create the designs. Please take a look at our disclaimer.
The legs are more simple overall but still require a lot of parts. We moved to using hardwood for the critical components for its strength.
Our design changed a lot from the one at last year’s Maker Faire. First, each leg has two wheels connected to a axel. The motor turns the axel via a chain. The biggest change is the legs now fold and unfold to make transportation easier.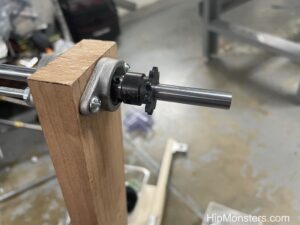
Here is a close up of the finished axel on the end of the leg with one of the gears.
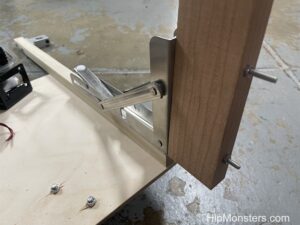
Here is one of the leg connecters that allows the new legs to fold for travel. They can lock in place when the robots are standing or walking.

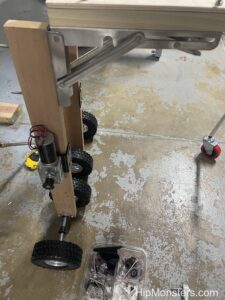
Here are the legs with the wheels attached.


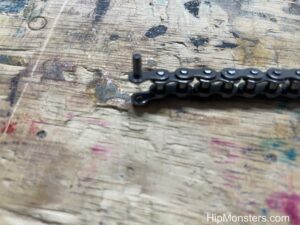
Here is a close up of the chain with one of the pins almost removed.


Happy Creating!
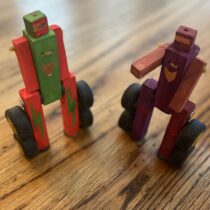
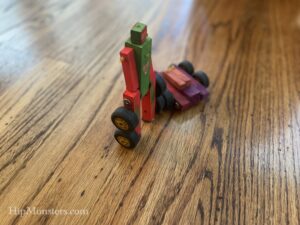
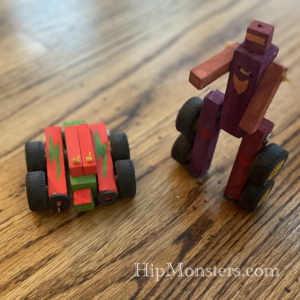
Here are some of our old creations that we forgot to post about. These are some of our wooden shapeshifting robots, inspired by Transformers.
Please note, this material is provided for informational purposes only and is not a guide on how to create the designs. Please take a look at our disclaimer.

Making these do not require a lot of materials. you just need six rubber bands, four lego car wheels, and a small piece of wood.
First, measure and cut two small pieces of wood to be the outside of the car and the legs. Measure and drill two holes that the lego wheels will fit securely in. Make sure that you leave enough space in between the holes for the wheels to fit.
Attach two of the wheels and cut the piece to the right size. Repeat to make another leg, making sure that the wheels on both legs align.
Next, cut two arms and drill small holes in the top that can fit a rubber band.
Cut a small body out of wood that

Now time for assembly!
Here is one robots in alt mode.
Both robots transformed
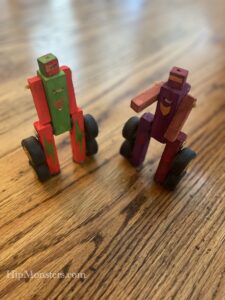
Front view.
Happy Creating!
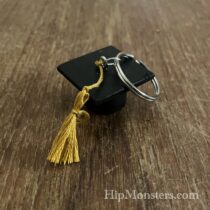
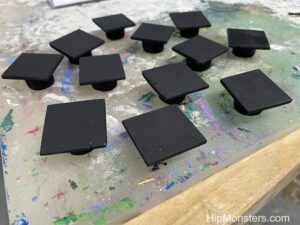
Graduation time is upon us and what better way to celebrate than creating something fun. For this year’s celebration we are making wooden graduation hat charms. This design is straightforward and suitable for all ages.
Please note, this material is provided for informational purposes only and is not a guide on how to create the designs. Please take a look at our disclaimer.
This first step is lots of cutting. We cut the tops of the hats from thin sheets of plywood. Cut each square to is 3/4th of an inch on both sides.
The bottom of the hats were cut from square bars that we spoke shaved into a circle 1/2 inch wide.
After cutting and spoke shaving, sand the tops and sides as smooth as possible using different grades of sand paper. To make the charms smooth enough to look like a real cloth hat will require a repeated sanding.
After the tops are well sanded, start sanding the bottoms.

To align the tops with the bottoms while glueing, we drew cross on the bottom of the circles and the squares. Align the crosses to center the circles.
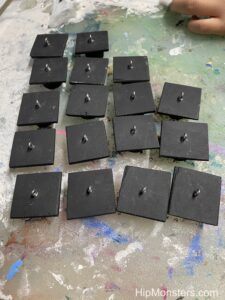
We used a flat black water based paint and applied two coats.
Here are some of the hats with the final coat.
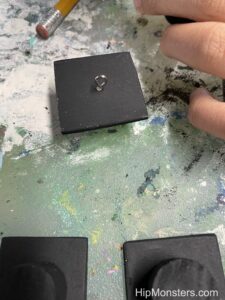
Next, attach the eye-hole screws to the top. The eye-hole screws will let people hang the charm.
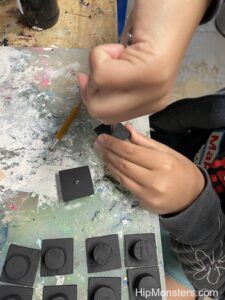
We recommend starting a hole for the eye-hole screw by using a small jewelry drill or very thin nail to make screwing the screws in easier. However, you can also screw them in without using a starter hole.
Take your time putting in the screws. If they break off they can be very hard to get out. Make extra hats and practice on scrap wood first. The main trick is to go slow and use as little force as possible.
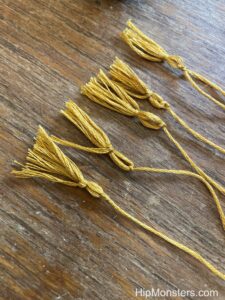
The tassels are made from golden thread and are the hardest part. To make a tassel, first lay down a few strings then lay a long string on top of them in the middle. Tie the long string to the middle of them, which will be the string that the tassels hang on. Finally, tie a short string near the top of the bunch to separate the tassel into two parts. Tassels can be very hard to make, and you might need lots of practice.
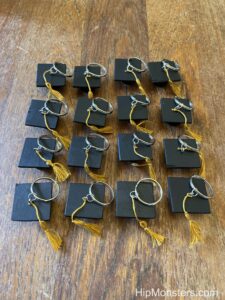
Now just tie the tassel to the eye-hole screws and you are done! You can also add a keyring onto the graduation hats to make them into a keychain.
Happy Creating!
This cute little wooden cat was a quick build from some leftover pieces. We wanted a simple toy that would be sturdy and easy to build, but would also look like a cat. All of the wood was harvested from our yard.

For the tail and legs we like to keep the bark on to give it a rustic look. The texture would also look like fur.
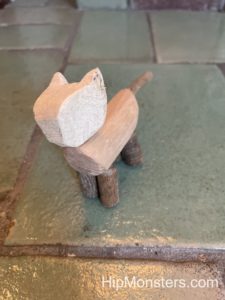
The head, tail and legs are attached using wire to make it poseable. To do this, we drill small holes in each on the limbs, and used the wire like a peg. There is no glue in the whole figurine.
Happy Creating!
The Hip Monsters team was thrilled to be invited to a Maker Fest last week at Ecole Bilingue in Berkeley, CA. Ecole Bilingue is a preschool to eighth grade French immersion school focused on preparing their students to make a positive impact on the world.
We had a wonderful time at the maker fest and it was amazing to see such talented makers and dedicated students. The event had great food (including handmade boba tea), a fun crowd, and an exciting lineup of makers. It was a beautiful day in Berkeley which added to the cheer.
Below are just some of the makers at the festival.
We were there with Number Three of RobotFreedom, who got a chance to test out her new legs. We will have a post in a bit on her leg redesign. The legs worked well and the batteries lasted longer than we anticipated.
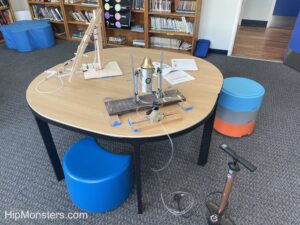
We also brought our pneumatics demonstration which is an ideal place to start kids (and adults) on robotics.
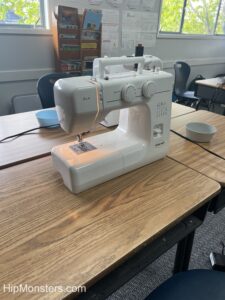
There was a great sewing section with helpful makers who quickly got even first time sewers make a tote bag.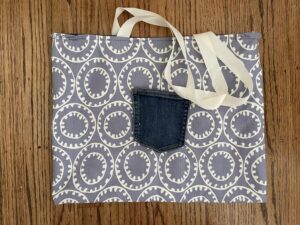
Here is a finished toto bag! We have already put it to good use storing cat toys.
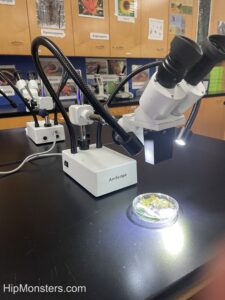
George and Janai Southworth from the San Francisco Microscopical Society had a fantastic demonstration of microbiology. They showed how different filters and lightning impacted what could be viewed through the microscope. Below is a petri dish of bacteria waiting to reveal its secrets.

Members of the UC Berkeley CalSol Solar Racing Car were there giving us the inside scoop on their upcoming race in Nashville, TN. Every few years the car is completely redesigned and rebuilt using the most up to date technology.
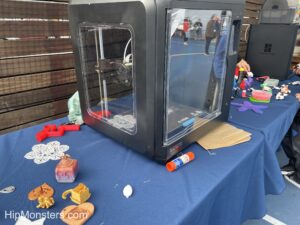
There was 3D printing space with a great collection of designs and examples. All the designs were coded by kids!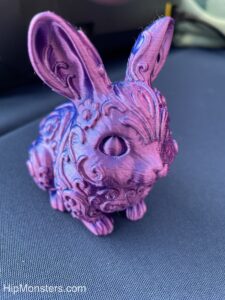
Here is our favorite creation, a 3d printed pink rabbit.
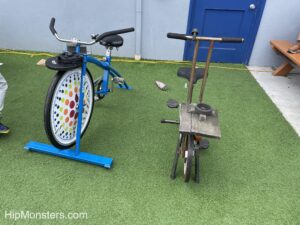
The bike powered smoothie machines were steampunk inspired pieces of art. They were designed and made by the talented students at Ecole Bilingue. They also are a great way to make sure you earn those calories in the smoothie. Every household should have one of these!
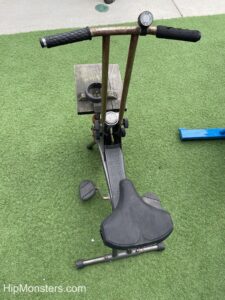
The designs are modified stationary bike with blender connected to the front wheel.
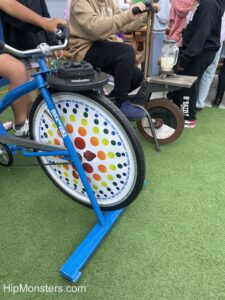
Here are the bikes in action making a smoothie.

They even had a robot making art! It was fun watching the robot as it dutifully created its next masterpiece.

Here is a view of the business end of the painter bot.

And last but not least, a RaspberryPi powered game console designed and built by one of the students. The compact design had custom made controllers that allowed for two person games.
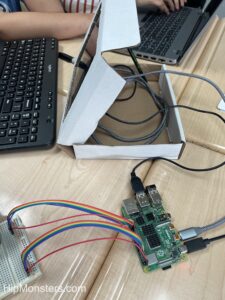
The stand was a clever design using a cardboard box as a case neatly cut so it looked.
Thank you so much to Ecole Bilingue for inviting us to the maker fest! We would love to participate in more of your events in the future.
Hope you find inspiration!
We decided to finally make an attempt to build a Dingbot robot based on the girl genius web comics.
Please note, this material is provided for informational purposes only and is not a guide on how to create the designs. Please take a look at our disclaimer.
Our design is based on the first BingBot, a small robot similar to a pocket watch. Below is a image of a GirlGeniusOnline Dingbat in action.
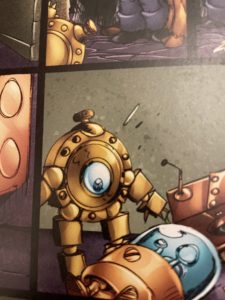
As the series continue she create a variety of different BingBots and even Wingbots.
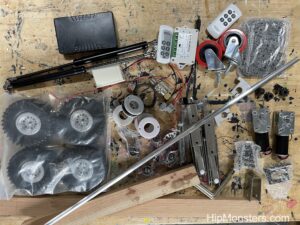
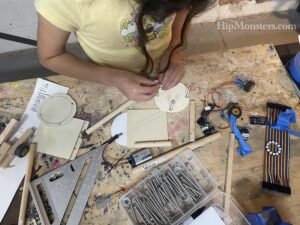
After we have settled on a design on paper we like laying out all the components on our workbench and start visualizing how the pieces fit together and to make sure we have all the parts we need.
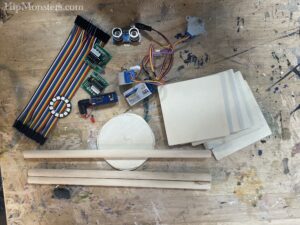
We made the design as small as possible but still fit all the electronics including a RaspberryPi Nano. We wanted the design to be a fully functioning computer. The idea was when it is not running about it can be used to play music or video games.
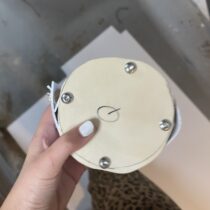
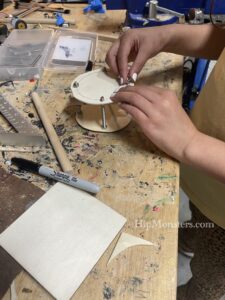
The front and back to the robot are plywood circles that will serve as bases for all the electronics. To make sure the two sides align, we clamped two pieces of plywood together and used coping saw. To smooth out any irregularities, clamped them together again and sanded them repeatedly.
We used 2 inch bolts to separate the front and back plates. The is the smallest width that will still be able to hold all of our electronics. After repeated measuring, we drilled the holes while they were still clamped. This assured the bolts would align. Since the bolts are part of the atheistic of the robots it is important to get the positions correct.
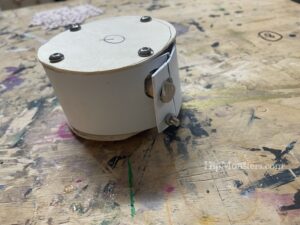
We used three nuts and four washers per bolts to acts as spacers. To keep the bolts from loosing we used lock bolts (which can prove difficult to put on) and a pneumatic tubing in between the top and bottom bolts. We have used pneumatic tubing as spacers before in our robot designs and it works great even after years of use.
Once the two plates were secured we cut a strip of plastic to seal the gap. We thought using the side to access the components would be a unique and useful design. Normally, we prefer to have most of the electronics exposed but dingbot has a clean and elegant design. We recommend testing your layout of a sheet of paper first before cutting the holes in the plastic.

After a few trial and error we managed to secure the plastic strip. The first one broke so the second time we heated it with a blow dry to make it more flexible.
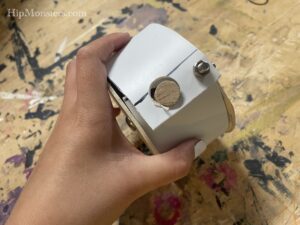
Down the center of the robots is a wooden dowel which will server as the spine for the robots. The legs and arms will both be anchor to the spine.
Here is a bottom view showing the spine.
We are not 100 percent happy with how the plastic strip pops out but we will try applying low heat again and try and mold it into shape.
Although you cannot see them, the design fits a RaspberryPi Nano, two motors, h-bridges, tons of wiring and a battery neatly.

Next step is to design the legs! We are leaning towards a toy robot inspired design.
Happy creating!