Where technology and beauty meet, our steampunk jewelry embraces the genius within! This collection of steampunk jewelry is fit for all steampunk-loving monsters. We were inspired by some of the cool steampunk gadgets in the books and movies that we have read/watched. Here are all of the books and movies that we were inspired by: Girl Genius, Secrets in the Mist, Howl’s Moving Castle, Clockwork Fairy tales, Map to Everywhere, and Castle in the Sky.
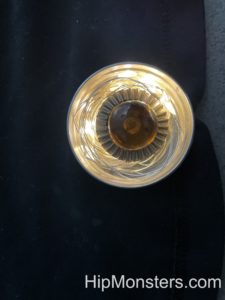
Circle of Power Brooch
The Circle of Power brooch lights up to illuminate the center gemstone. It is two inches in diameter and has a magnetic attachment. To make this, we glued a Mancala gem on a gear and put it in a metal bottle cap. We then secured fairy lights around it and attached a lightweight battery to power them. You can easily turn on and off the fairy lights, and it is easy to replace the battery. The brooch is attached by very strong magnets, so you don’t have to poke holes in the thing that you are attaching it to.
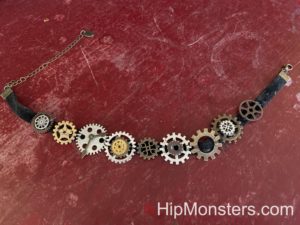
Gears of Time
The Gears of Time choker is about six inches long and attached with a clasp. To make this, we sewed gears onto a normal black choker making sure they looked as if the meshed together and could work. To add depth and complexity we stacked gears on top of one another and used hot glue to secure them. We wanted the choker to fit tightly so it appear that you were peering into the inner workings of a robot.
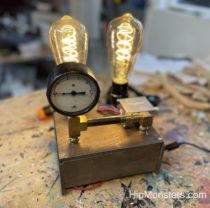
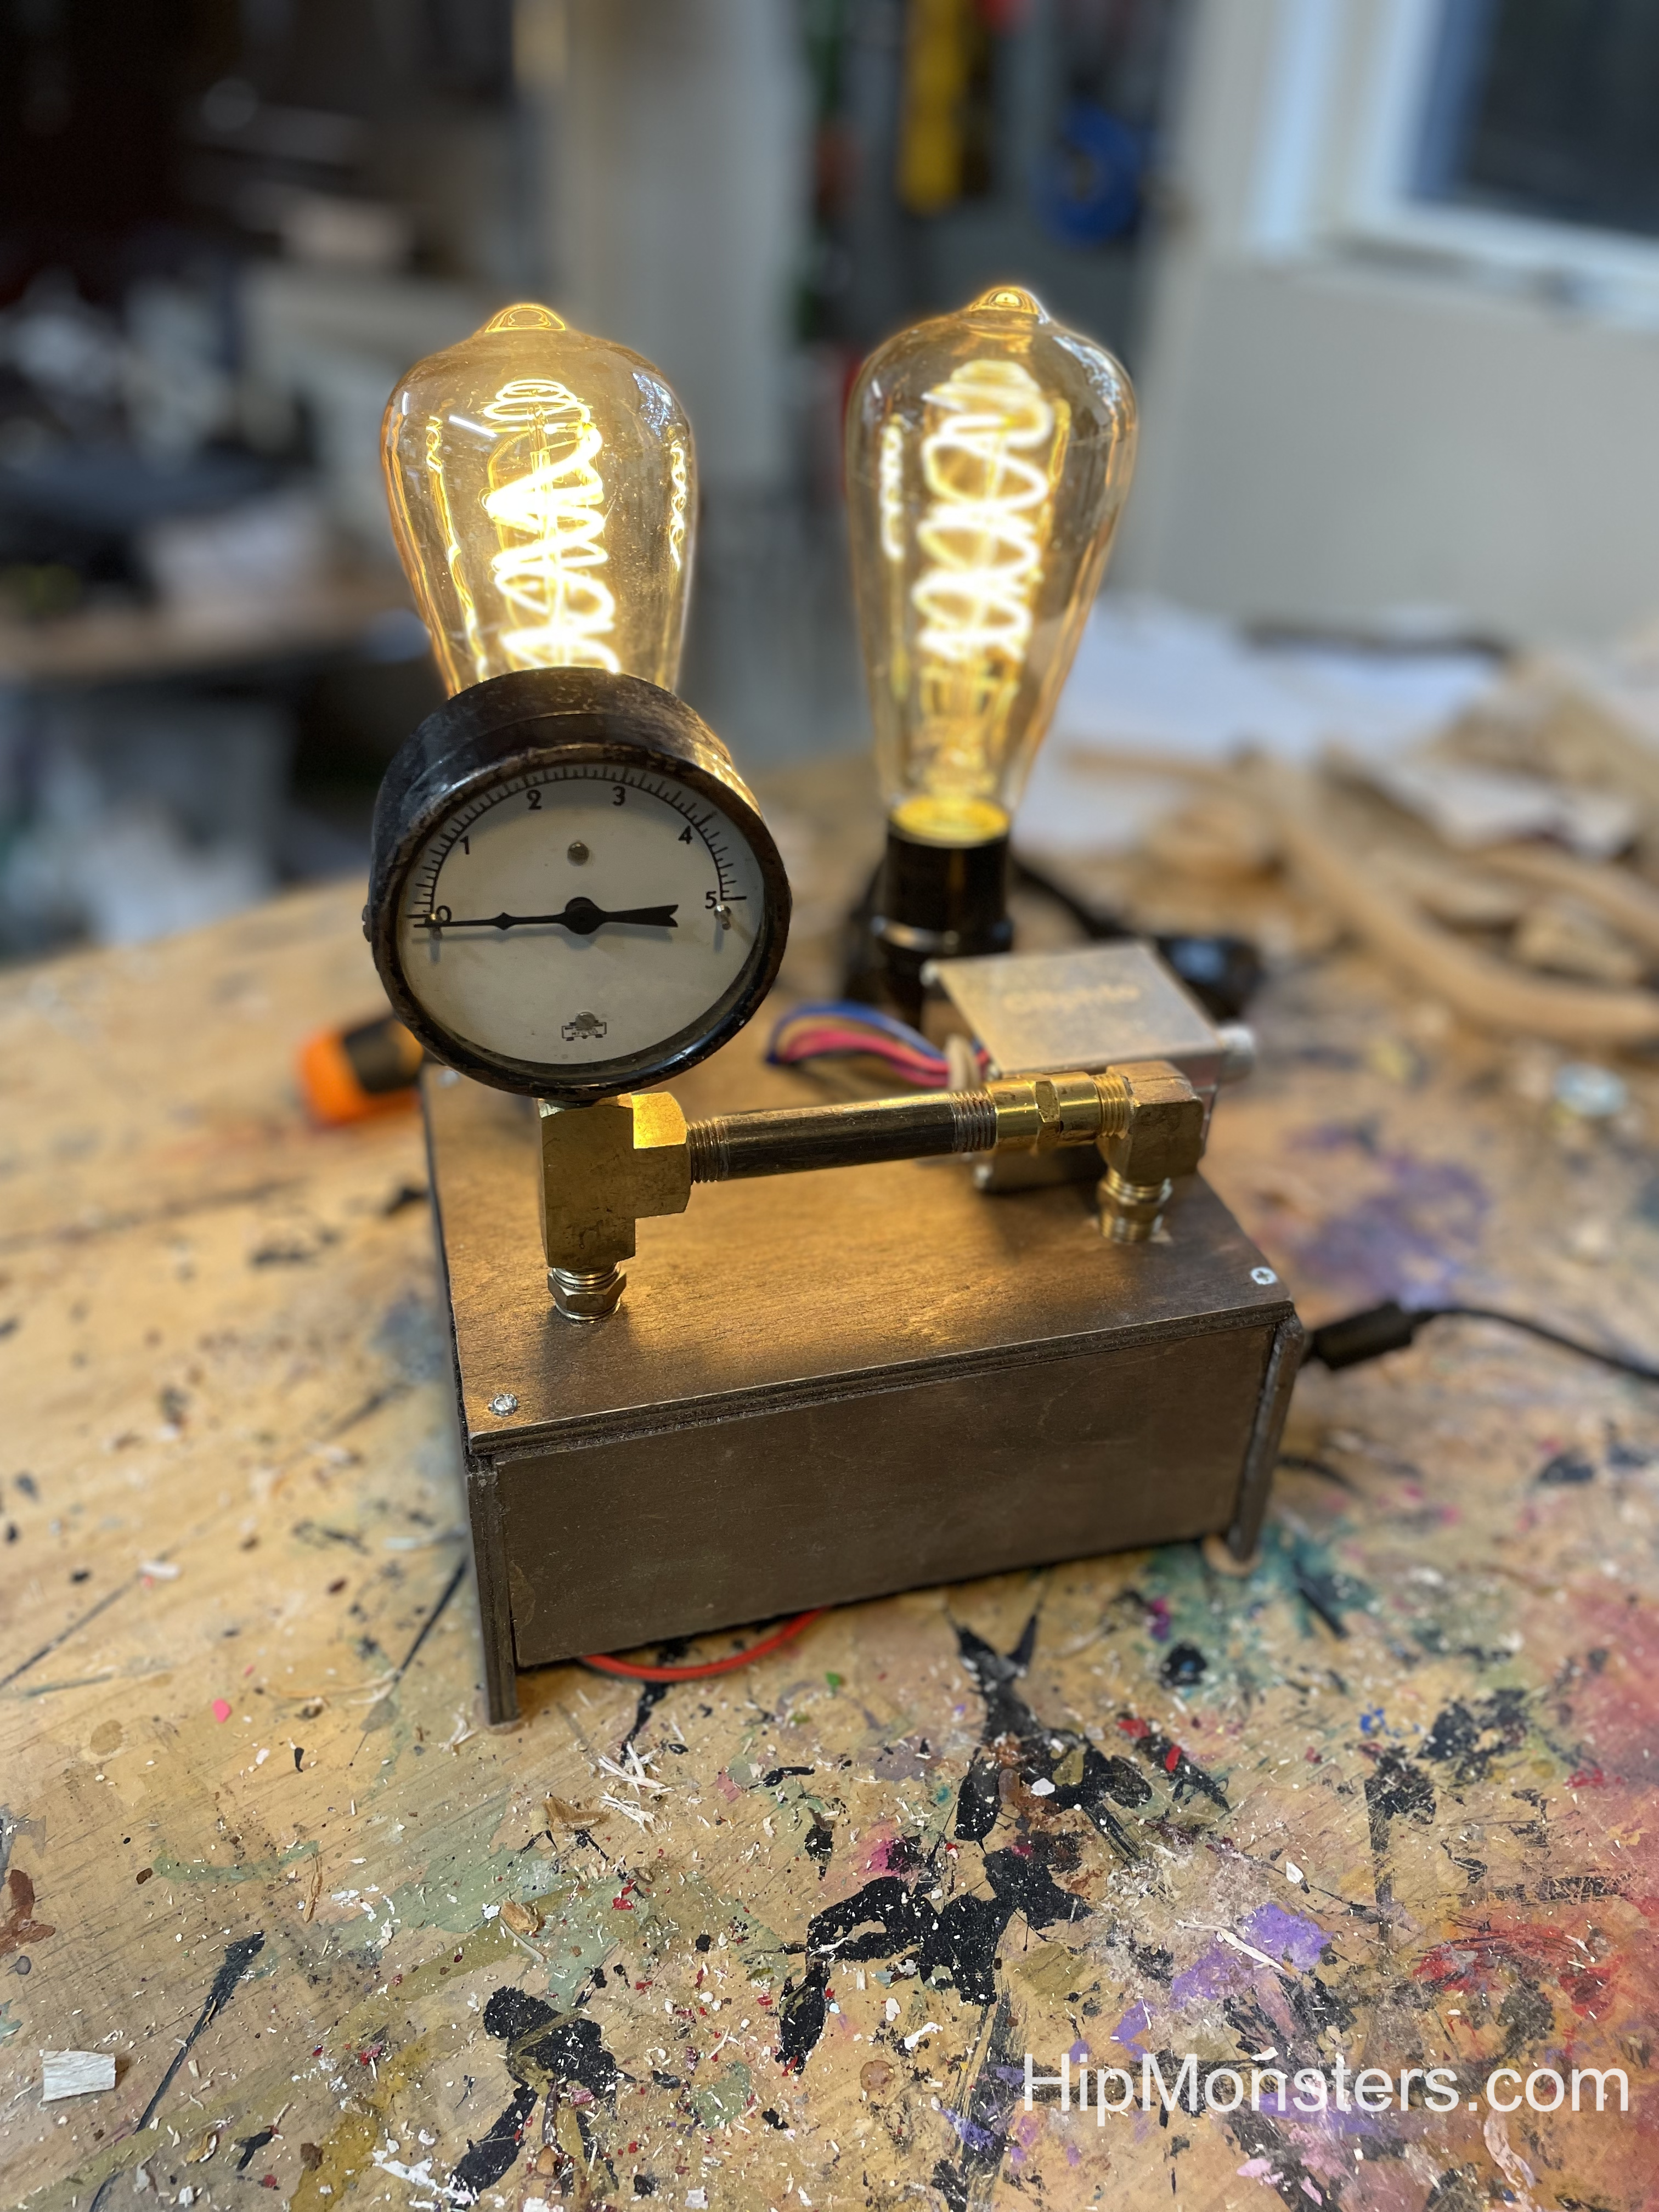
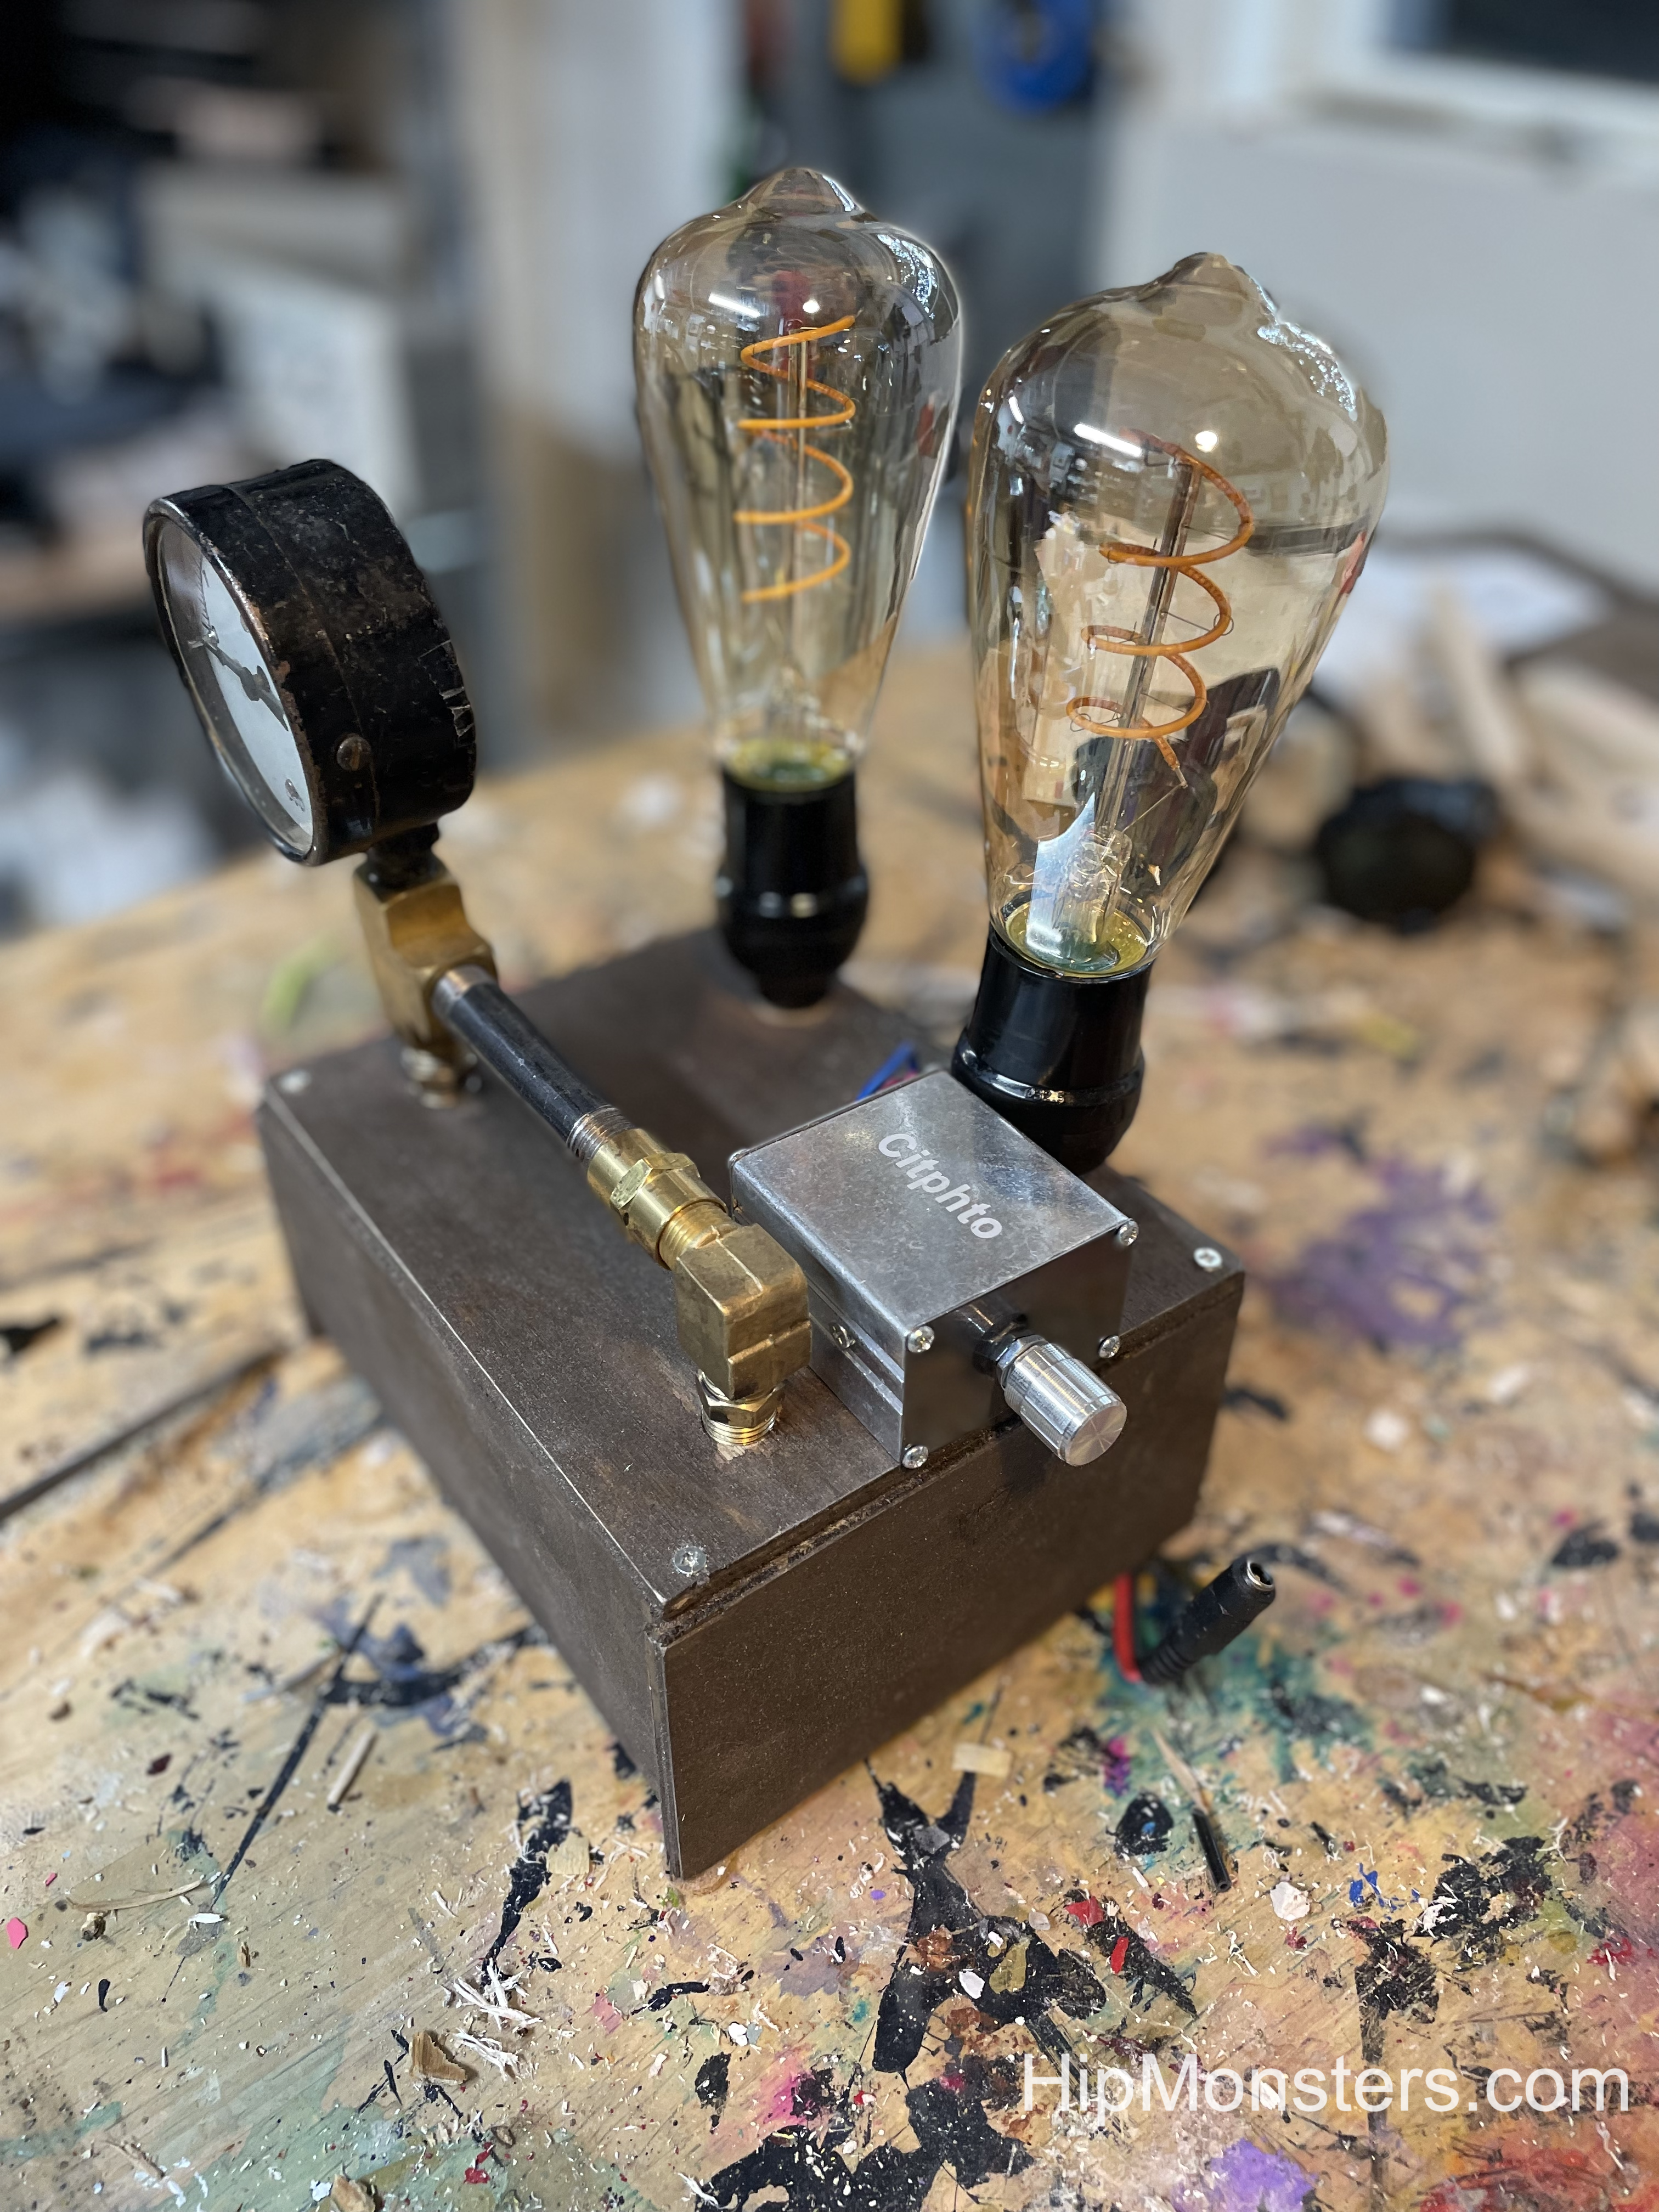
The Hip Monsters team decided to make something that interests people when they walk into the room. Inspired by Girl Genius and this Steampunk creation, we made a mysterious steampunk contraption that only we know the use of.
Our amazing steampunk device.
This is our steampunk creation. It has two light bulbs, a pressure gauge, and some metal pipes. The light bulbs’ brightness is adjustable.
The side view
This is the side view of our device. You can see that on the side of the creation, there is a silver metal box. That controls the brightness of the lightbulbs.
The back view
On the back, you can see that there is a wire going from the silver box away from the device. that is where you plug in the device to the outlet. From the front it is barely noticeable, you can only see it from certain angles.
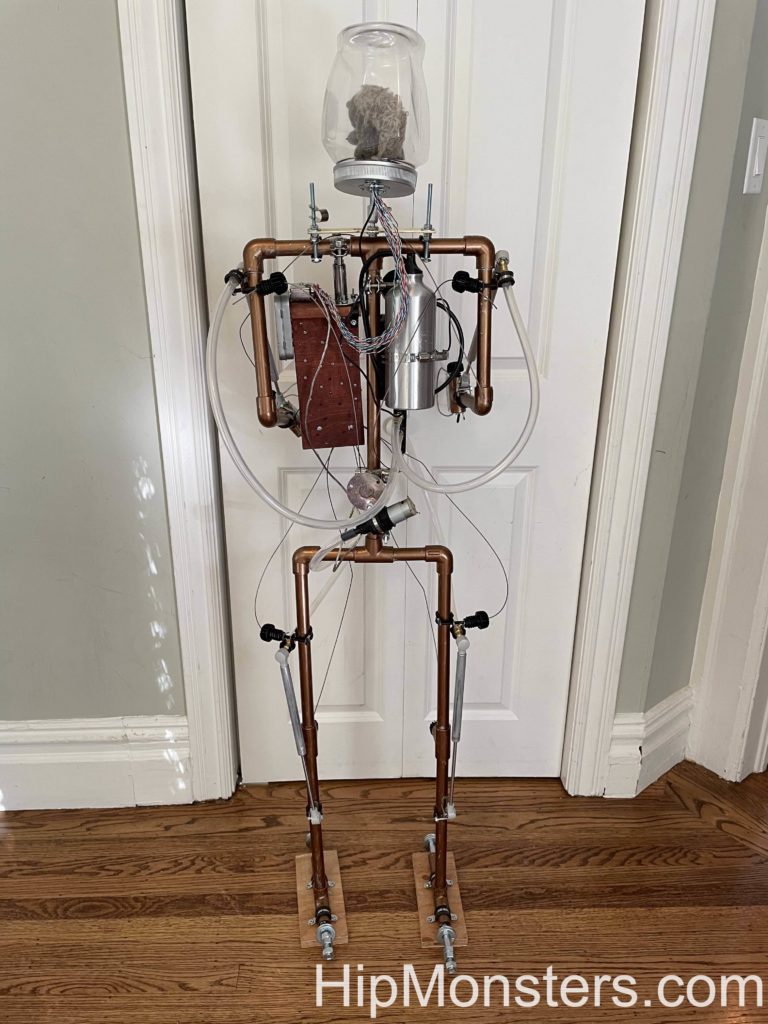
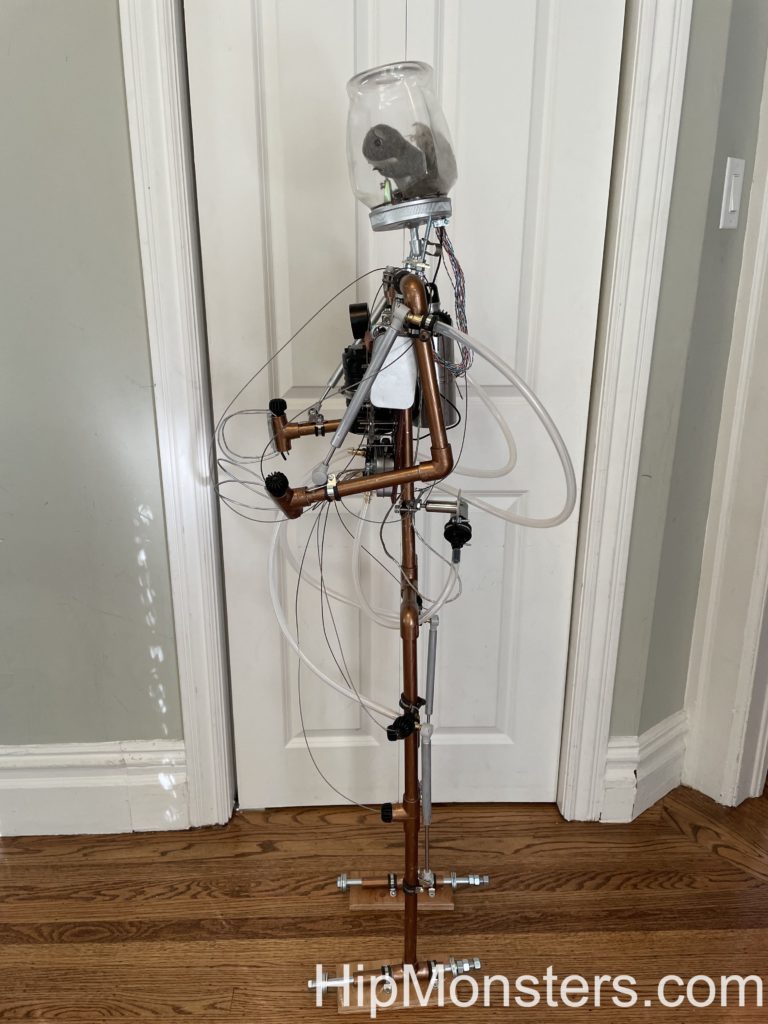
We saw the need for a new robot for Halloween, so we made one. This is our steampunk squirrel powered robot Number Three. We wanted it to be as big as a kid to help with our Halloween decorations. Our other robots were small and not easy to see. Our plan was for a big robot with lights and room to grow as we came up with new ideas.
This post is the very start of Number Three, before we made it move, think, and gave it sensors.
Please note, this material is provided for informational purposes only and is not a guide on how to create the designs. Please read our disclaimer.
Getting started
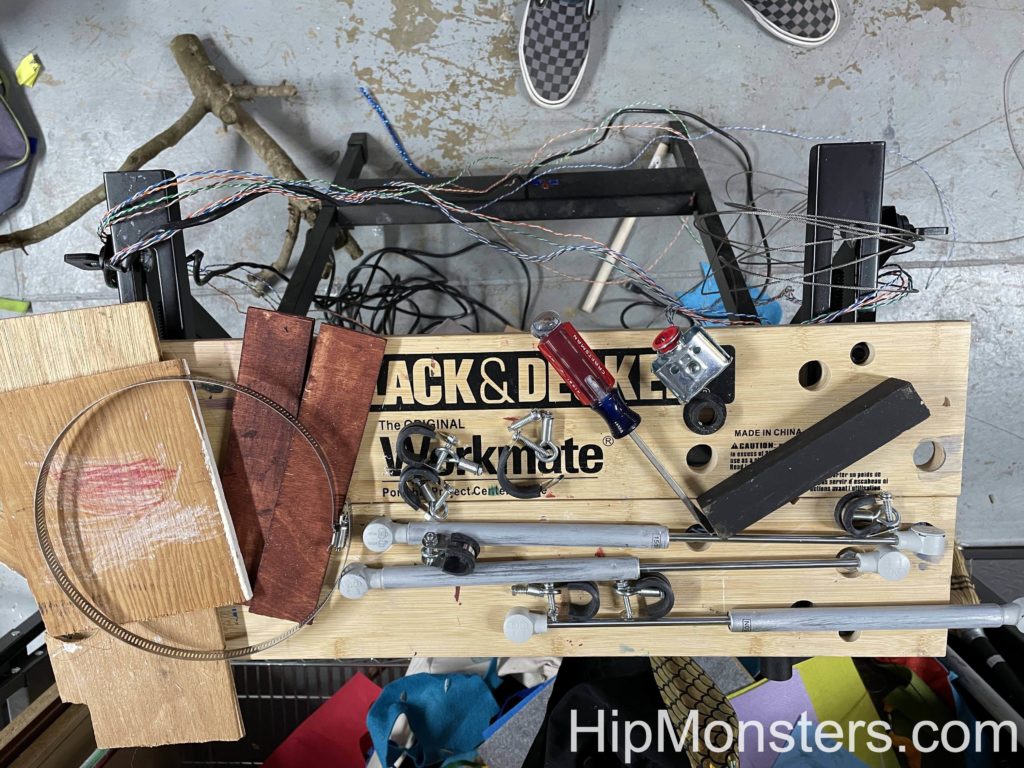
These are some of the parts that we used. We gathered most of it from unused parts from other projects. This project ended up being a great way to recycle old parts and scraps and it made it look even more steampunk-y.
Scrap parts
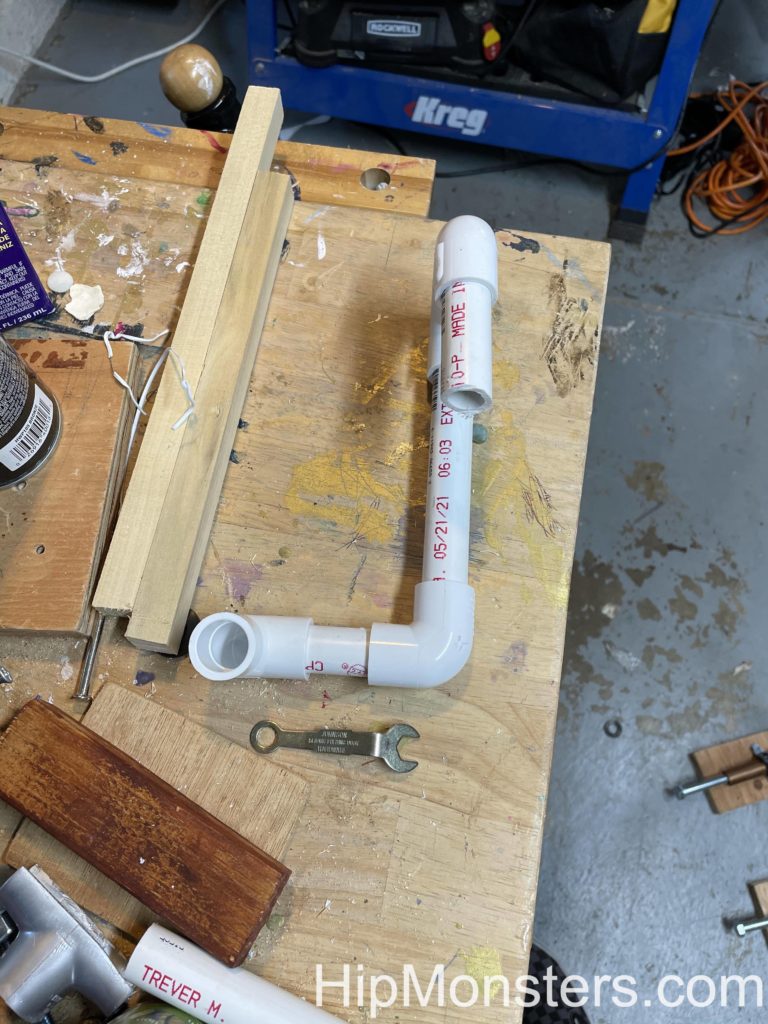
We used PVC pipes for the skeleton of our robot because its strong and lightweight. Also we had fitting from remodeling that would attach to the pipes and let us hangs details. The pipes are standard so if we did need to buy anything it would be easy.
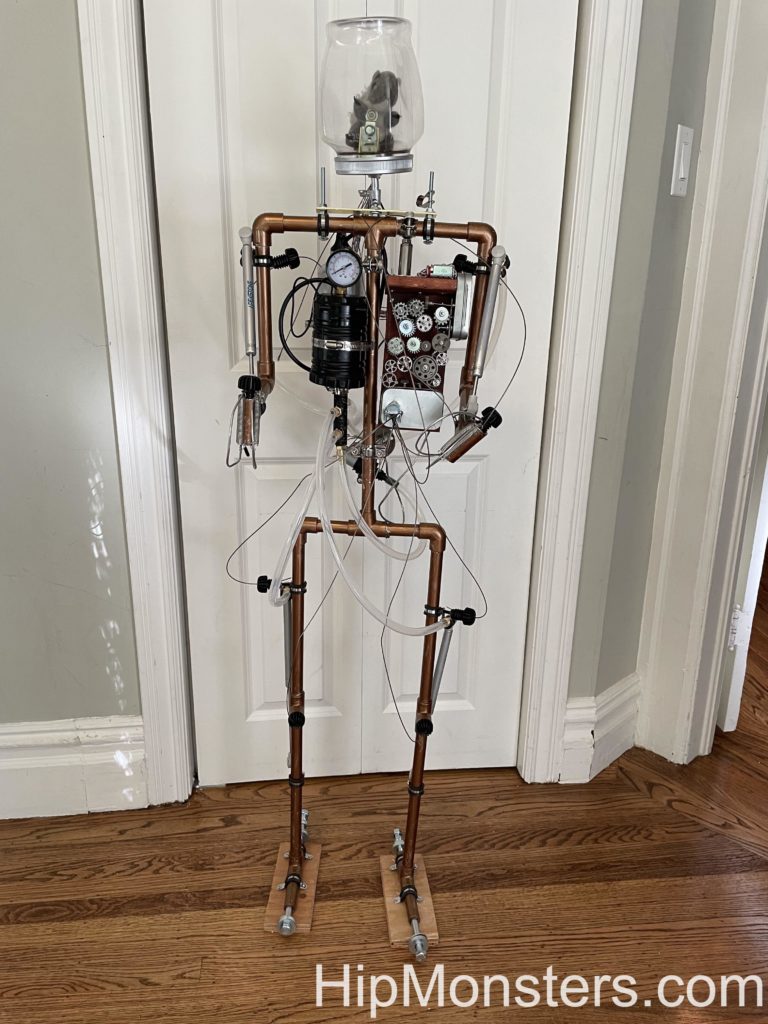
Completed Robot
The image to the right is the completed robot. The starting images ended up not as good as we expected so the final image was the best to show how the tubing was used. First, we cut the pipes to the right size using one of us to figure out the length of the arms, legs and spine. Then we assembled it and added feet to keep it stable as we worked. Getting the right balance and weight for the feet was harder than expected. We used concrete bolts with extra washers as needed to weigh them down.
Then we assembled the PVC pipes and painted it with two coats. The first was sliver spray paint; the second was bronze. We did this so when the bronze paint chipped off it would still look like metal instead of plastic. Next, we used an old security camera mount and attached a plastic jar on the neck. We added a toy squirrel inside and a few parts that looked like little controls for it. We named the squirrel Professor Brookenhoff.
For a fake engine core we used an old battery powered lantern connected to an old water bottle.
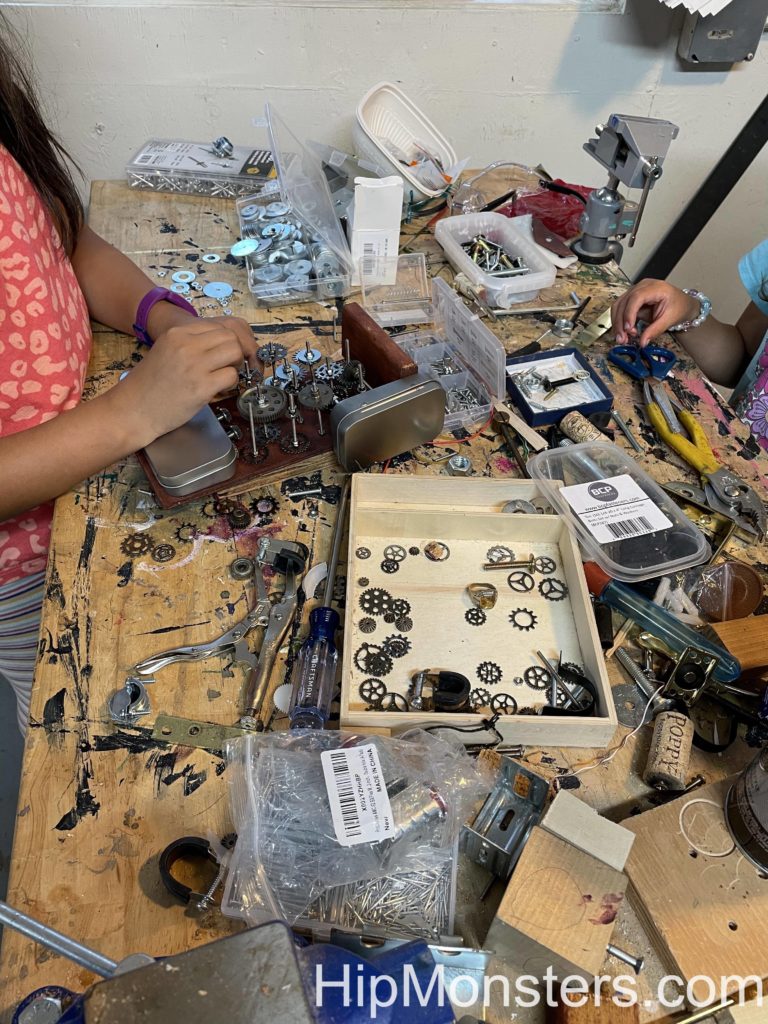
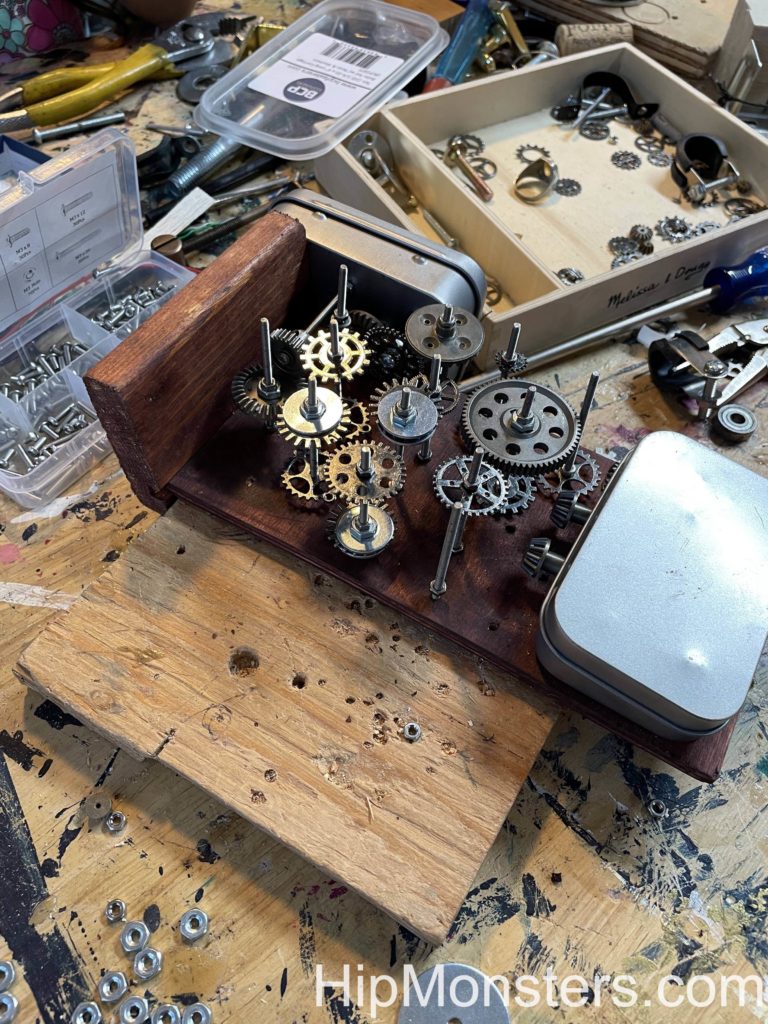
Assembling the gear box
Now we started on the fake control box. To make is steampunk we used gears and only a few wires. Then we assembled the gears to control the robot. We used old wood as a base and stained and distressed it by hitting it with a hammer.
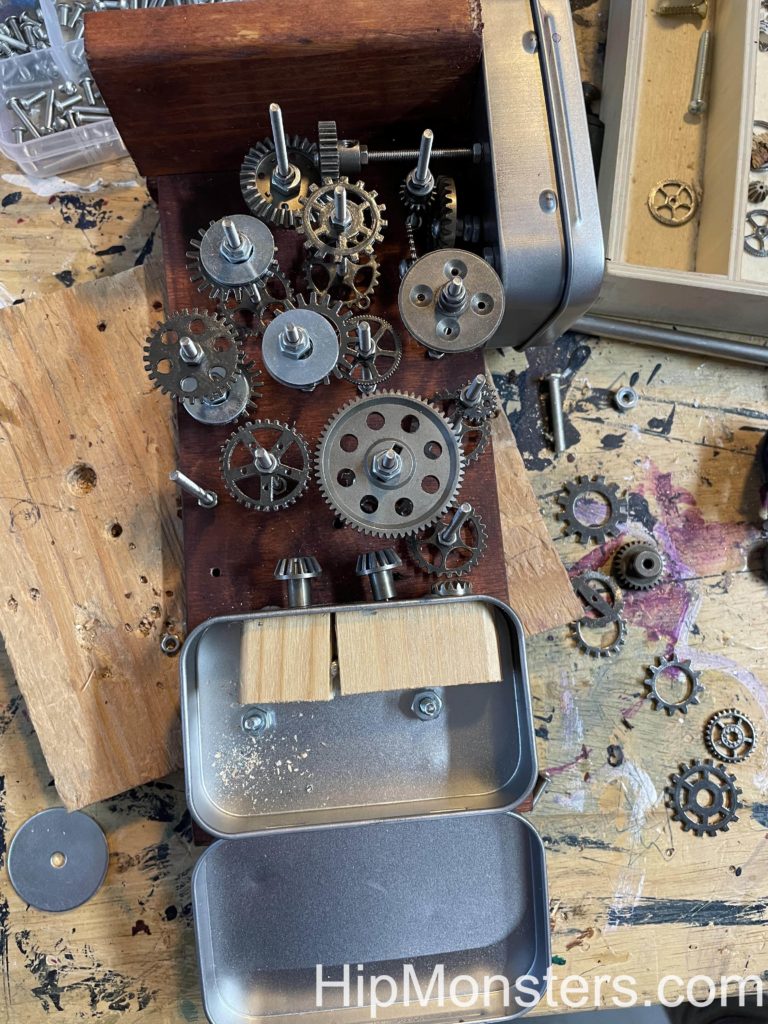
After that, we drilled a bunch of holes on the back and put thin, long bolts through them to create a framework for the gears. Before we assembled it we laid out the gears on the table in the pattern we wanted then transferred the gears to the rig. Remember to lay out the gears in the opposite way you want them in the rig.
Side view of the gear box
Here is a view of gears completed with the control boxes on each side.
The gears took the most time and ended up being a lot harder than we imagined. It was difficult to screw the tiny nuts into place to give it a 3d look. Also, the bolts proved to be sharp. We attached some gears to the side of the control boxes so it would look like they actually controlled the gears.
Close up of the gear box
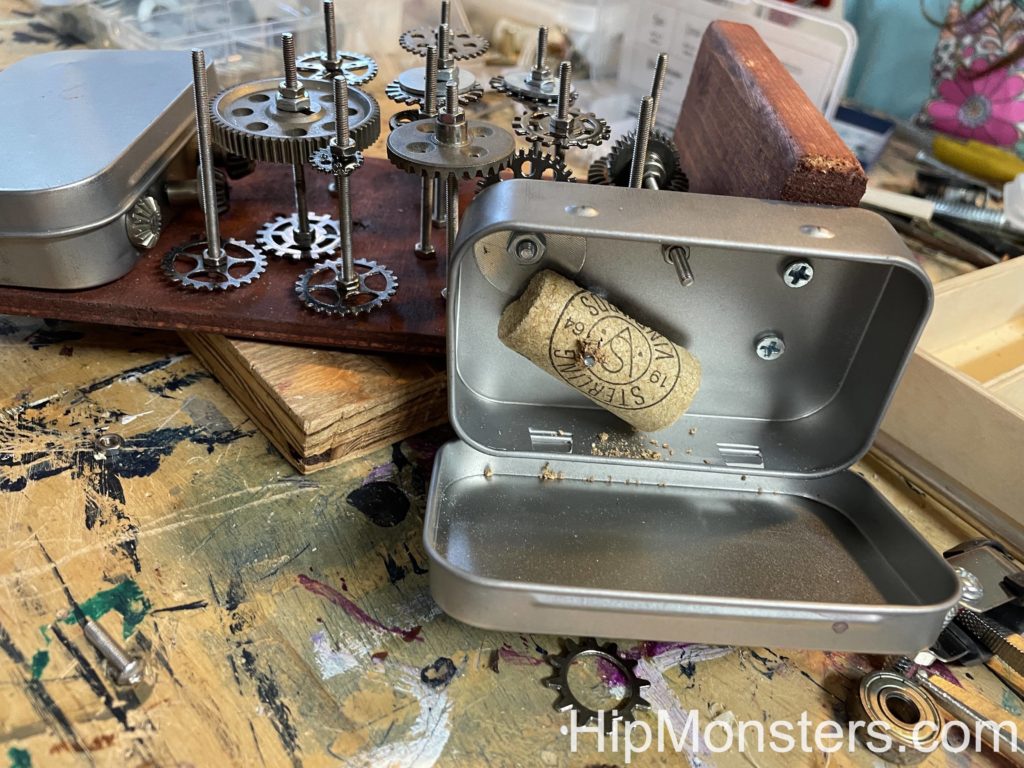
Then we attached a box to run the wires through. We had a plan on the gears, engine, wire, pistons that we made before we started work that was our best attempt at design an honest working robot. The things we added is what Number Three would have needed if it was real.
Side view
We then added a second box next to the gears for attaching the control wires.
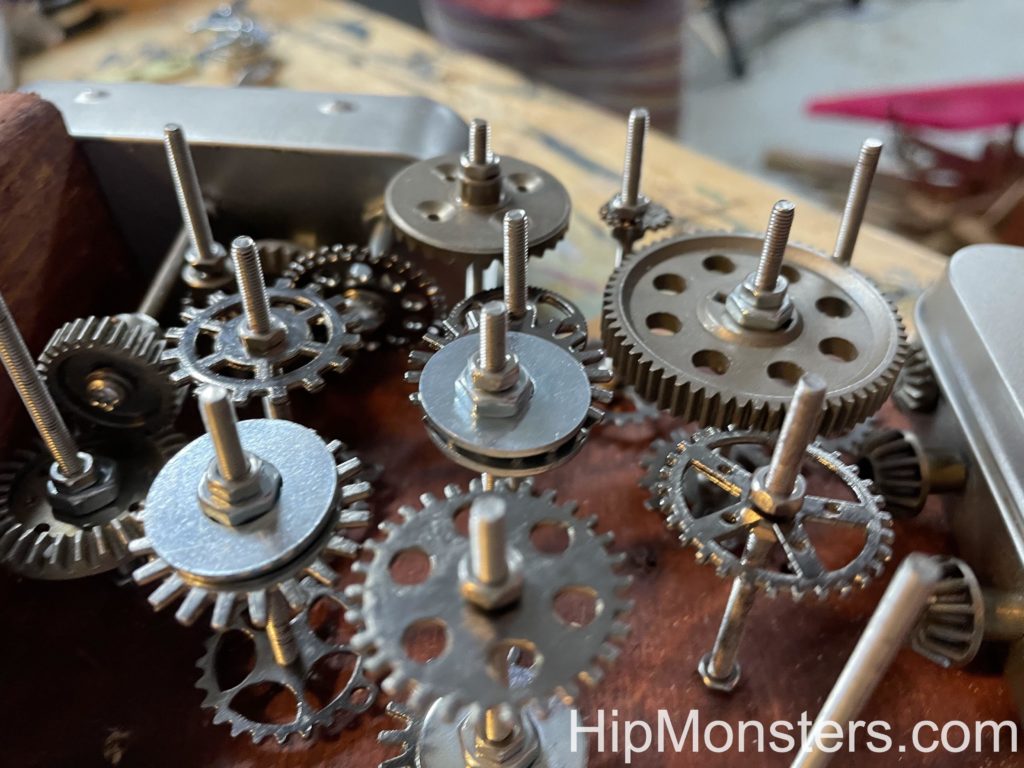
Close up
Here is a close up of the gears. Getting a 3-D design is important to make it look real. Each gear needs two bolts. One on top and one on the bottom. Make sure they are tightly screwed together.
Back view
Now we focused on putting on details that would make it look like Number Three could move. Since it was supposed to be steam powered we used four left over pistons. We attached pneumatic tubing to the pistons then attached the other end to the engine. The idea is the power from the engine would create steam, and Professor Brookenhoff would give commands to the gears which would send the steam to the right piston to make it move. The idea of the head came from Carmichael from The Umbrella Academy.
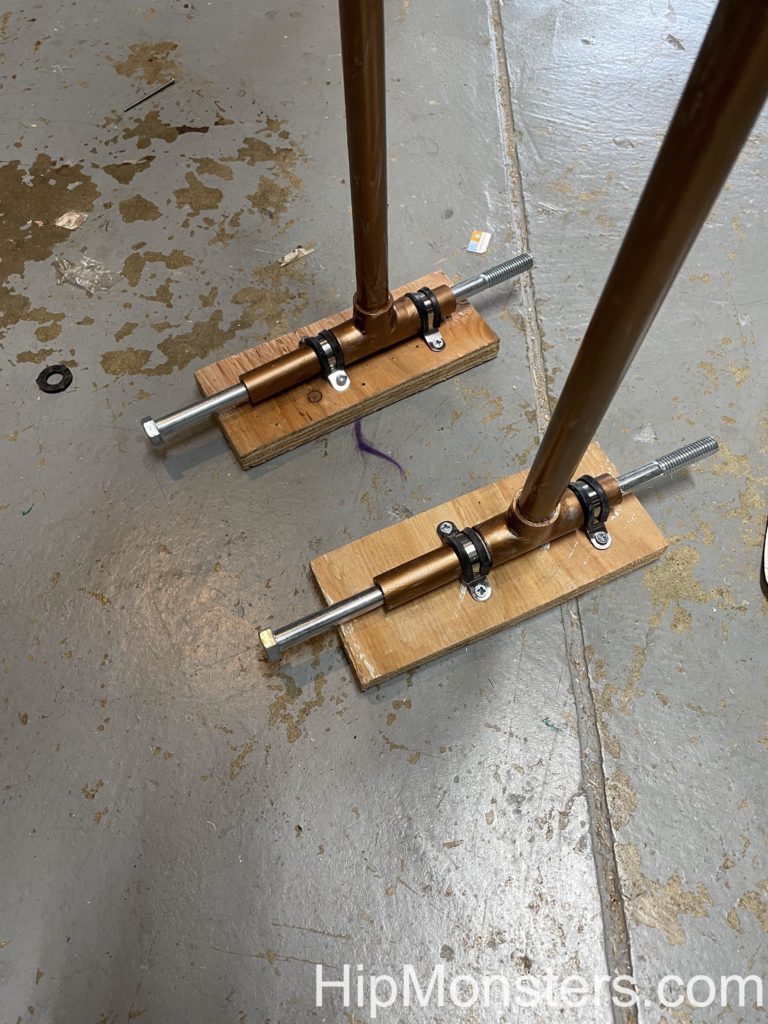
Close up of the feet
As we added more details to Number Three, we also needed to add more heavy things to the feet for stability.
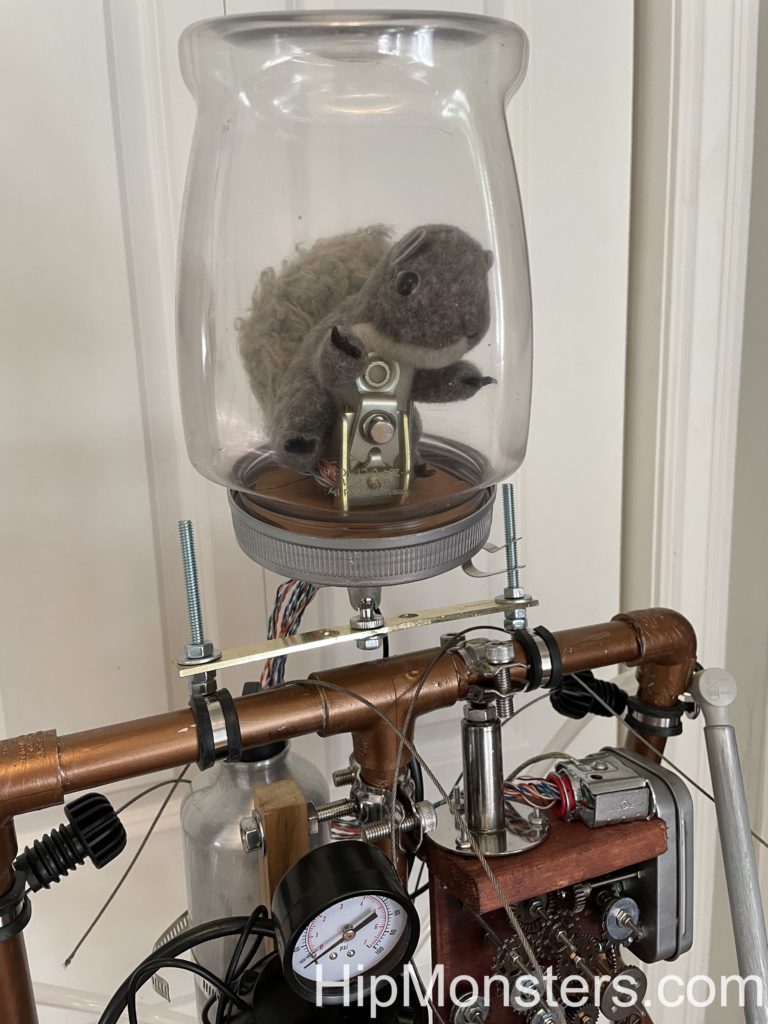
Close up of the head
A close up of Professor Brookenhoff piloting Number Three.
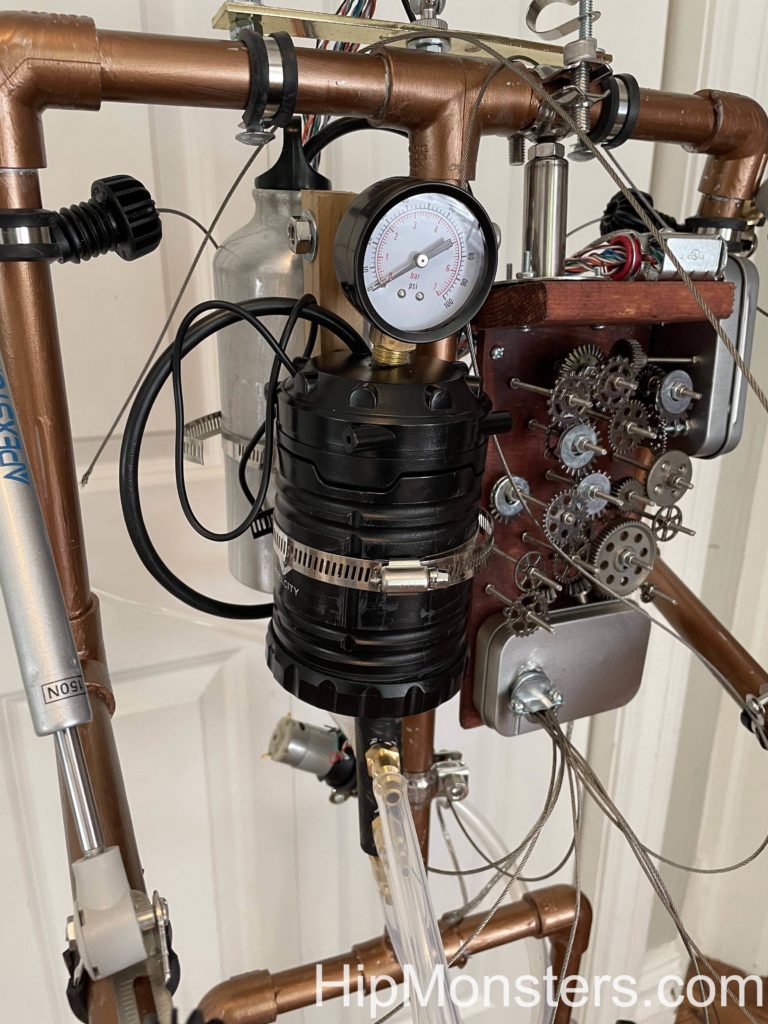
Close up of the chest
A close up of the tubing from the engine to the joints.
Side View
Number Three from side view. Here you can see the hands which also ended up being hard to make. Finally we made the hands out of wires and springs so it can hold things.
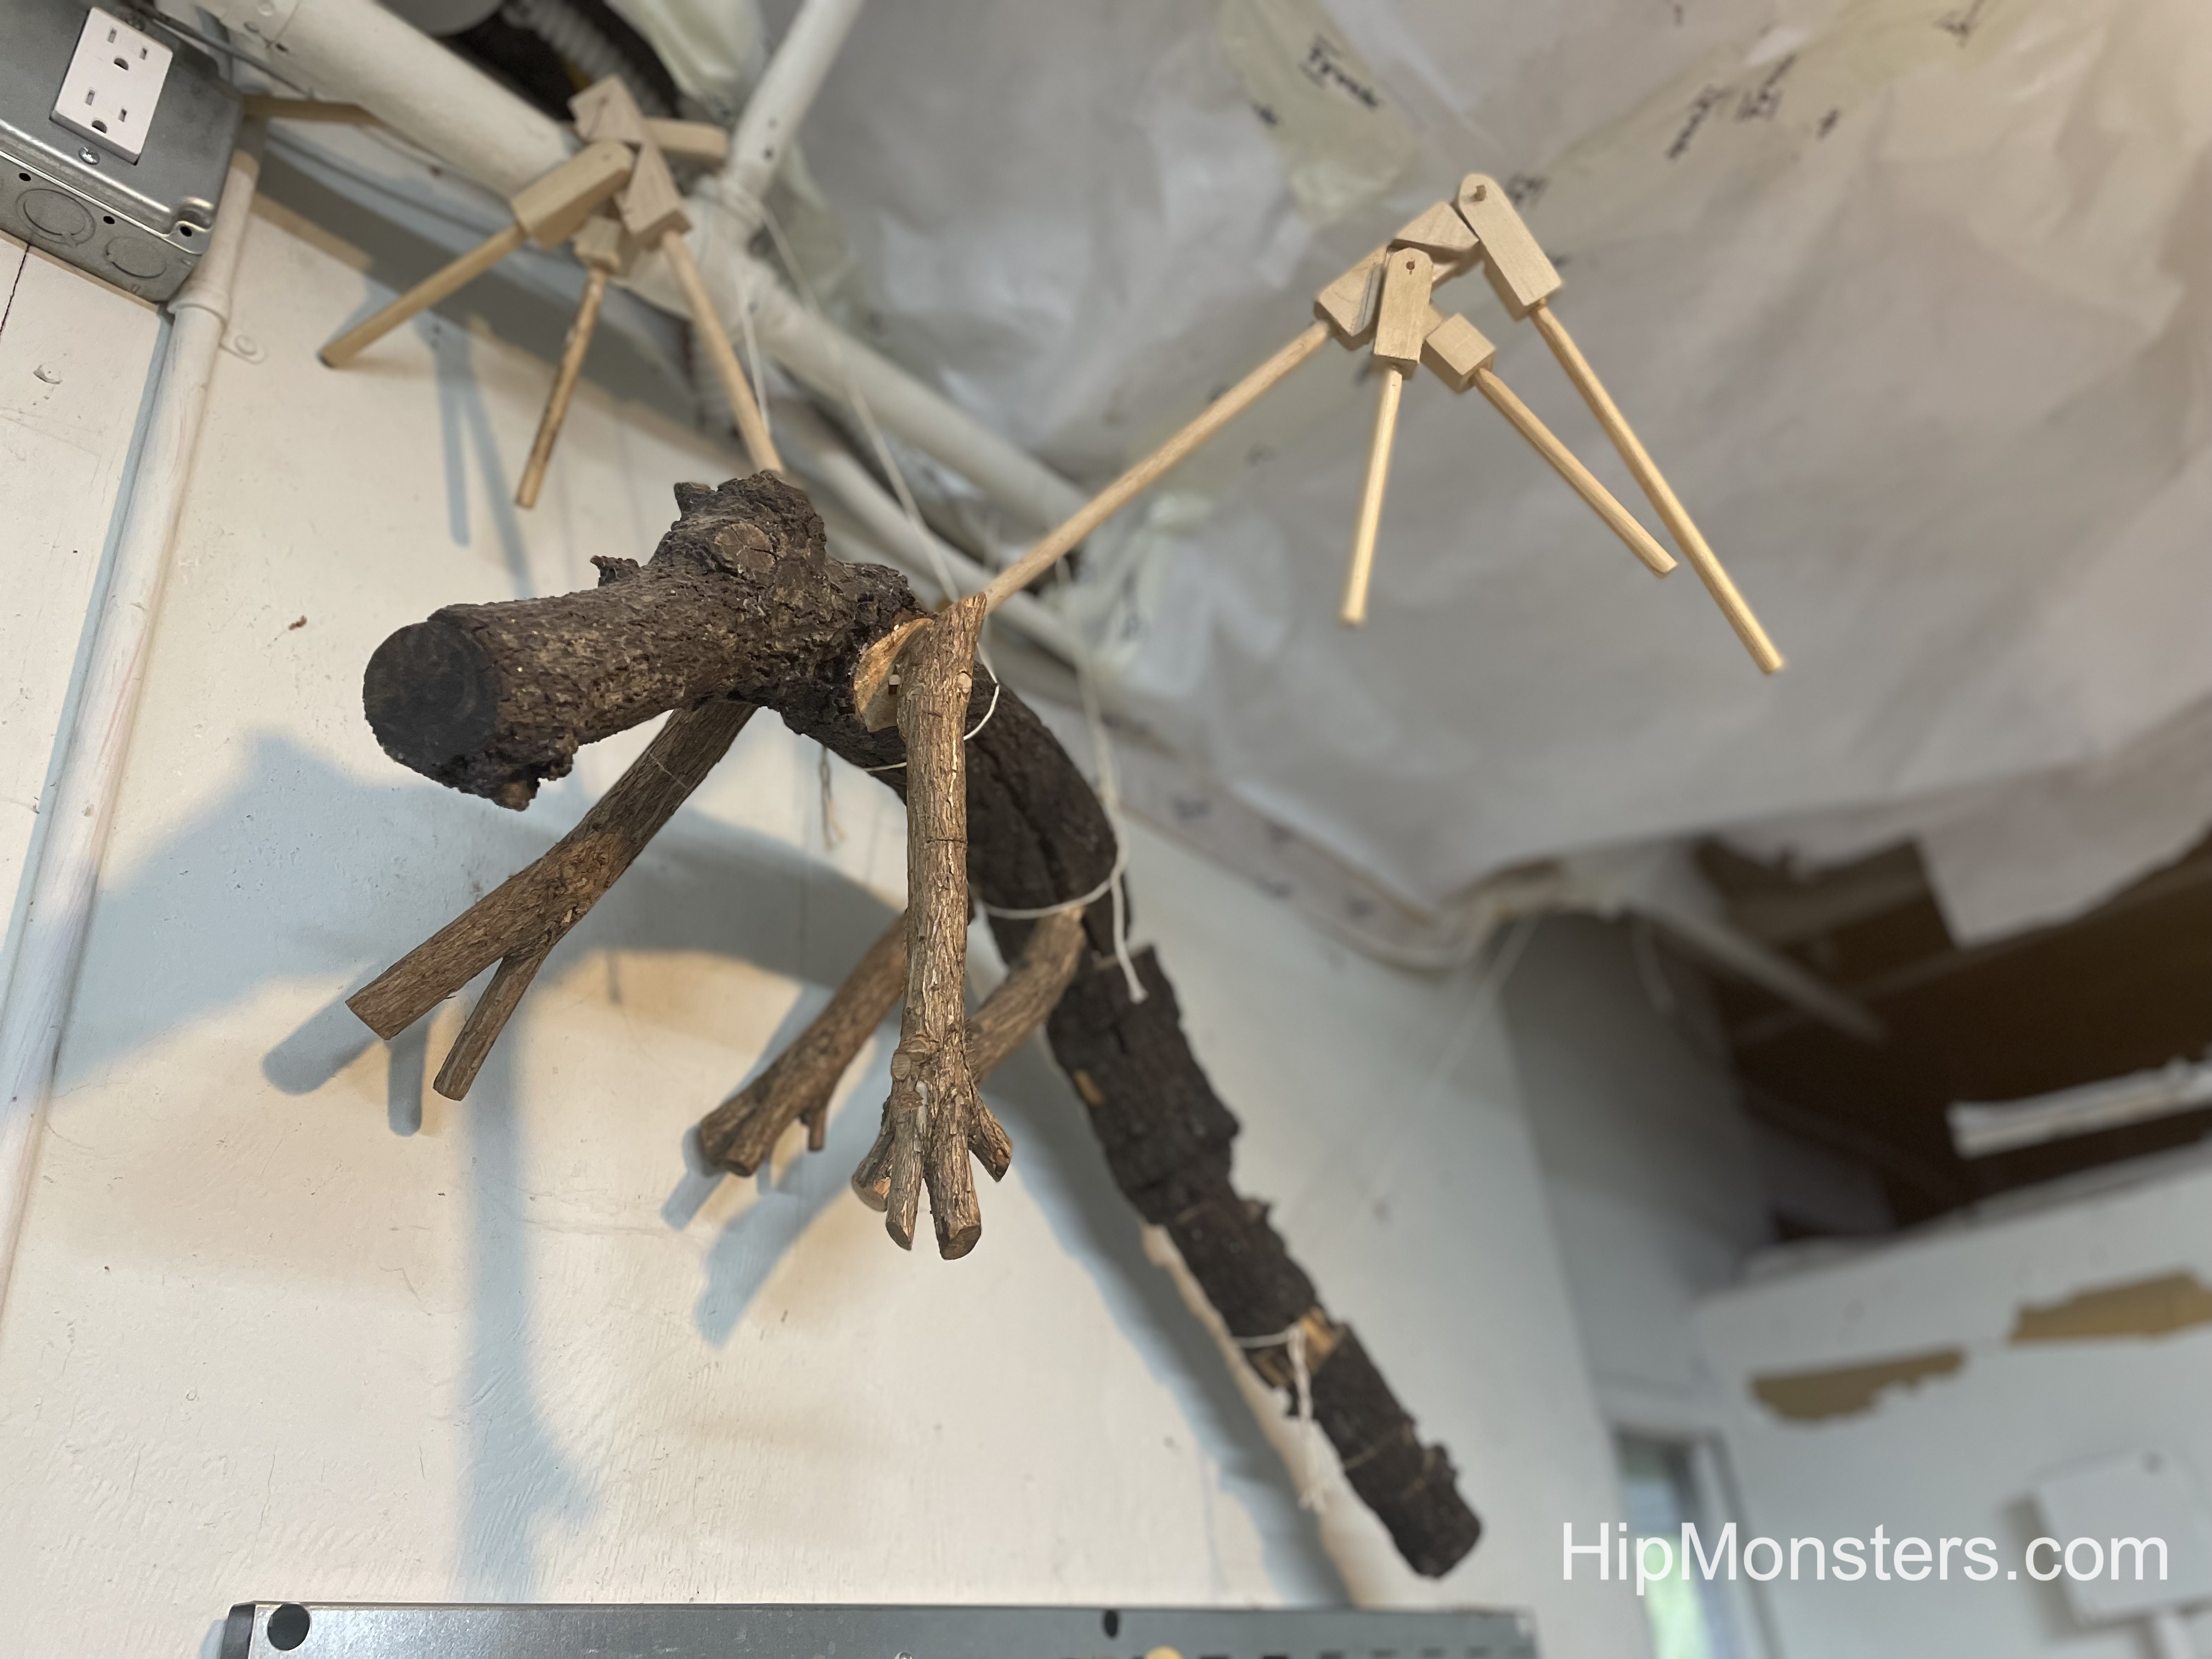
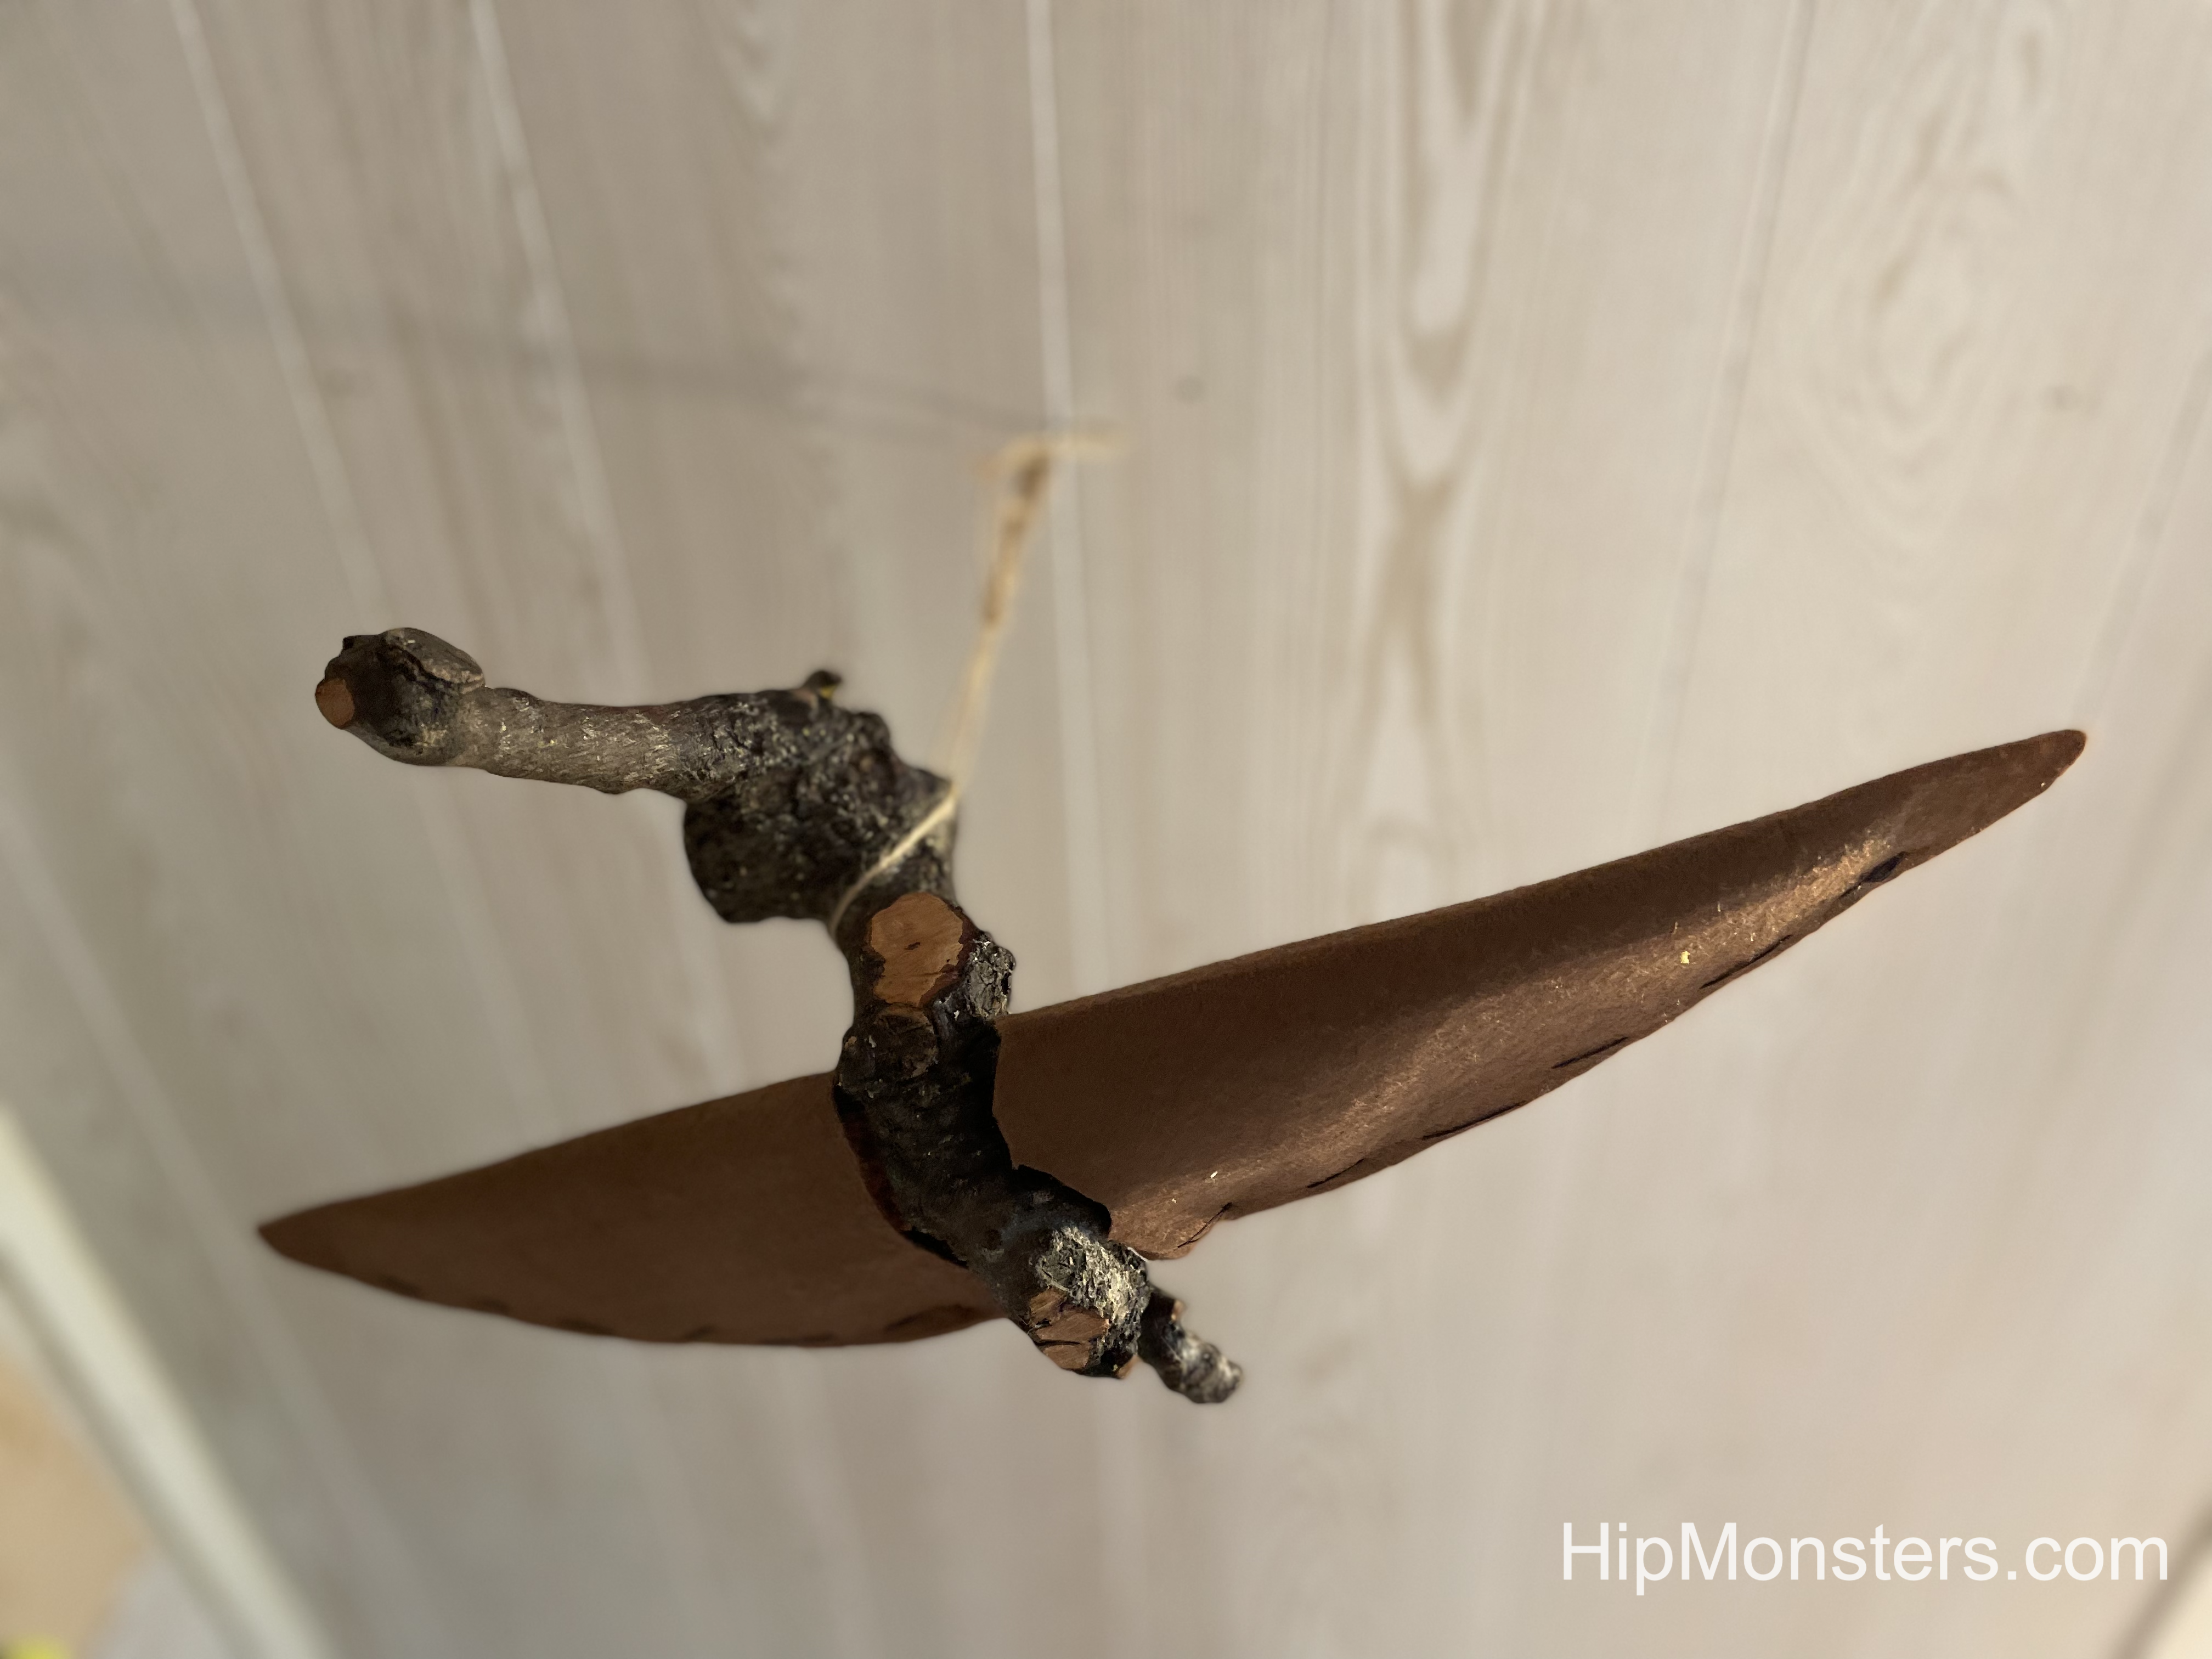
Born from one of our favorite bushes and a failed costume, Lin the dragon was our most complex monster at that time. Lin is made from wood from our own garden, making her unique.
Flying free!
Lin has posable legs, tail and wings. The legs can barely support her so we decided to hang her from the ceiling to watch over us as we craft.
Side viewClose up of a wing joint
The wings are from a dragon costume we were building that proved to be too heavy. The tail is made by repeatedly cutting the log and threading a steal wire through them to secure it.
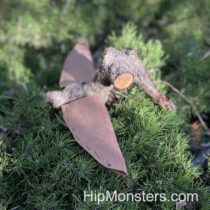
This monster was made from a branch too weak to be used for other projects. We decided to make it into a hummingbird because it already had a long beak, and the body was already shaped like a bird. After lots of trimming, sanding, and bees wax, we added felt and wire wings.
Bottom view
Hung from the ceiling, the hummingbird monster comes to life.
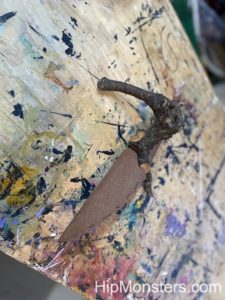
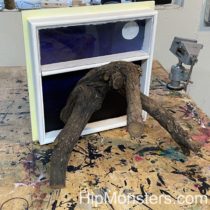
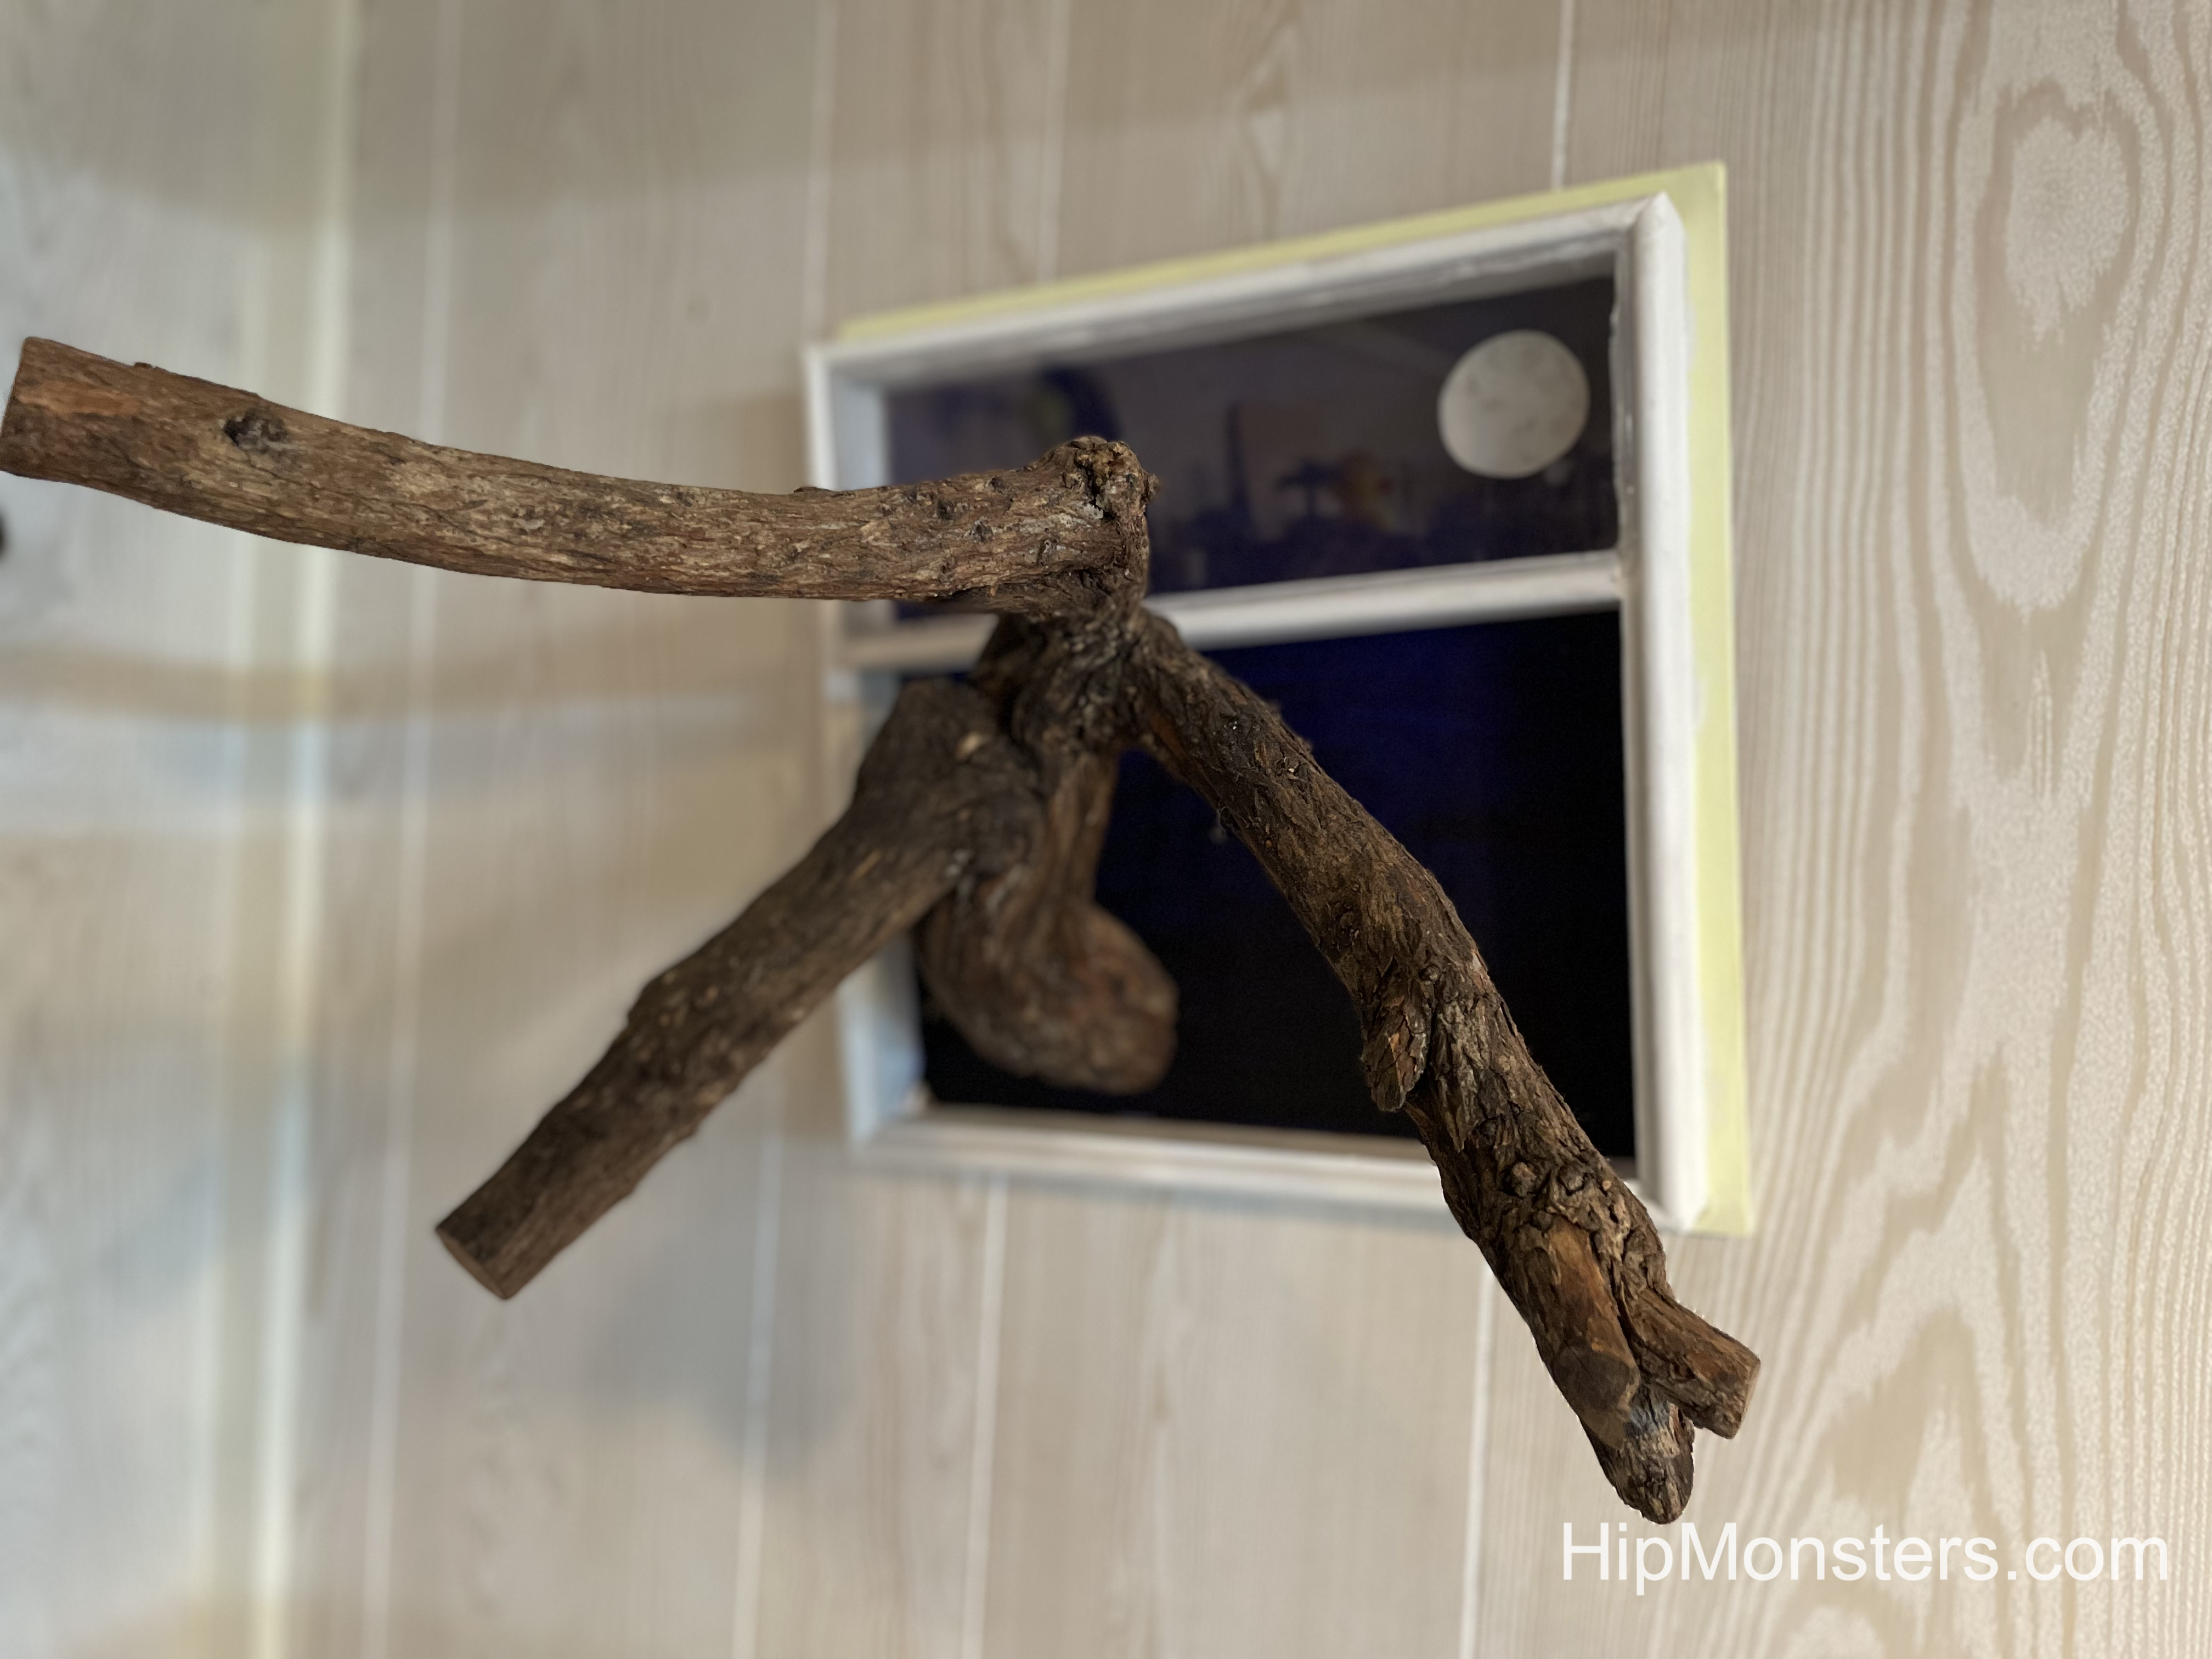
We call this monster the Anteater. The Anteater monster was a wonderful branch that was too split to make a good wand or use in other projects. After we stabilized the splitting and cut out all the rotted wood, we sanded her and coated her heavily in bees wax.
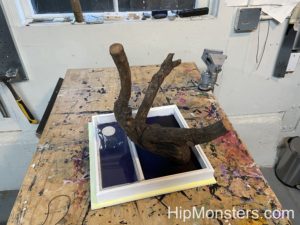
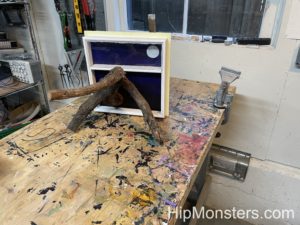
Side view
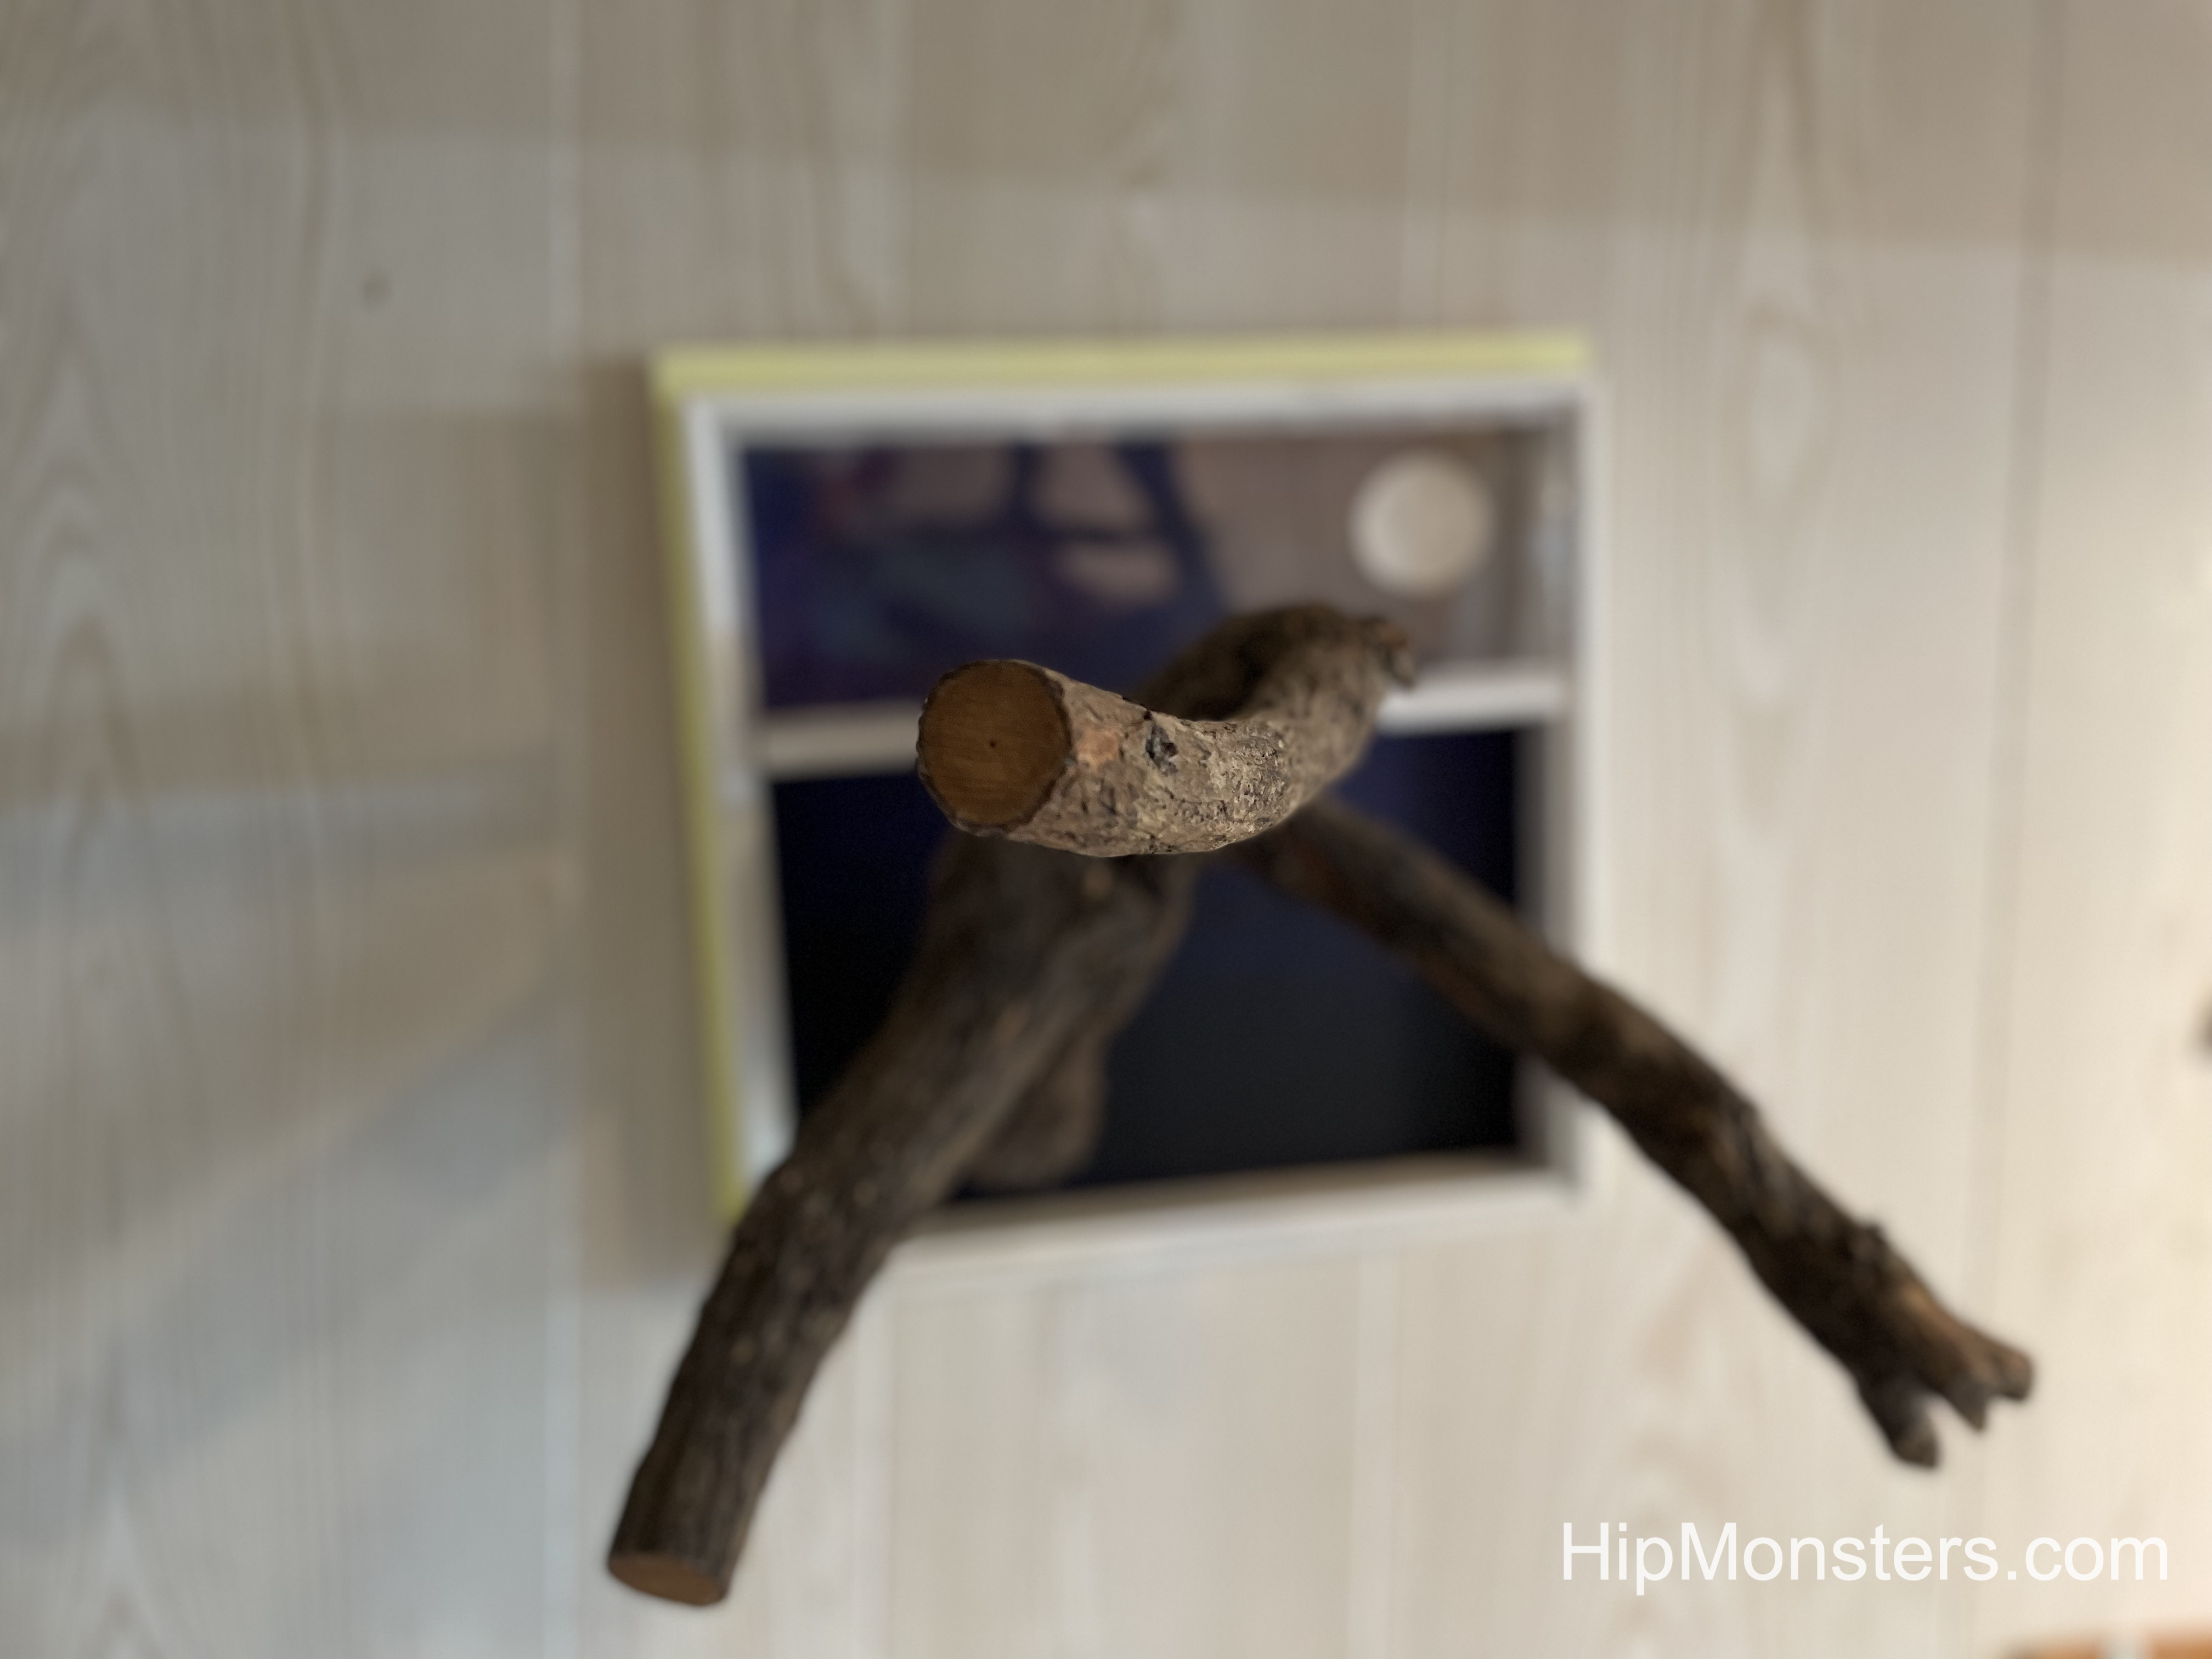
At first we thought of mounting Anteater on the wall as if she was a trophy, but then the sisters team thought of having her appear to climb out of the wall. We then used a picture frame we were working on and created a fake window using the picture frame, paint, and plexiglass for her to climb out of. With a window as a mount, she made a great addition to our living room.
Need to track the moon phases for that perfect time to cast a spell? Worried about when you are due to change into a werewolf?
The following instructions are for a quick DIY Sun, Earth, Moon Orrery we did for a school project. This is suitable for ages 6 to 12 but may need adult supervision. We were inspired by this article in instructables.com but needed a much simpler design.
This project was also the start of HipMonsters, and we still use some of the same skills for our robots and woodworking projects.
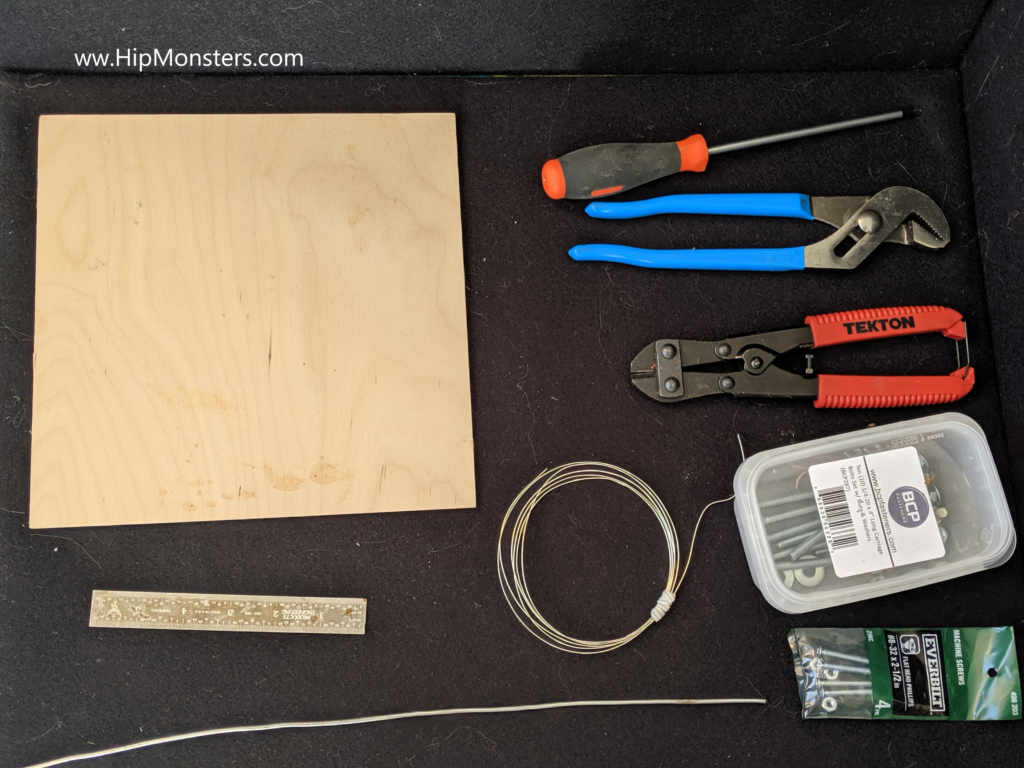
Please note, this material is provided for informational purposes only and is not a guide on how to create the designs. Please read our disclaimer.Equipment:
Drill
Pliers
Wire Cutters
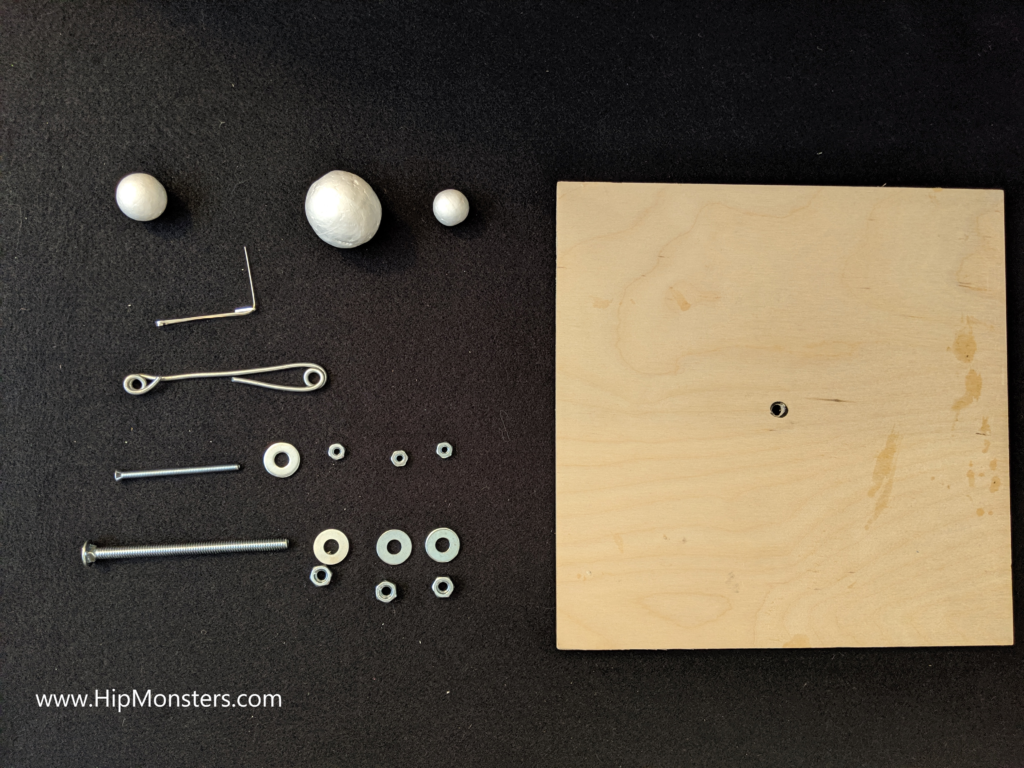
Parts:
Plywood (10 X 10 inches)
4 inch bolt with 3 nuts and 3 washers
2 inch bolt with 3 nuts and 3 washers
3 foam balls of different sizes
9 inches of thick wire (may use coat hangers)
5 inches of thin wire (may use pipe cleaner)
Foam padding
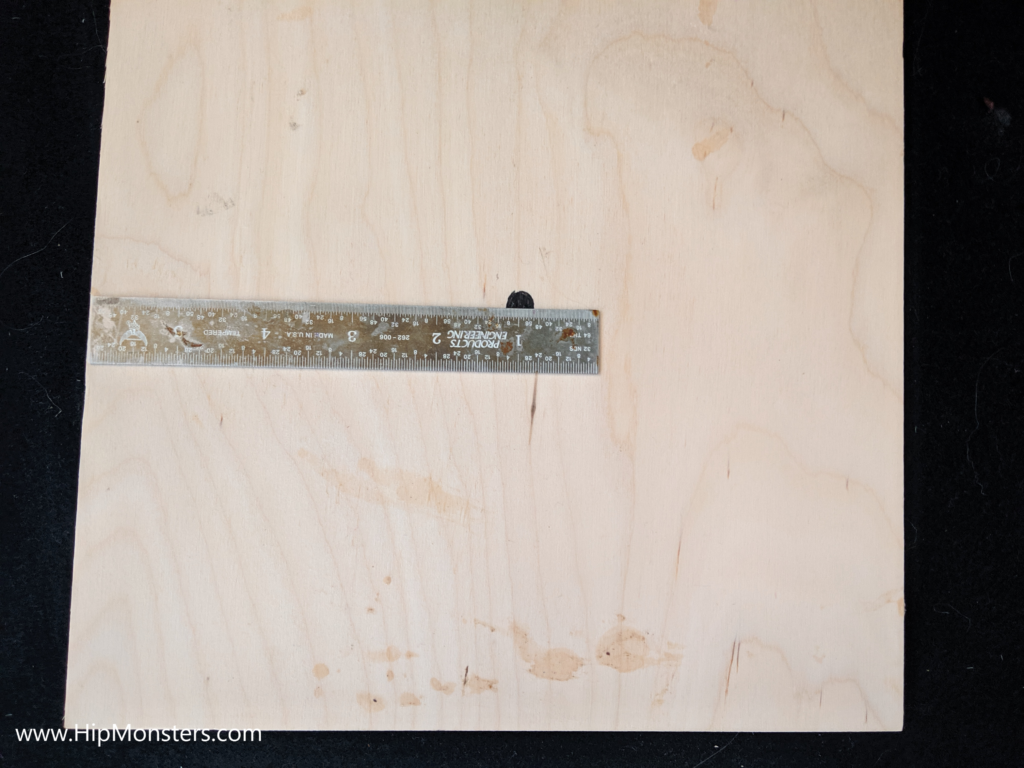
Step 1
First, measure the center hole for the main screw. This screw will support the Sun, Earth, and Moon.
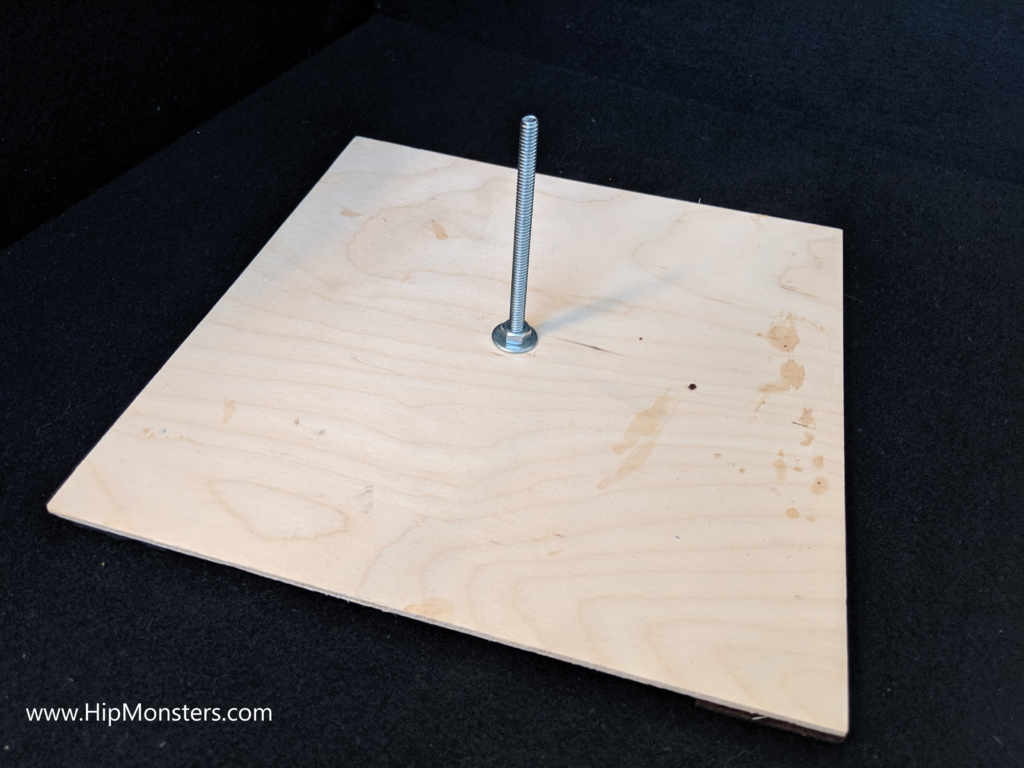
Step 2
Next, drill the hole and push the large screw through the hole and secure it with a washer and bolt.
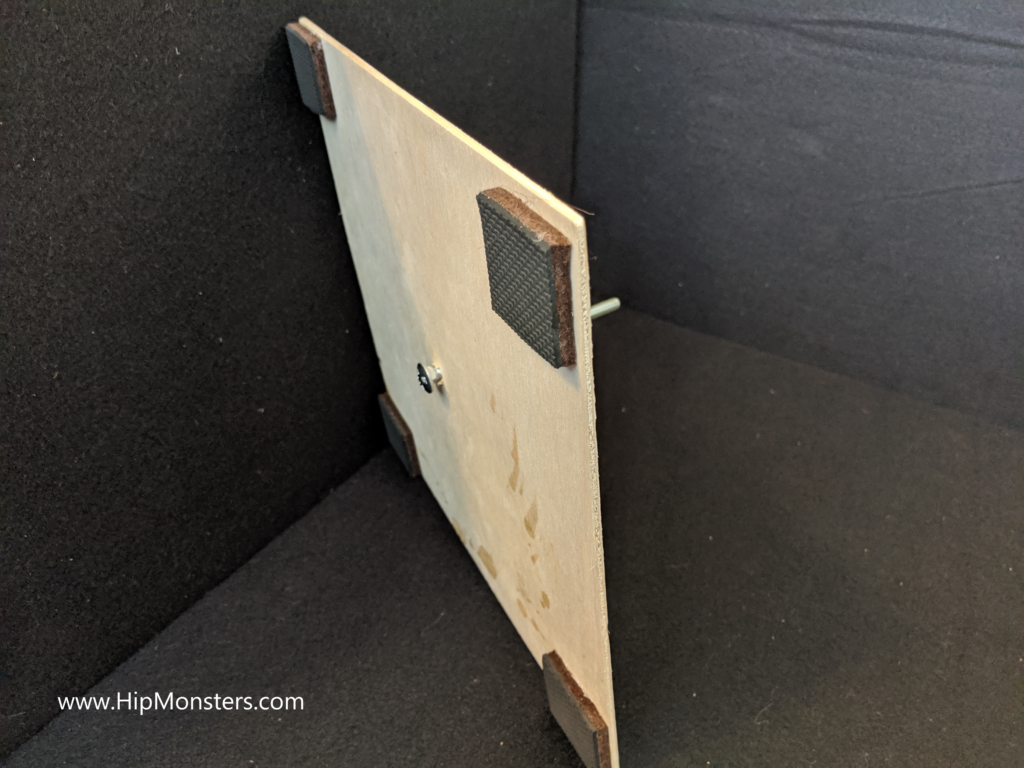
Step 3
Turn over the base and stick four foam pads on the bottom. We used one large foam pad for furniture and cut it into four pieces. These foam padding will prevent the center bolt from scratching the table when placed upright.
Step 4
Turn the base back over and make sure the foam padding is tall enough to prevent the bolt from scratching the table. If not, then add another layer of foam. Next, screw another a nut to the halfway point on the bolt and then put a washer on top.
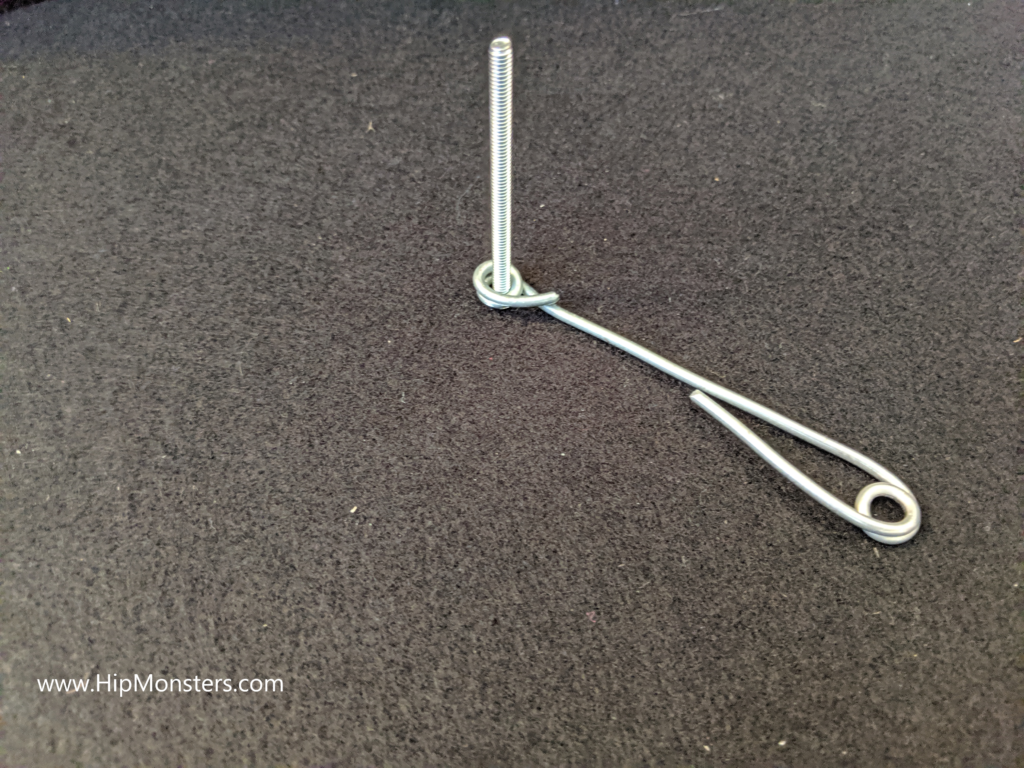
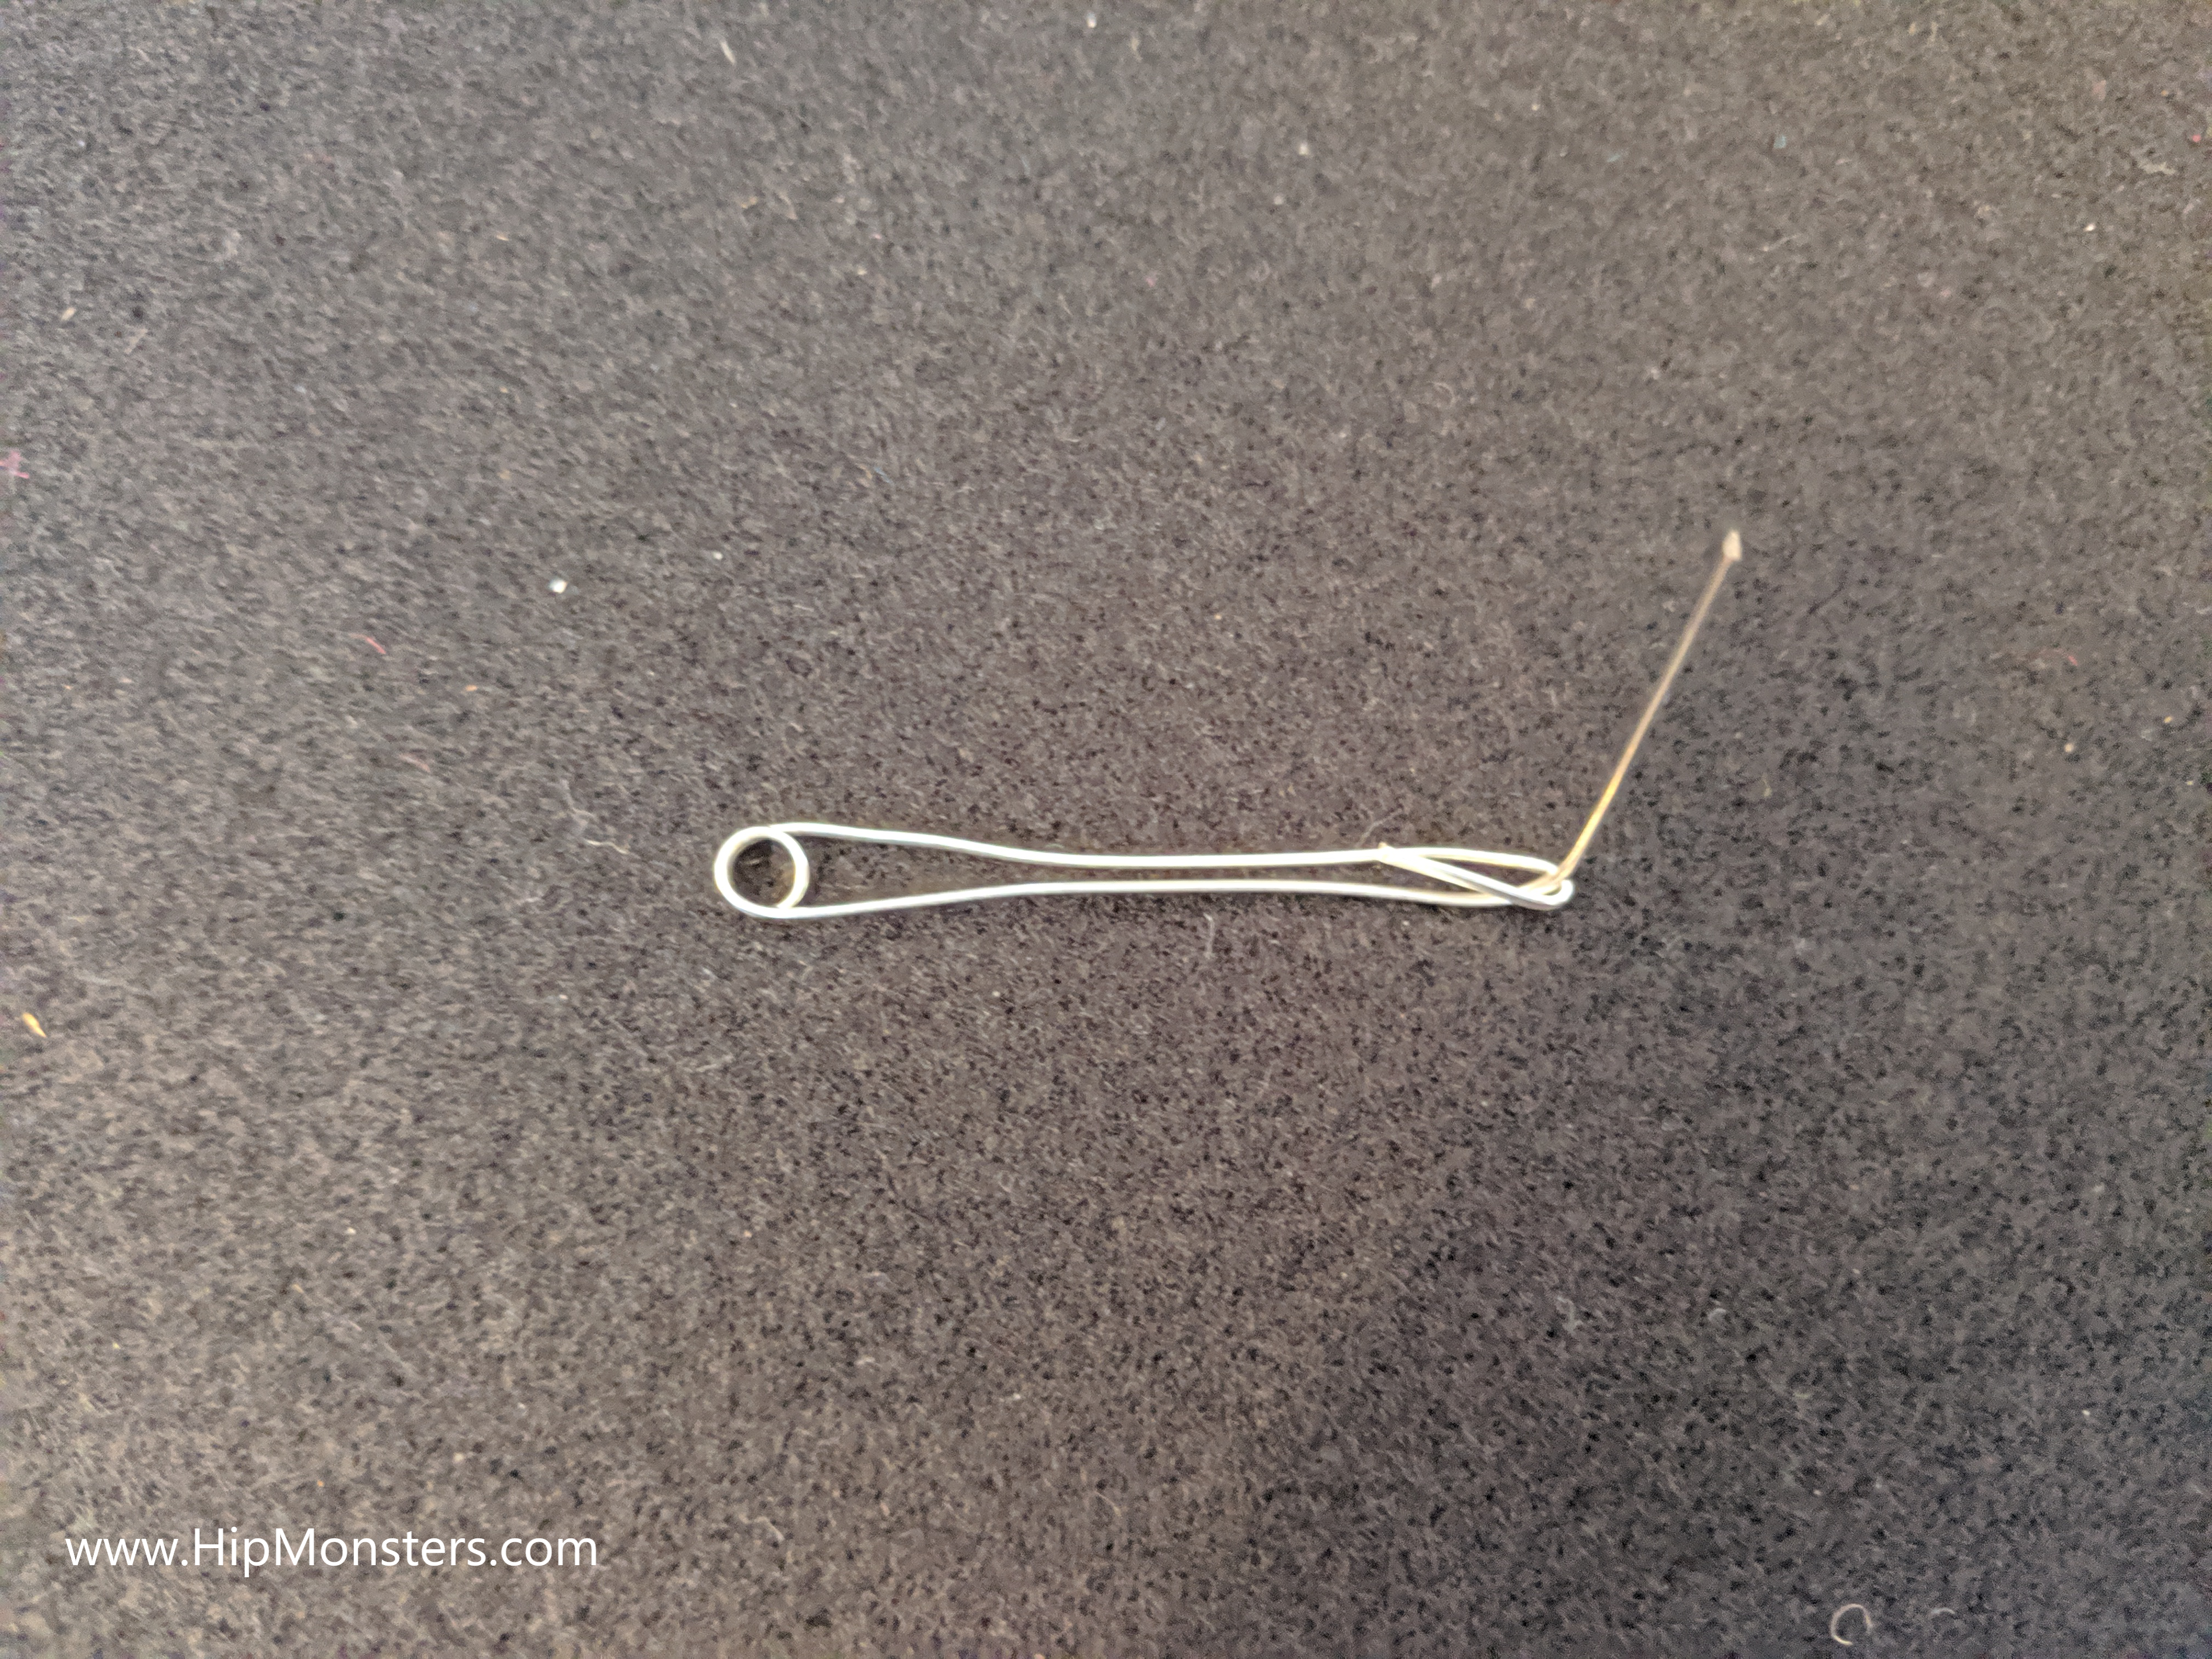
Step 5
Now we need to make the support wire for the Earth. Take the larger wire and bend both ends using a screwdriver as shown. The goal is the make the loops tight enough so the bolts are secure when threaded through them.
Step 6
Here, both ends are ready to secure the Earth to the center shaft. Notice one loop is smaller than the other. The larger loop is for the center bolt; the smaller one is for Earth’s bolt.
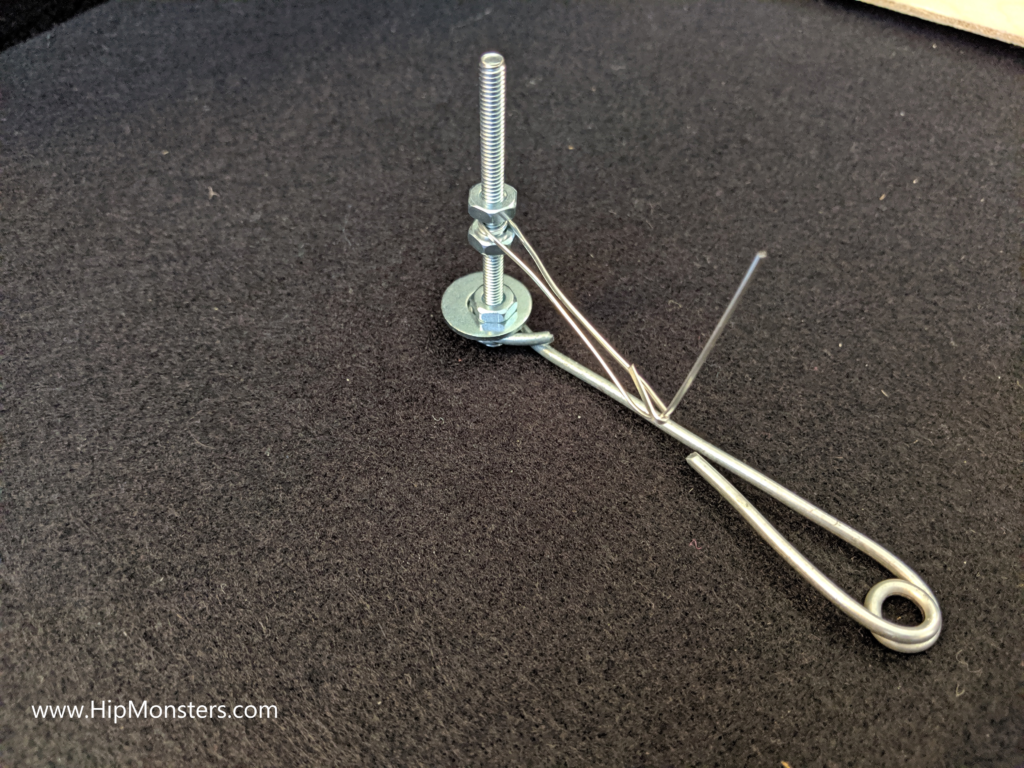
Step 7
Now, thread the smaller bolt through the smaller loop.
Step 8
Secure the bolt to the arm with a washer and nut. Then screw a nut halfway up the bolt. This bolt will serve as support for the Moon’s arm.
Step 9
Next, create the Moon’s arm. Bend the thinner wire similar to the Earth’s arm but only put a loop on one end. Bend the other end up to support the Moon.
Step 10
Now connect the thin wire to the screw on Earth’s arm and secure with a bolt.
Step 11
And we are nearly there! Just connect the thick wire to the screw and put a washer and bolt on top. Make sure to screw on tightly, the weight of the arm can make it droop.
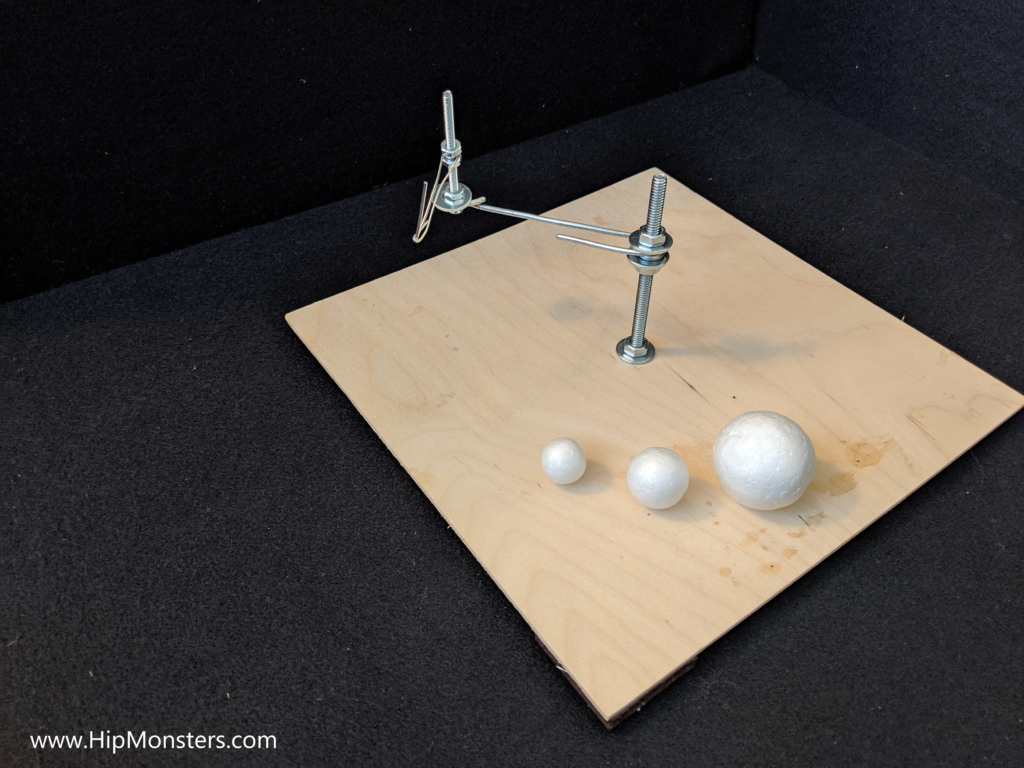
Step 12
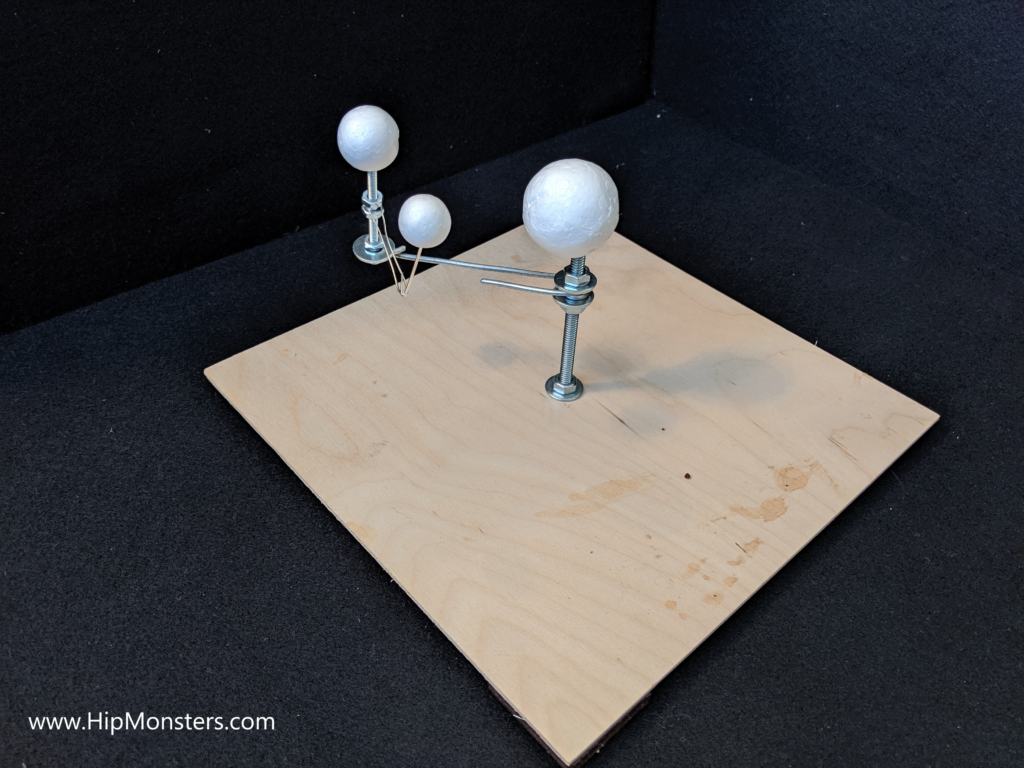
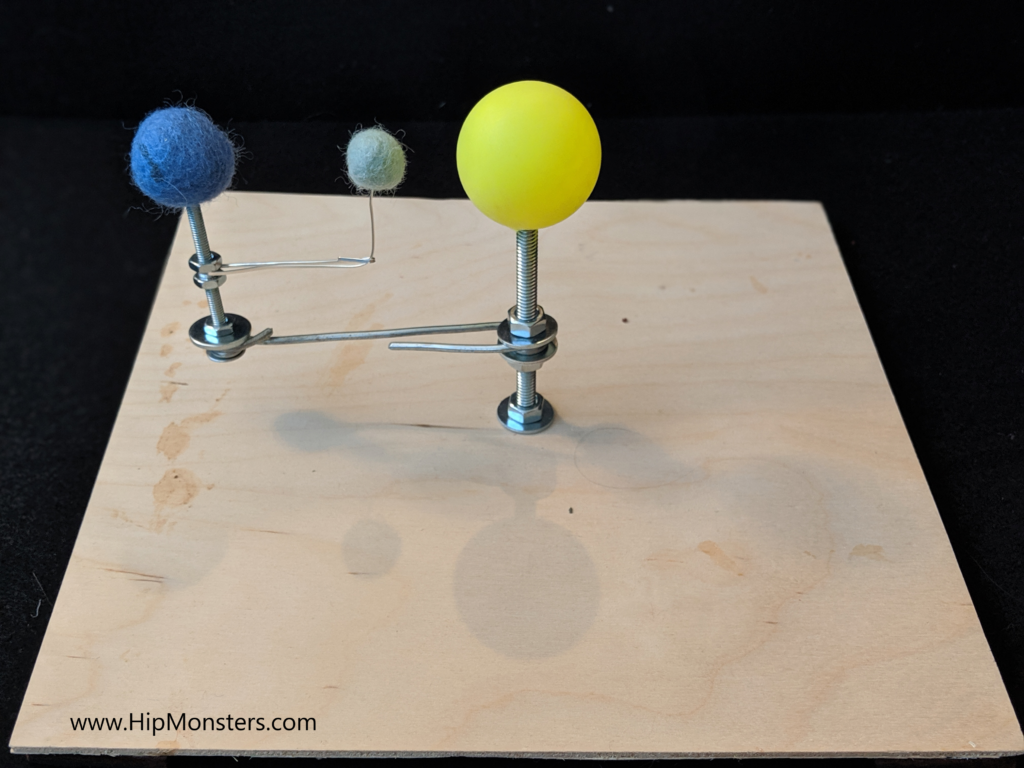
And finally we are ready to add the Sun, Earth, and Moon. The smallest ball is the Moon and goes on the smallest arm. The Earth is the mid-sized ball and put onto the outer bolt. The largest ball is the Sun and placed on the center bolts. You can paint the balls as the final step if you want to.Putting it all together
The Sun, Earth, Moon orrery is almost complete, we just need to assemble! Here are all the pieces laid out. We substitute the foam balls in one build with a ping pong ball for the Sun and felt balls for the Earth and Moon.Enjoy
You now have your own Sun, Earth, Moon Orrery and predict the next eclipse or start planning for the next full moon! Keep a watch out for werewolves!
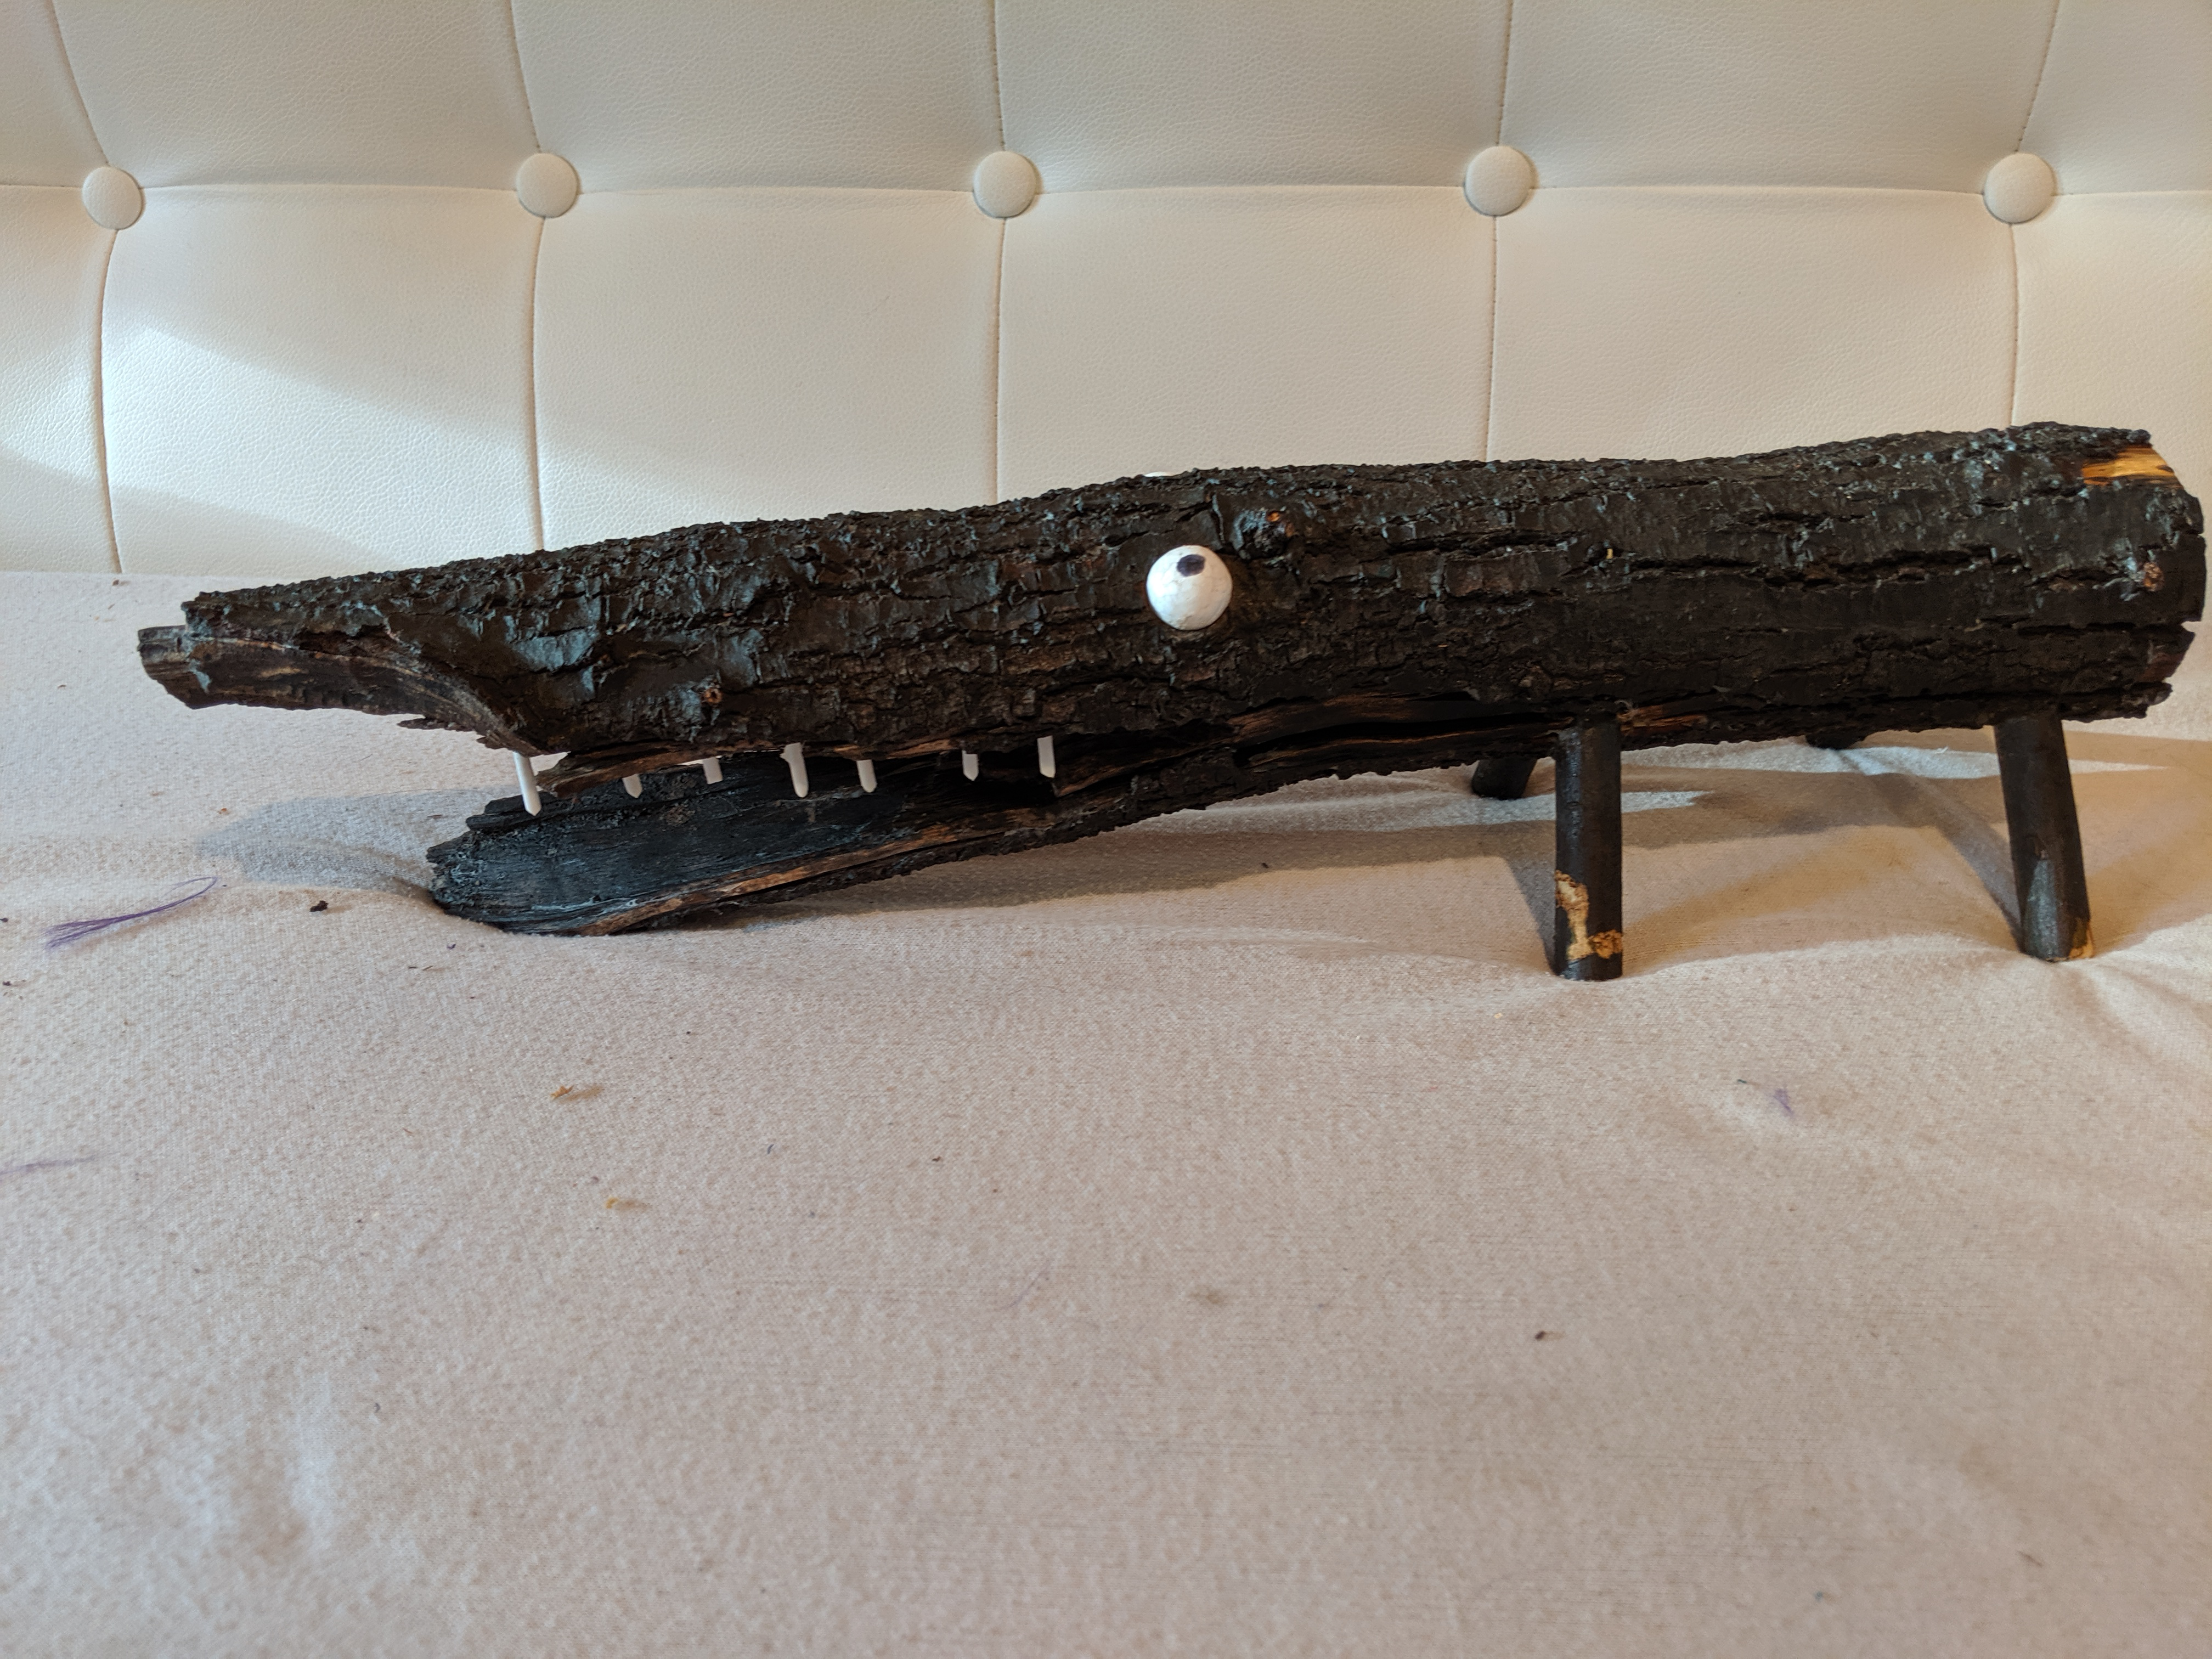
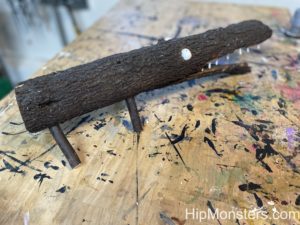
The HipMonsters team does not like trees going to waste, so whenever we stumble upon a piece of wood too rotten or misshapen to be used for our projects, we create a wooden monster! We try to let the original shape of the wood inspire the final result. This pieces of wood was split like a giant mouth, so we decided to make it into an aligator.
Allie!
Born from a dead branch of a juniper bush, this monster is built to protect a child’s room. It is very possessive and will only allow one monster in the room at a time. Perfect for making sure human children have a restful nighttime sleep.
Allie from the front.
We made Allie’s eyes out of two Styrofoam balls and drew in her pupils with sharpie.
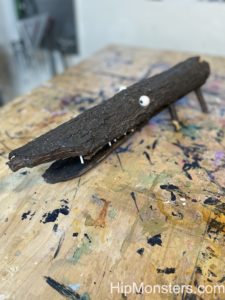
Allie from the rear.
Allie was one of our first monsters and is at the front of our house every Halloween!