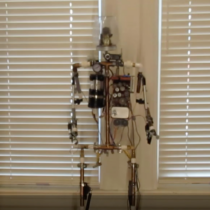
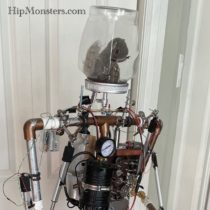
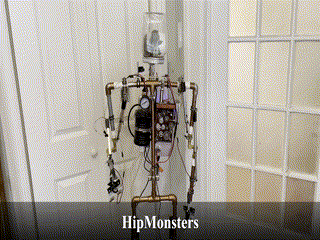
Here is a preview of HipMonsters.com’s next project, Robot Freedom. No robots were destroyed making this, but Number Three had a few wires yanked off.
Category: Latest
The latest articles on our art, creations and robotics.
Foam-Mo Creations
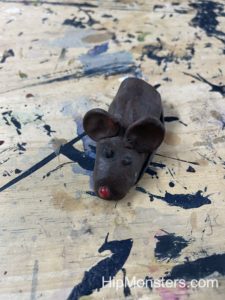
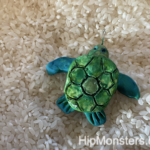
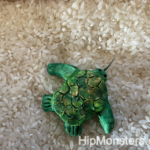
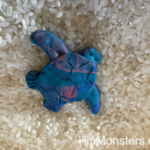
This is an introduction to one of our favorite making materials, Foam-Mo. Foam-Mo is really great for making models of organic stuff, such as plants and animals, whereas regular air-dry clay has the wrong texture. The Hand of Glory, from one of our other posts, was also made out of Foam-Mo.

This is an introduction to one of our favorite making materials, Foam-Mo. Foam-Mo is really great for making models of organic stuff, such as plants and animals, whereas regular air-dry clay has the wrong texture. The Hand of Glory, from one of our other posts, was also made out of Foam-Mo.
Please note, this material is provided for informational purposes only and is not a guide on how to create the designs. Please take a look at our disclaimer.
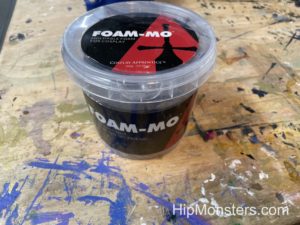
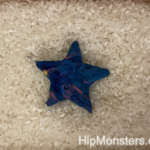
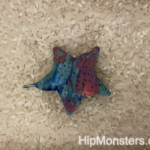
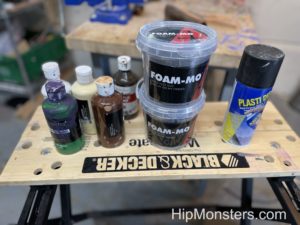
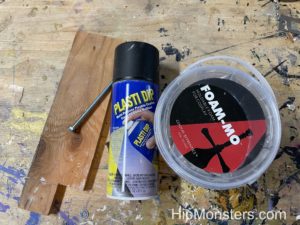
This is what Foam-Mo looks like when it’s packaged. If you want to work with Foam-Mo, you should also get some plastic spray, because without the plastic spray Foam-Mo can disintegrate over time.
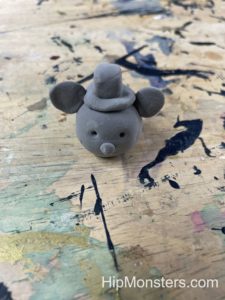
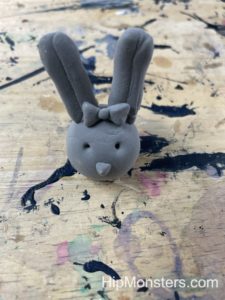
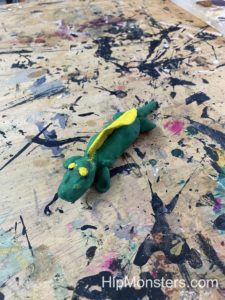
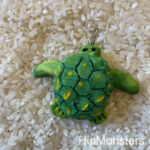
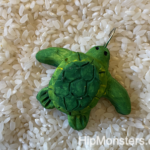
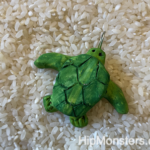
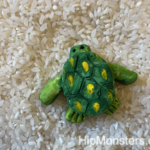
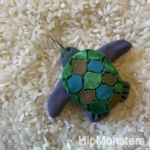
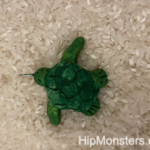
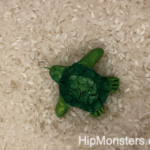
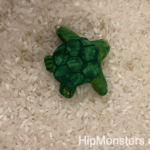
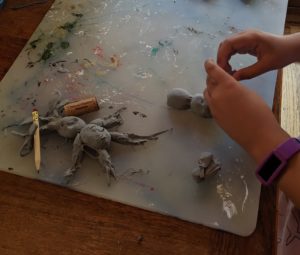
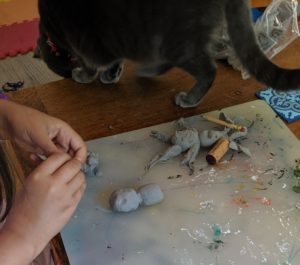
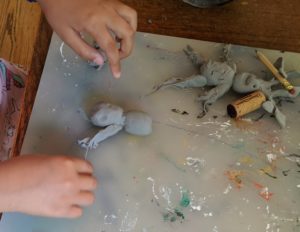
Here are some of the small designs that we made. Like we said earlier, Foam-Mo works well with organic stuff. It is really soft, and moldable, and not sticky at all. You should not add water, because water can damage your creation, causing them to crumble. While working with Foam-Mo, we used some of the same techniques that you would use for regular clay to mold it.
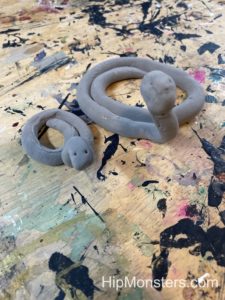
Here are some more animals that we did, two small snakes. Foam-mo can be rolled really thin, but it holds the same risk as air-dry clay when it it thin. As it is very soft, it also might need supports while it is drying. For this project, we had to prop up the heads to prevent drooping.
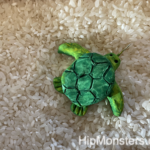
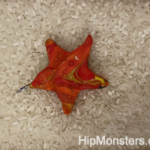
This is what it looks like after is is sprayed with plastic. Make sure to do multiple layers, and get every part of the clay. Make sure to spray it AFTER the clay has finished drying.
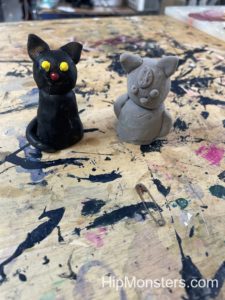
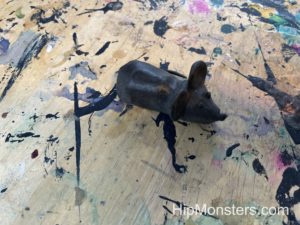
Here is a cat that we sprayed and painted next to one that we didn’t. The cat that didn’t get sprayed looks droopy, and has the wrong texture, due to the fact that we left it unsprayed for over a year, and it started disintegrating.
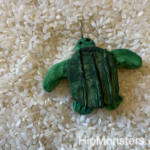
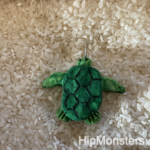
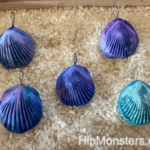
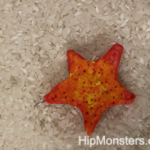
Here are two projects that we finished spraying and painting. The colors show up pretty bright, even though the plastic spray was black. We did multiple layers for some of them, but I think that the paint worked pretty well. We used acrylic paint, but you can research and find your own paint.
Happy creating!
DIY Moss Terrarium

What do you do if you break a pot? This fun DIY moss terrarium will teach you a great way to decorate your space with recyclable materials! It will brighten up your space and help you avoid throwing away useful pottery!
Please note, this material is provided for informational purposes only and is not a guide on how to create the designs. Please read our disclaimer.
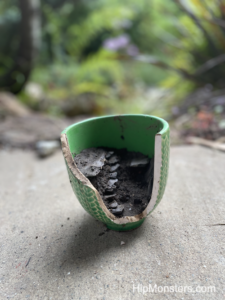
Let’s make a moss terrarium! The first step is to pack in as much mud as you can without the mud falling off. You can press in flat shaped rocks for stairs and platforms, then put more mud on top of it for more support. To create stairs, find similar sized rocks and stack them on top of each other, with space in front of it.

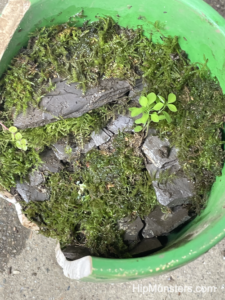
Here is what it first looks like after you attach the platforms. We used slate as our rock, because it is very flat. We also put some rocks along the side of the pot to look like the side of a cliff.
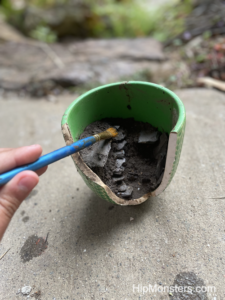
Use a paintbrush and water to clean mud off of the rocks and the front edge of the pot so it doesn’t look too dirty.
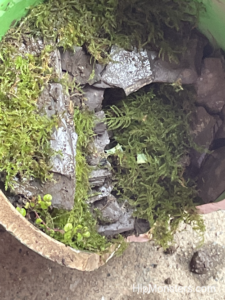
Next, before the mud dries, walk around outside to gather mosses and small plants. Gently tear the moss to the right size and press it into the mud. More is more, so put moss on every available surface to make it look more like a forest. If the soil is too dry, or not sticking, slowly add water in small amounts.
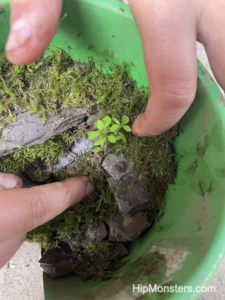
For the small plants, poke a small hole and press it in. Put more moss over the exposed soil around it and press. If it is too small, first make a ball of mud around the roots of the plant and then press it in.
Gently water all of the plants with a mister or with your finger. Do not dump too much water all at once or you will kill your small plants and/or sweep away the rocks and mud.
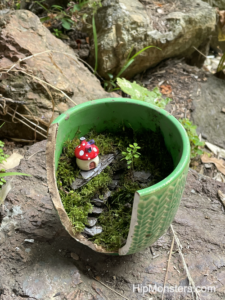
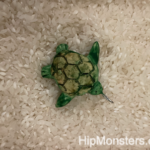
You can also add some small decorations on the terrarium to create a landscape or a scene. Make sure to water it regularly! But if your plants die, you can use the same method to replace them!
Happy creating!
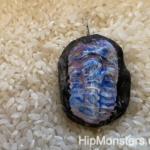
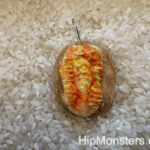
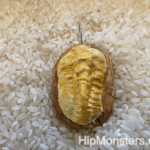
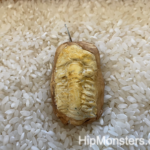
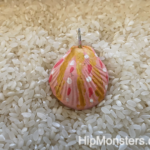
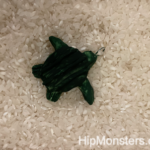
SF Zoo Fundraiser Jewelry

jfheTo support the San Francisco Zoo, the HipMonsters’ sisters team, and a neighborhood friend decided to sell jewelry to raise money and awareness. Their efforts were a great success, raising nearly 400 dollars in two days of work, thanks to the generous and kind people of San Francisco.
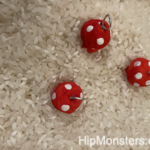
Here is a selection of just some of the fundraiser jewelry sold! The jewelry is made with molding clay and painted with acrylic paint.
Thanks again to our neighbor friend and all the kind people who donated!


Happy creating!
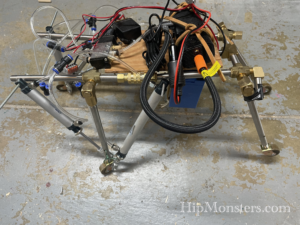
Making of Number Six and Number Seven
After finishing Number three, we wanted to make smaller and lighter walking robots. Leveraging what we had learned from building our first walking robot, we made two mini robots, Number Six and Number Seven!
Please note, this material is provided for informational purposes only and is not a guide on how to create the designs. Please read our disclaimer.
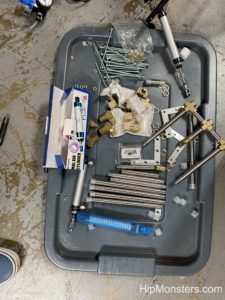
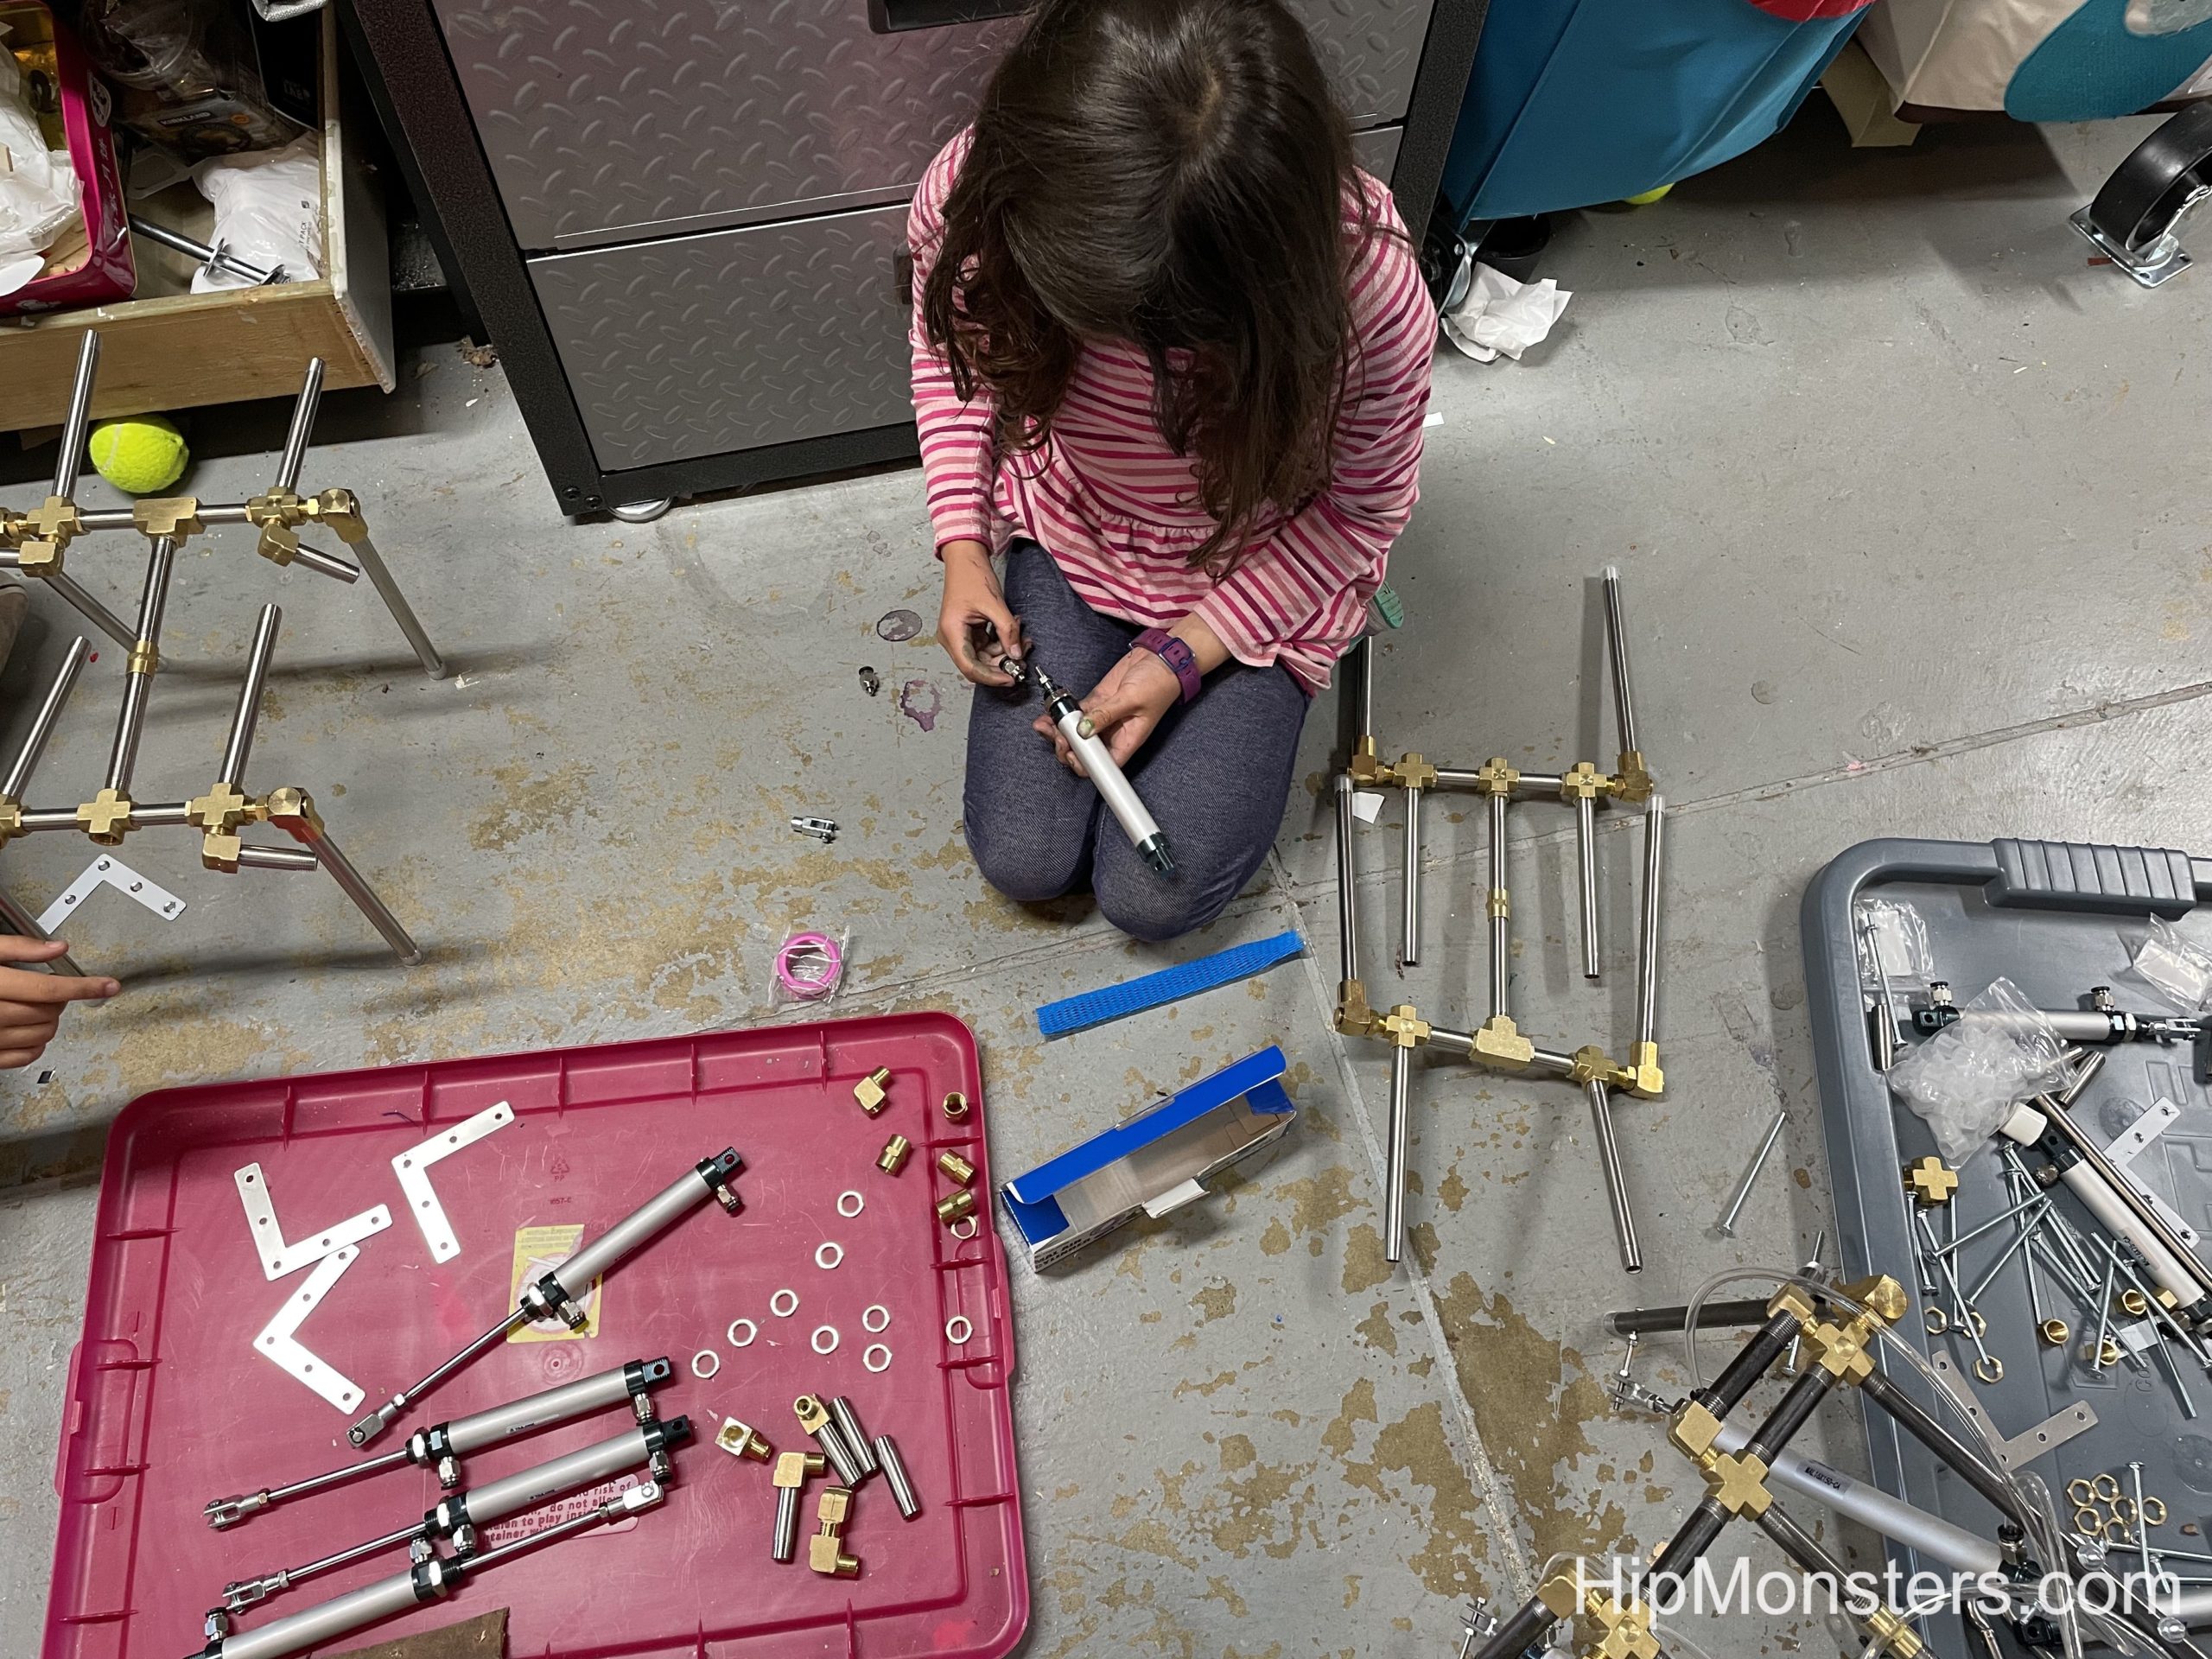
Because we had a completed robot design it was easy to make sure we had all the parts we needed before beginning. Since Number Six and Number Seven were smaller we were able to spend about the same amount of money but use lighter steal parts. We hoped the reduced weight would make for better walking performance.
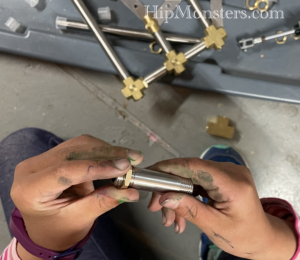
The steal tubes also had bolt threads as apposed to pipe threads. Pipe threads are “V” shaped which made it difficult to get a piece tightened pointing the correct direction. With bolt threads we could use a nuts to tighten the connection between the tube and the pivot joints however they were positioned.
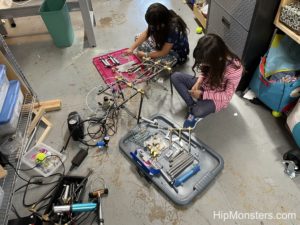
Working as a team the assembling went fast and in less than a day we had the beginnings of two robot. One trick we have learned is to use the floor as an assembling space. We are cramped for space and using step stools can be tricky in a workshop so the floor tends to be safer.

Here is a completed frame. It cannot stand yet and has to be held up. Here we had the initial knee designs. The knee design was important when we were developing the first walker. Later we switched to a tube in the piston rod that acted more like a spring to prevent the leg from over extending. What is critical in our approached is letting the robot fall forward but stop the fall before the robot is in a position it cannot recover from. The sister team learned this trick from a class at school where the teacher said when humans walk forward it is more like a controlled fall.
Now we start on installing the air pistons. We had to repeat this process many time because we kept switching around to position of the pistons and the direction of the air tube couplings. If the pistons are not the same on both side the robot will veer to one side and if the coupling are facing apposing ways the tubing becomes impossible to arrange. We have found facing the coupling up is typically the best orientation.
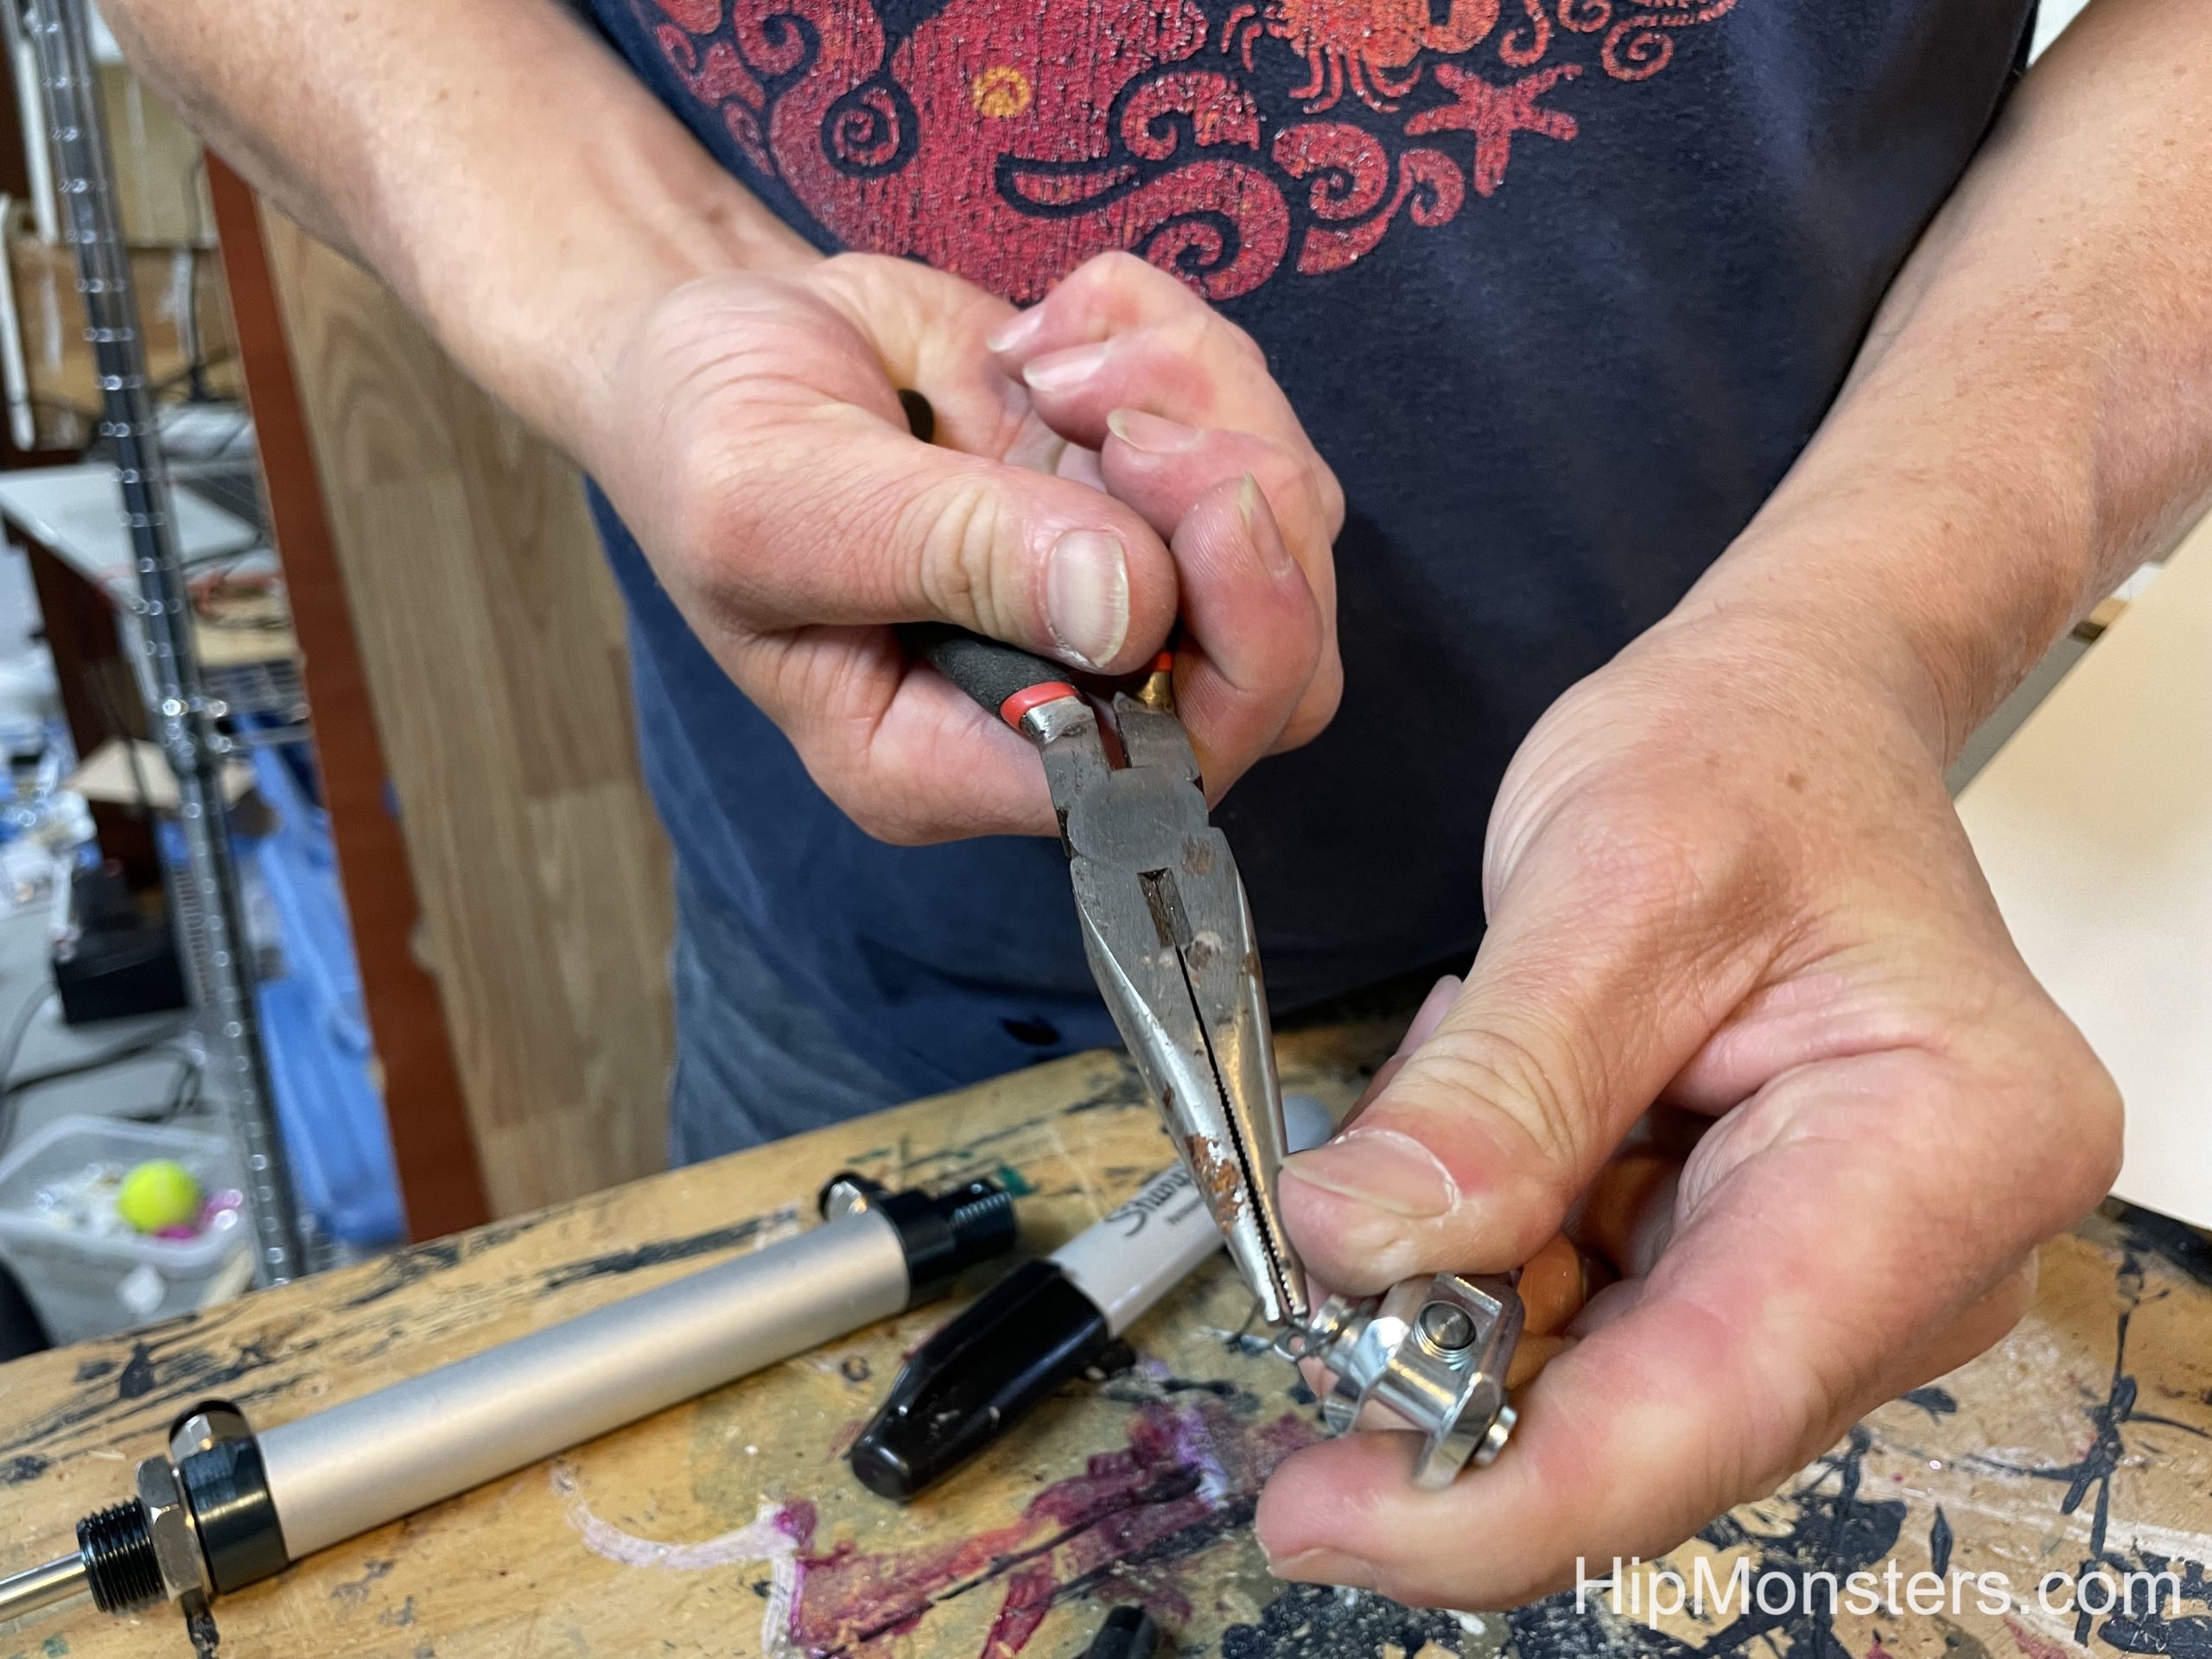
We did have to modify the piston attachment by removing the peg. This did require a parent’s help as the clip that secured the peg was difficult to remove without breaking it.
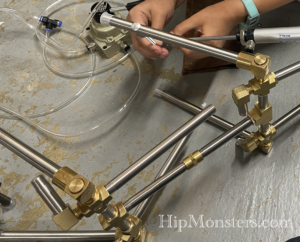
Next we began attaching the pneumatic air tubes. When measuring make sure to know were the pneumatic solenoid valve will be attached and account for the full movement of the legs. It is best to do one tube, test it, then do the opposites side. We found as we added tubes we had to change the initial lay of of the tubes. The tube work is a bit of an art form much like wiring a control unit.
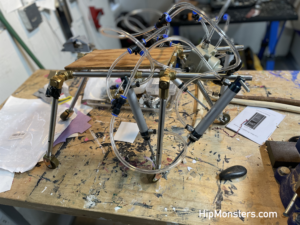

Here is a close up of the all the piston installed.
Here is another view of the tubing being fitted and a close up of the pneumatic solenoid valve. Make sure to do clean, straight cuts with a sharp scissors to assure not leakage when attaching to the couplings.
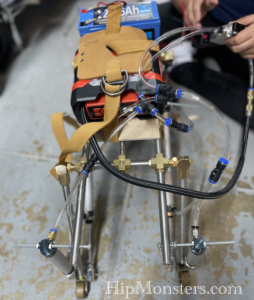
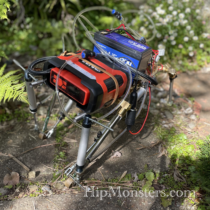
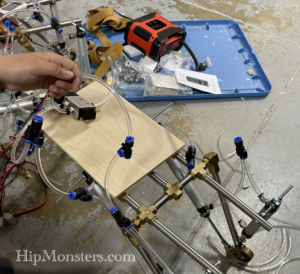
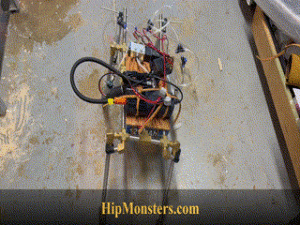
Here is a front view of a completed design for Number Six and Number Seven. For testing we used a leather book strap so we could reposition the components as needed. We also tested a number of different air pumps. This pump, which we did not use in the final design, was the quietest and used the least amount of power. Latter, we switched to another model because this model kept shutting off after prolonged use.
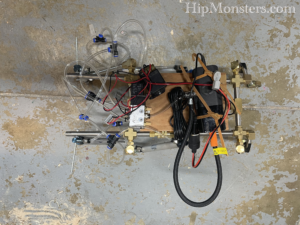
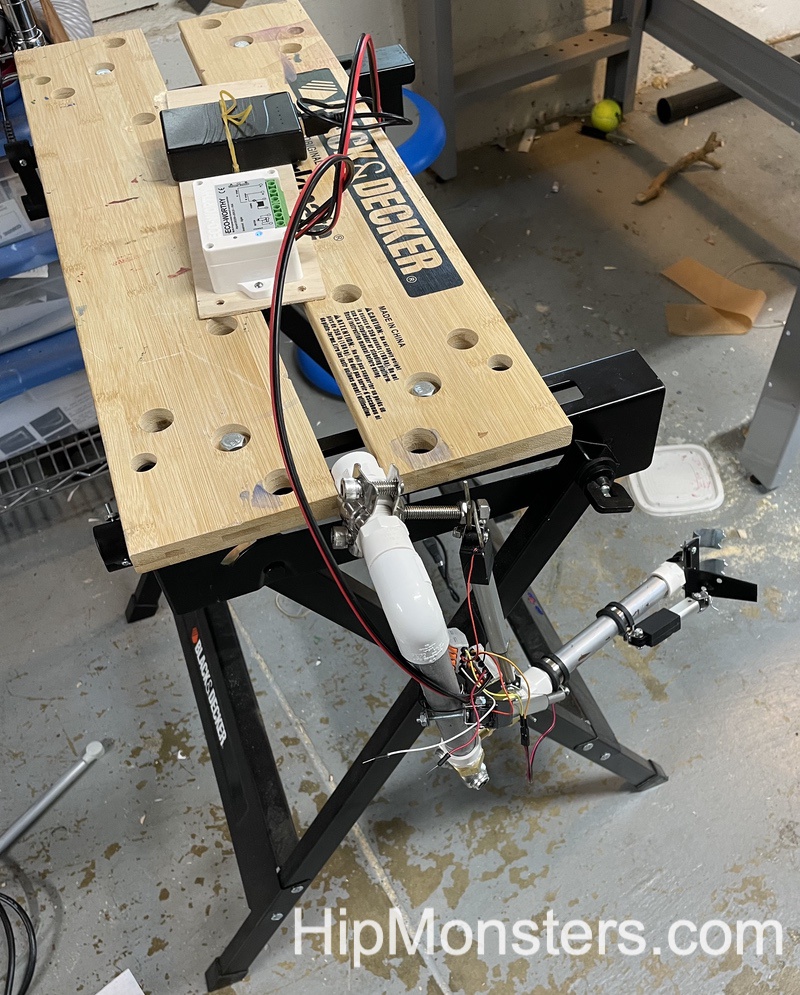
Like with other designed we used a garage door remote controller because it reverse polarity to the pneumatic solenoid valve which switches the air flow from one leg to the other enabling the robot to walk. It is the small black box in the center of the robot.
The battery we secure to the underside for protection (the light blue box under Number Six). Instead of doing lead acid battery for Number Six and Number seven, we switched to a 12V 6Ah Lithium Iron Phosphate Battery from our lead-acid battery due to it much lighter weight and increased amps.
 Here is Number Six walking in our yard.
Here is Number Seven walking in our workshop.

And here we have all three robots, Number Five, Number Six, and Number Seven going for a walk together! The larger robot is Number Three. Number Seven is in front and Number Six is on the left.
Happy creating!
Making Mandrake Roots
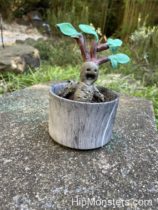
Inspired by the character Professor Sprout (from Harry Potter) and this wonderful article, we set out to make our mandrake root for Halloween.
Please note, this material is provided for informational purposes only and is not a guide on how to create the designs. Please read our disclaimer.
Mandrake roots are a mythical plant that has a root that looks like a person. They scream when they get pulled out of the ground, and hearing the screams can knock you out, or even kill you. They are featured in Harry Potter, but were invented before that. For more information, go to the article above.
For our mandrake roots, we used a type of foam-like clay called Foam-Mo. Foam-mo is really useful for making organic details like plants and animals. It air-drys and can be painted, but has to be sprayed with a plastic spray, or else it will disintegrate. We recommend using several layers of the under-coat spray for maximum protection. We painted the mandrakes with acrylic paint.
Make sure to use a nonporous surface for a build table or the Foam-Mo will stick to it once it dries. We used old cutting boards.
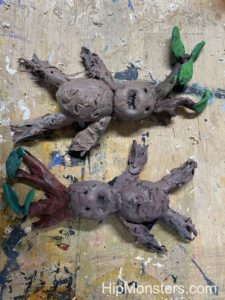
To make the mandrakes, we made ovals for the head and body, and tubes for the legs. We also rolled out thinner tubes for the tree branches and flattened small diamond shapes for the leaves. We used a pencil to made the lines in the leaves and to make the eyes, lines on the body, and the mouth. Remember, no two mandrakes are the same, so make them all slightly different.
Foam-mo is pretty delicate, so we needed to be careful when attaching stuff. To make it hold it’s shape, we used stuff to prop up the mandrake roots while they were drying. to make the edged look like roots, we gently pulled out thin strands of Foam-Mo at the end of all of the limbs.
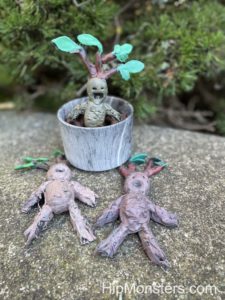
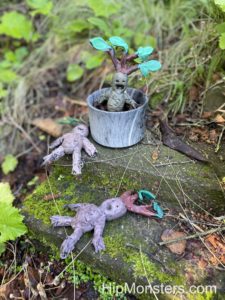
After the Foam-Mo dries, we sprayed it with a plastic spray and painted it with acrylic paint. We painted them all slightly different shades of brown and green.
Please DO NOT water your mandrake, even if they tell you to! They are definitely not waterproof.

Happy creating!
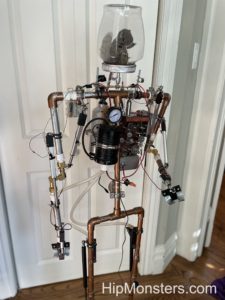
Upgrades to Number Three
Since we discovered how to make Number Five move, we decided to upgrade Number Three. We tried to preserve as much of the original design as possible, so we didn’t mess with the decorations or redesign the frame. We also made the legs stronger so the robot could support itself easily and won’t fall. Professor Brockenhoff was very pleased with being able to more effectively scare strangers!
Please note, this material is provided for informational and fun purposes only and is not a guide on how to create the designs. Please read our disclaimer.
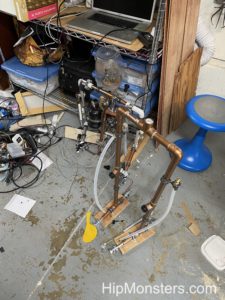
We started off by disassembling Number Three. Given how Number Three was designed as a framework, it was pretty easy to take apart.
Number Three’s Arm being Upgraded
We wanted to upgrade Number Three to make it move. Since walking with two legs is incredibly hard, we decided to only make the arms and hands move. We first used hinges to upgrade the hands so that they could open and close. Next, we had to replace the fixed joints with movable joints. Borrowing from extra part from Number Five, we added flexible joints for pipes to power a air brush. The added weight of the metal join required use adding more support for the legs. We tried plastic joints, but they failed durning testing.
Then we attached lightweight linear actuators to the joints to move them. Given we wanted more controlled movement and a quieter robot for our front parlor, we opted for electronic verse pneumatic power. We attached the linear actuators so that when they extended, the arms reached out and when they pull back, the arms bent.
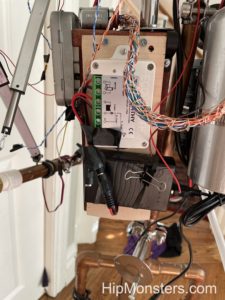
And finally, for controls, we used a remote control unit for garage doors. Since we need the polarity to switch (the wires reverse, positive/negative to negative/positive) to have the linear actuators go in and out we had to make sure the control unit reversed the polarity not just turned the power off and on.
And now you see the update Number Three testing its arms with Professor Brockenhoff at the controls!
Happy Creating!
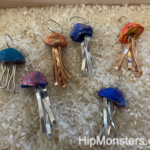
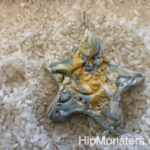
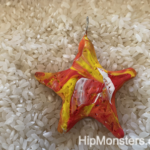
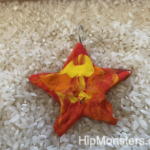
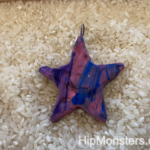
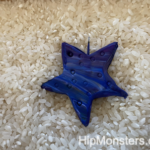
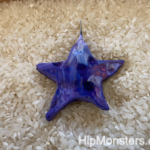
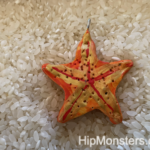
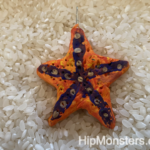
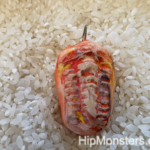
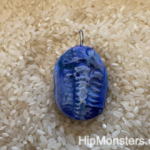
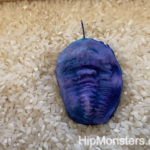
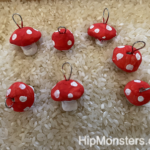
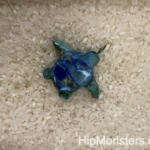
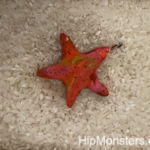
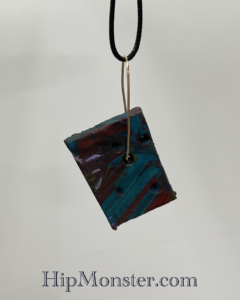
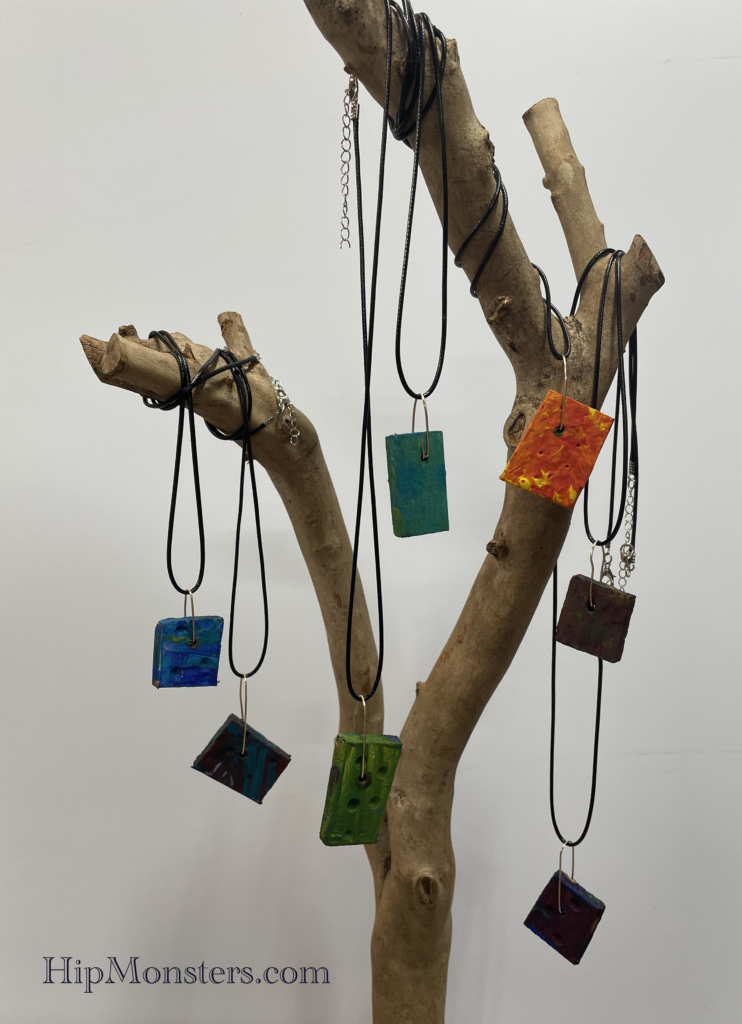
Color Splash Collection, Summer 2023
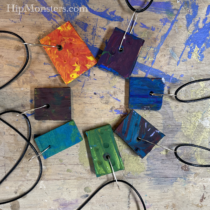
The Summer 2023 release of the Color Splash Collection is in!
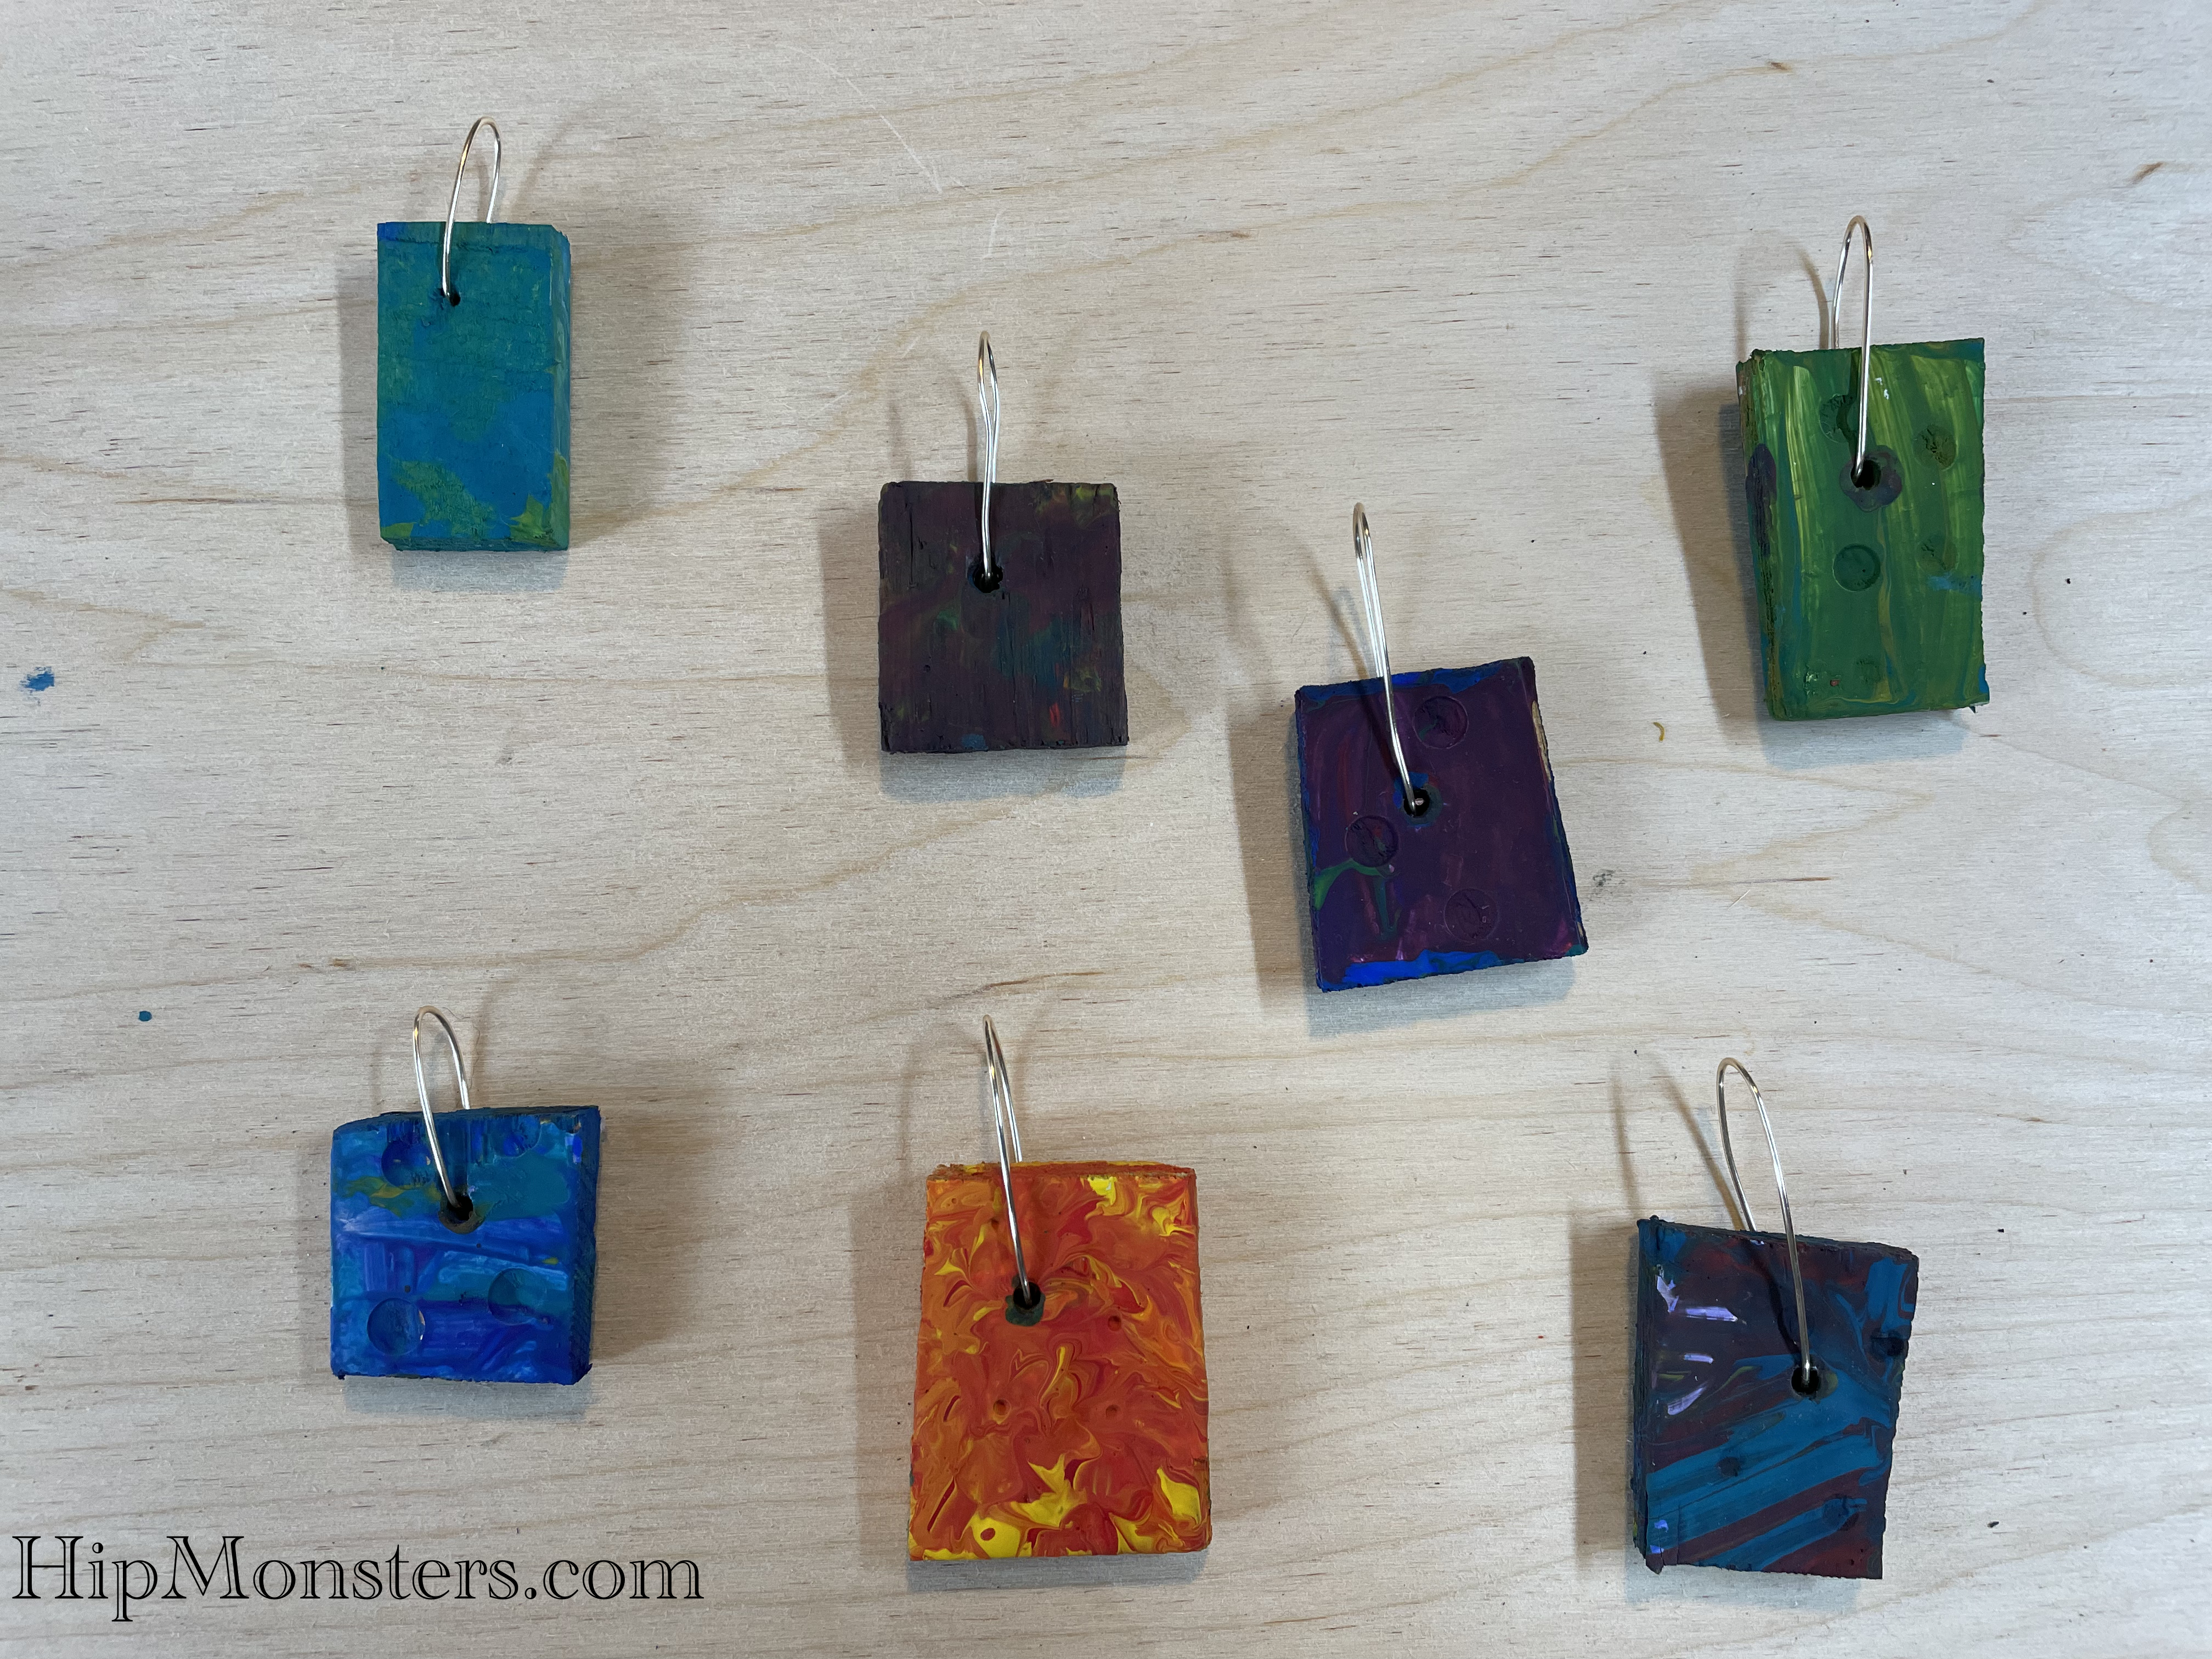
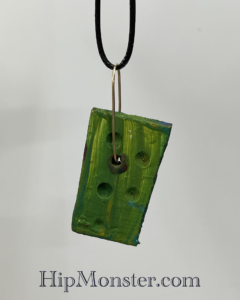
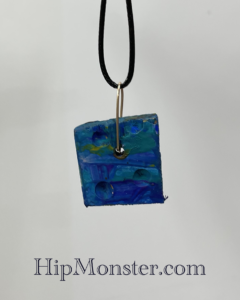
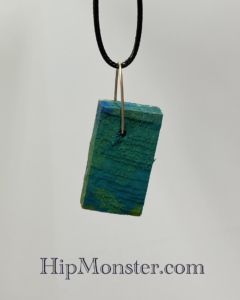
Made from wood and painted in acrylic paint, each necklace is uniquely painted and secured with a silver wire. The color pallet is rich and drawn from nature. The wood is rough cut to give a natural, unrestrained look and feel. Look below to see each necklace in detail.
Sea Foam
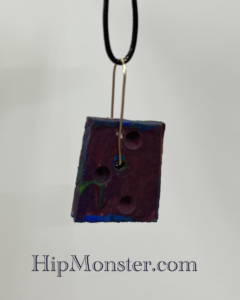
Lava Flow
Night Ocean
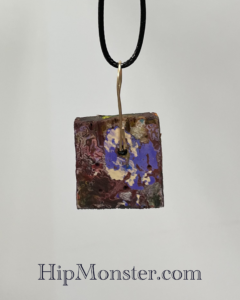
Red Night
Summer Pond
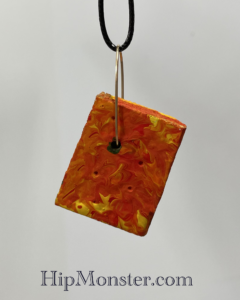
Orange Sunset
Night Waves
All jewelry made at HipMonsters is crafted and designed by kids. Each is made with love and inspired by nature, science and a love of creating something new.
Happy creating, and wearing!
Herbal Potions
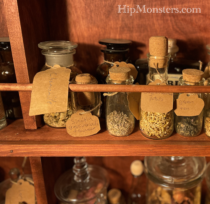
One of the small projects that we do is make herbal potions, tiny jars or pouches full of crushed up herbs and flowers from our herb garden. They keep away the spiders and smell very nice. We also use some of our dried herbs for cooking, to give the food more flavor.
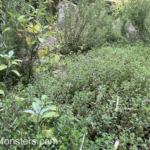


We grow lots of herbs in our yard, so when we trim the branches, we can dry them and put them in jars to be used for potion making. Make sure to label the jars so you don’t forget what they are filled with.
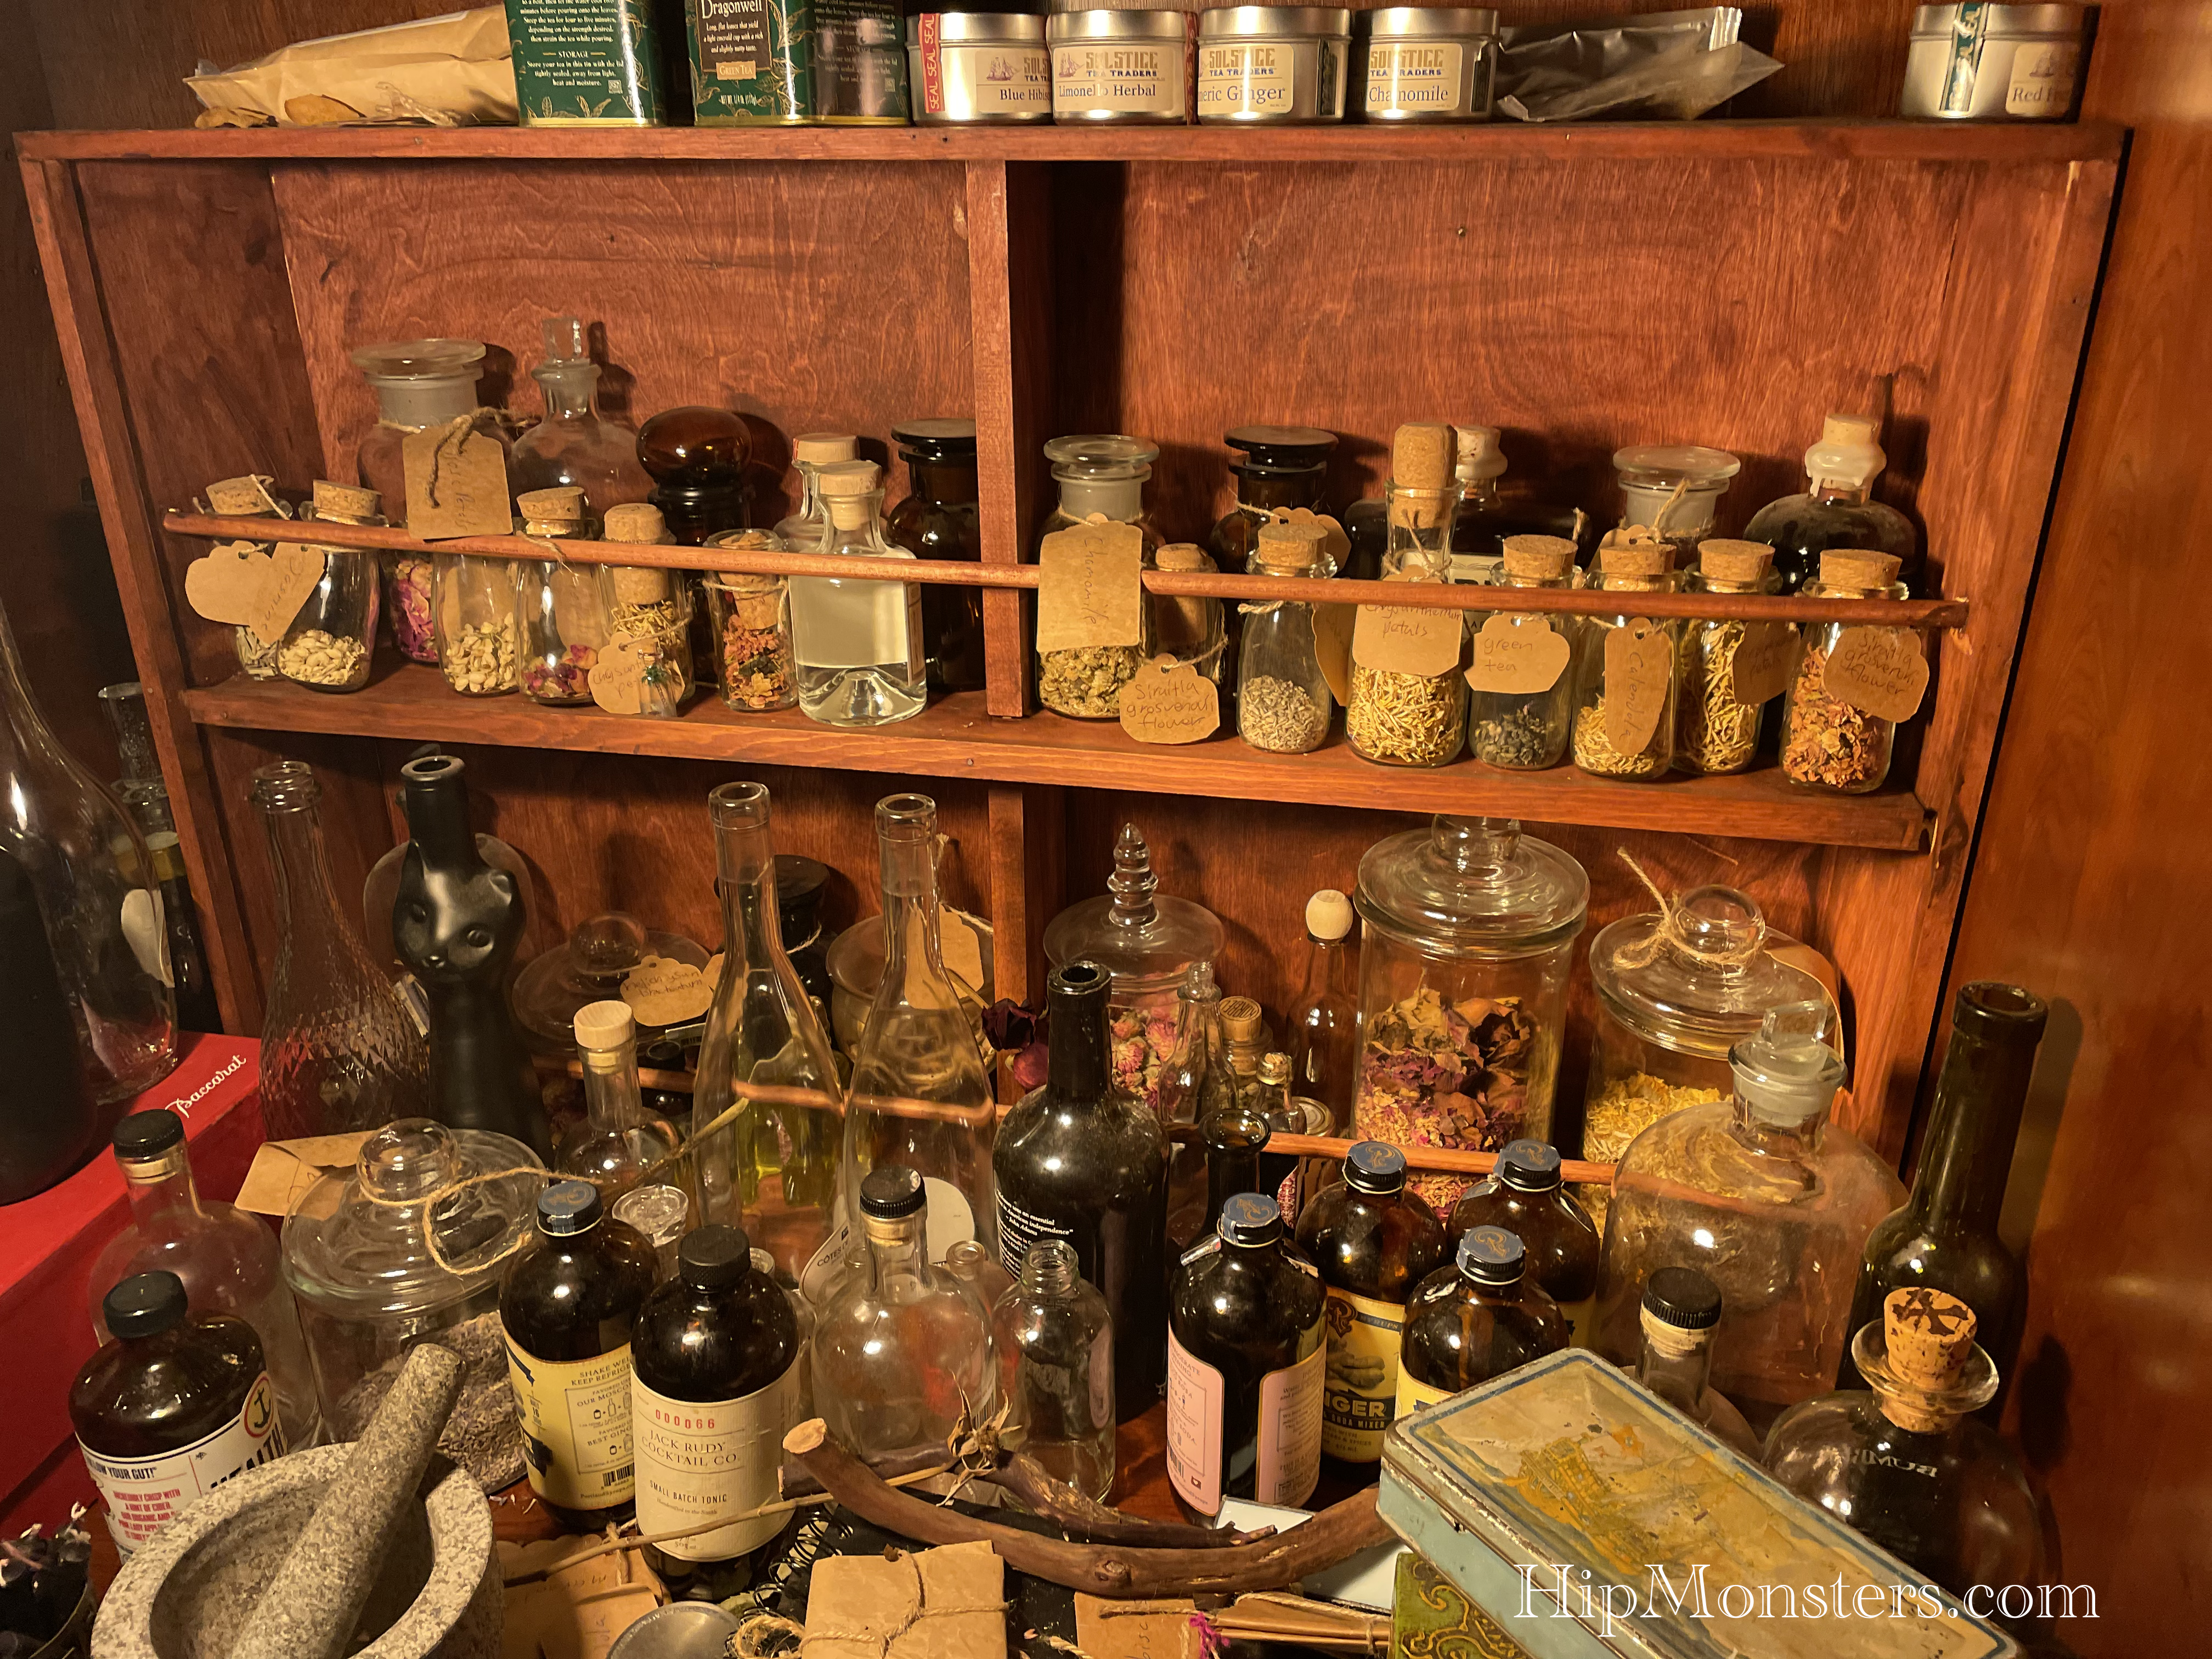
You don’t want to add lavender into your potions instead of rosemary! We also use some of the dried roses to make herbal potions because they smell very good, but they are much harder to crush.
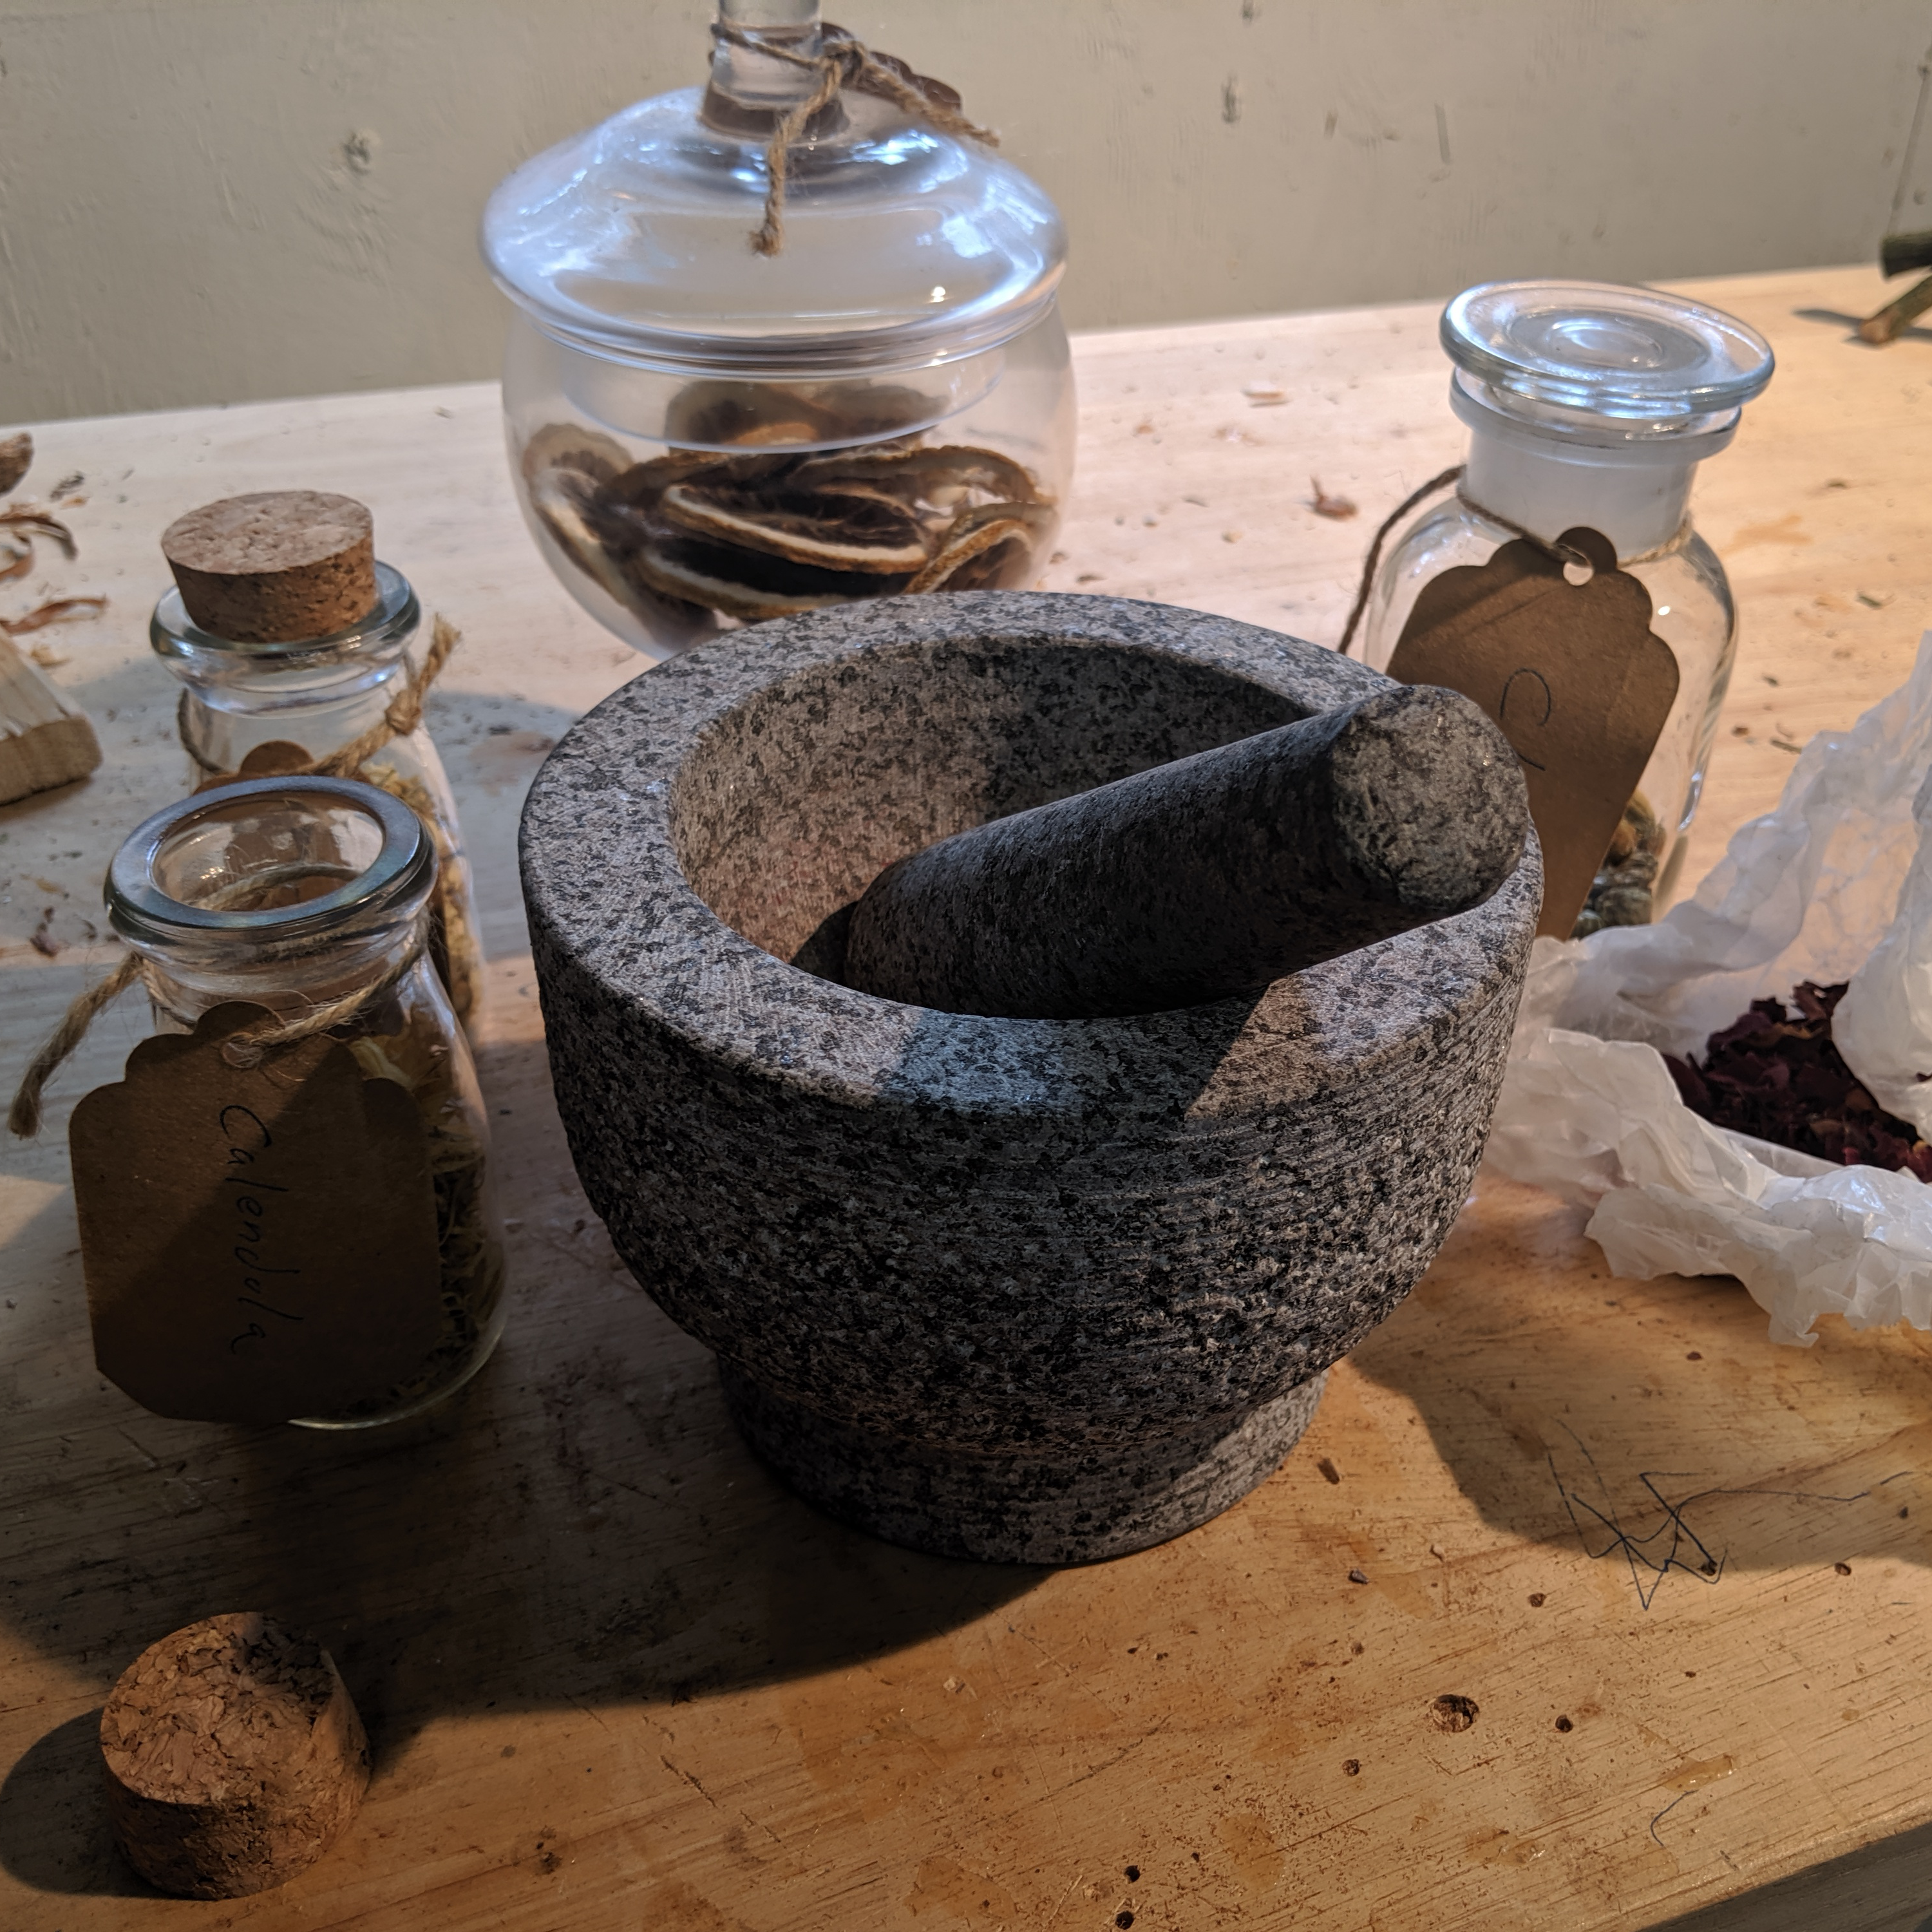
After we finish grinding them up, we carefully pour the herbs onto wax paper, or in a tiny jar. If you pour them on wax paper, make sure to fold it carefully so the herbs don’t fall out. We also tie them up securely in twine after folding them. If you put them in jars, use a funnel or a rolled up piece of paper to make sure that you are pouring into the jar, not onto the table
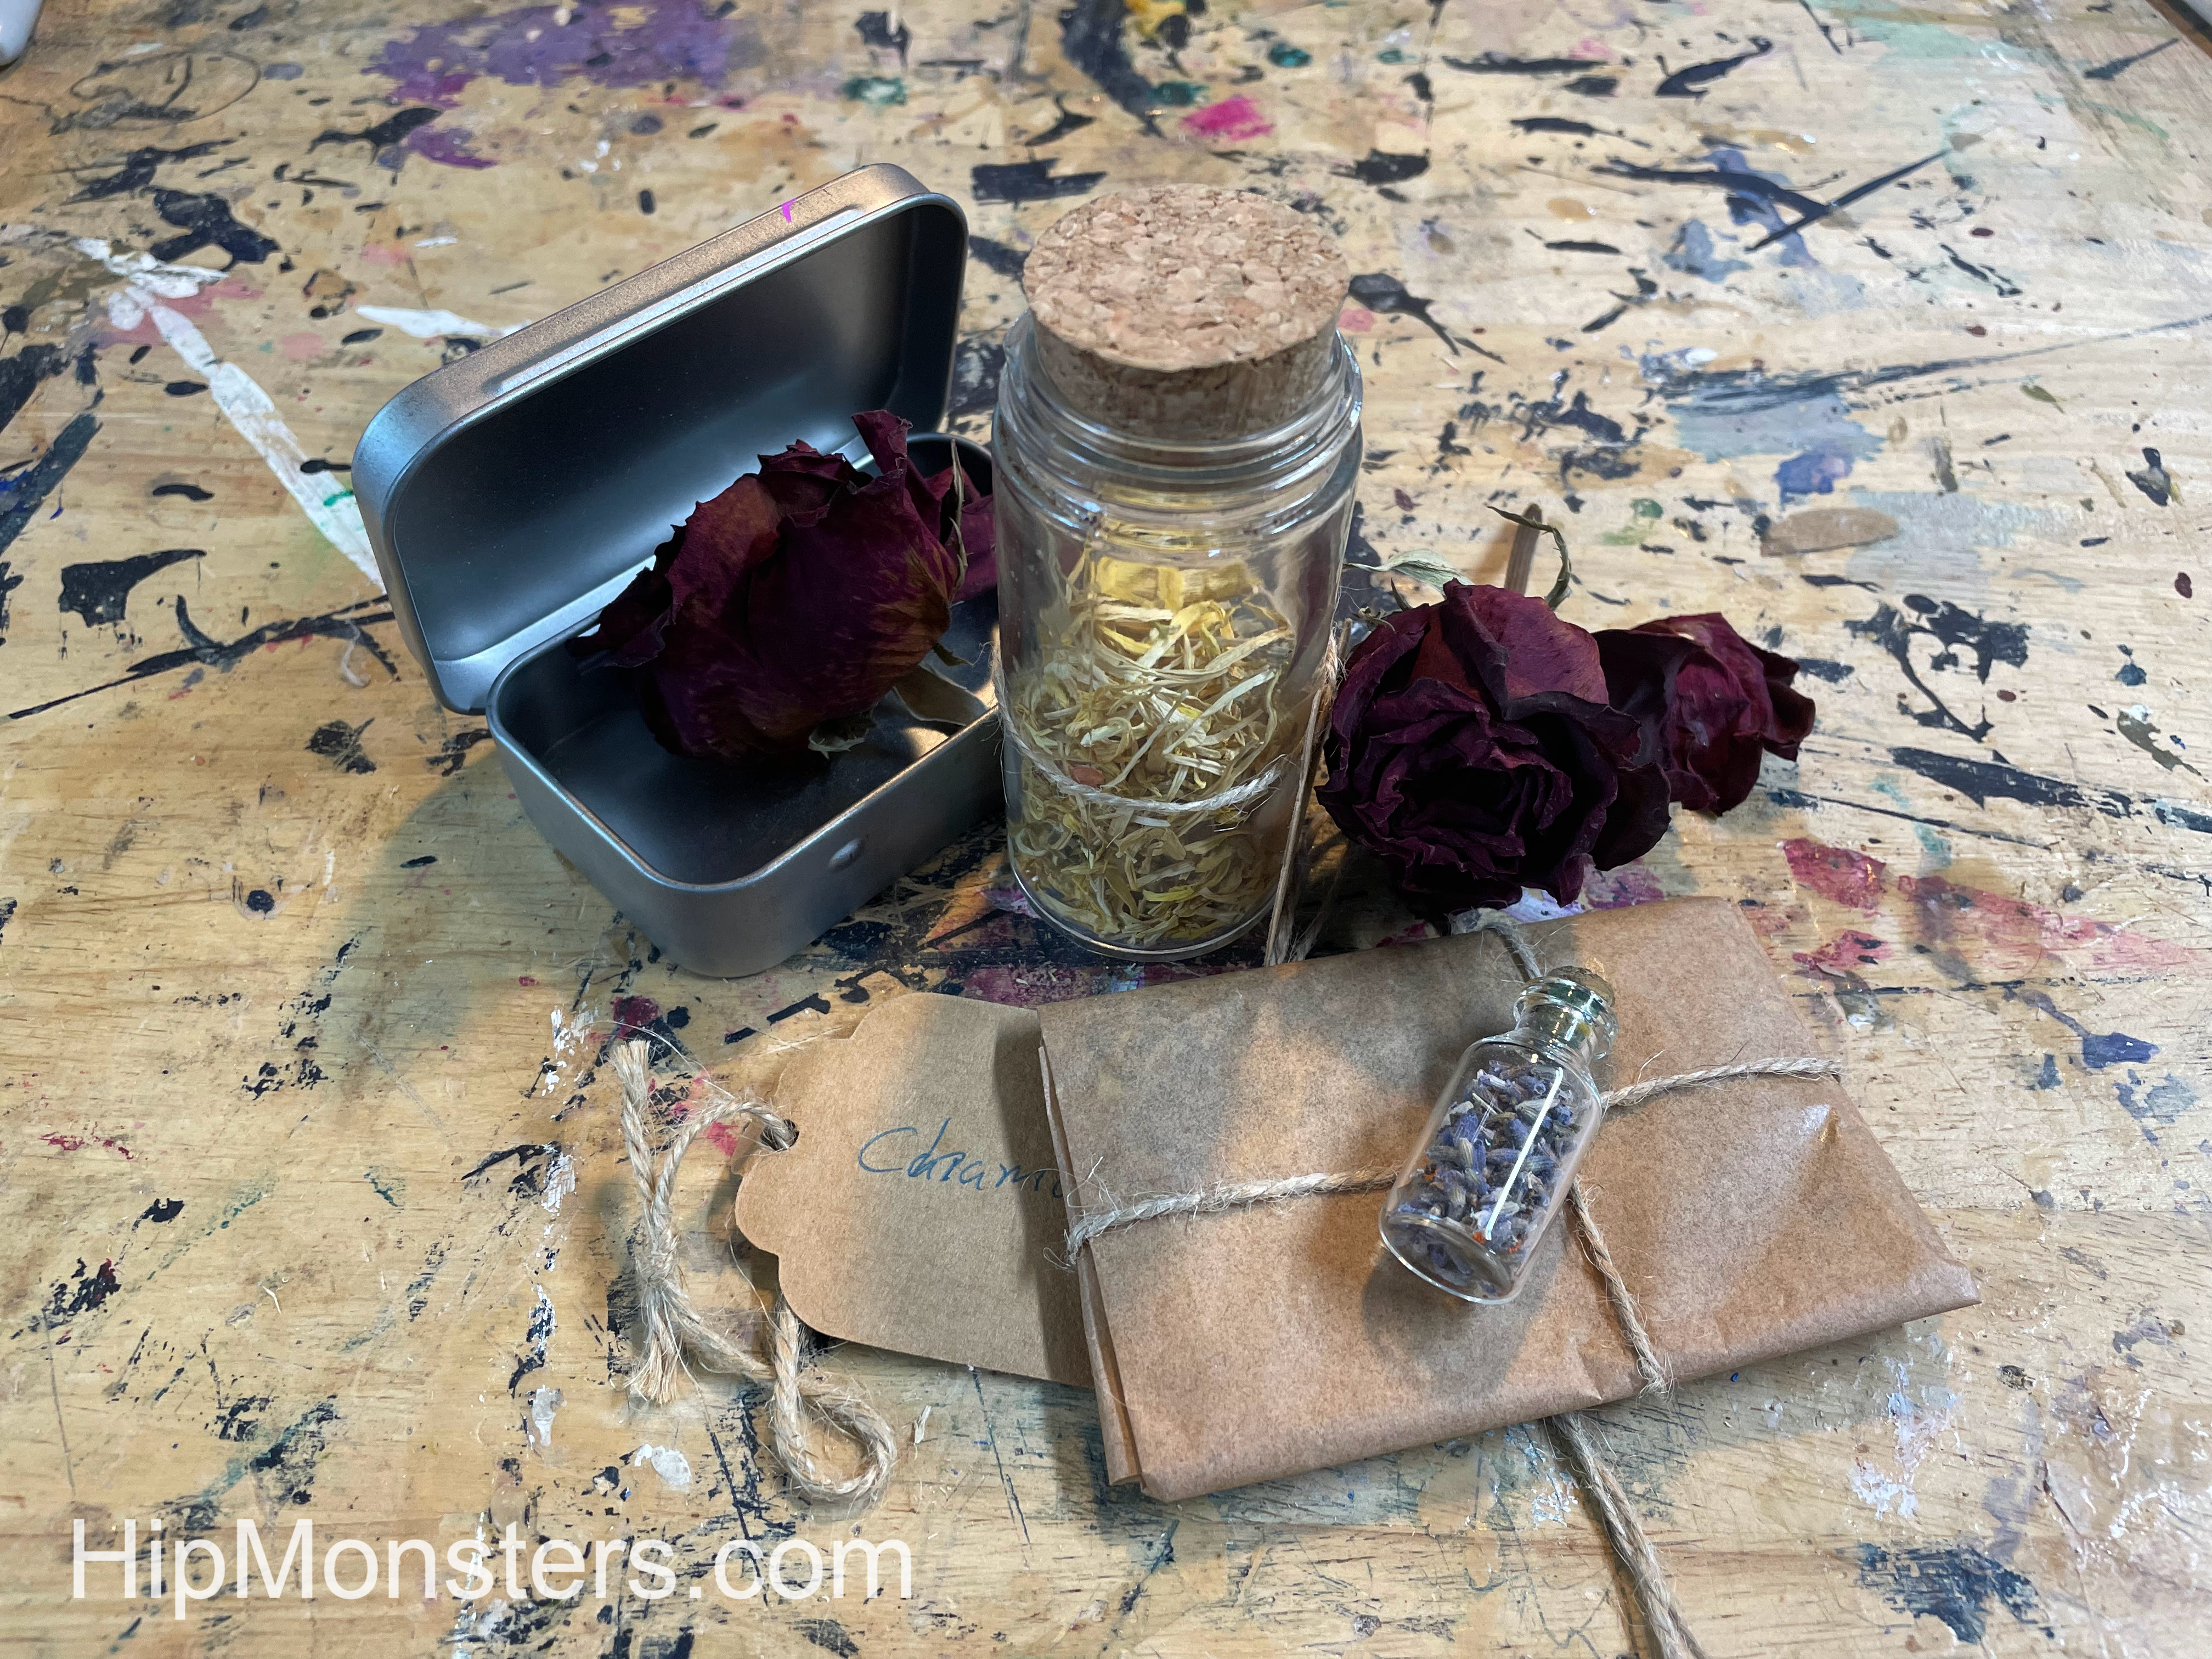
This it what they look like when completed. You can gift them to a friend, keep them, or use them for cooking.
Happy creating!
The Making of the Hand of Glory

Inspired by Harry Potter, the HipMonsters team made our own Hand of Glory out of Foam-Mo. The Hand of Glory is a mix of realistic and creepy, making it the perfect Halloween decoration.
Please note, this material is provided for informational purposes only and is not a guide on how to create the designs. Please read our disclaimer.
Foam-Mo is a foamy clay that we use for many of our projects. It is great for making organic stuff like plants and animals. After it dries, you spray it with a plastic coating to make it last longer. You can paint over the plastic coating.
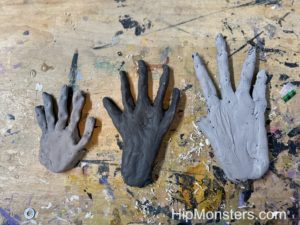
For our first attempts, we used our own hands as a model to make them, but we felt like they didn’t look very much like magical objects. They were also very flat and 2d looking, not like the real hand of glory at all.
For our final hand of glory, we made the fingers more long and skinny to make it both more realistic and creepy. To get the shape, we rested it over a bowl to dry. We also added more texture to make it look more like dry skin instead of making it smooth. We also defined the knuckles more to make it more creepy. like it is trying to grab you. We also added more of a wrist to make it more like it is in the movie, and so we could easily mount it.
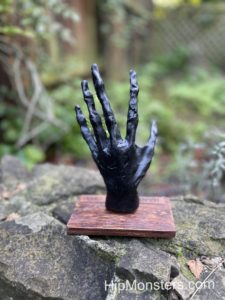
Once we finished the hand, we made a wooden stand for it to be mounted on. We stained it and sanded it to make it look distressed, and made a wooden plaque. We attached the Hand of Glory to the stand by screwing it in.
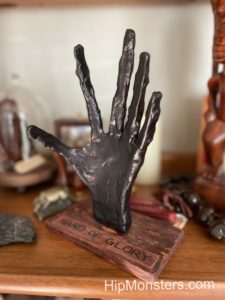
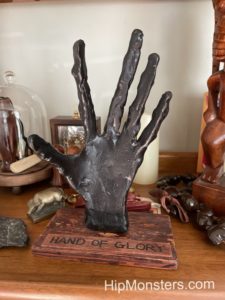
This is it completed! It is a great addition to our Halloween decoration cabinet, just don’t touch it, unless you want it to grab you.
Happy Creating!